Air Fryer Juicy Lucy Burgers (Copycat Recipe)
This post may contain affiliate links, read our disclosure policy.

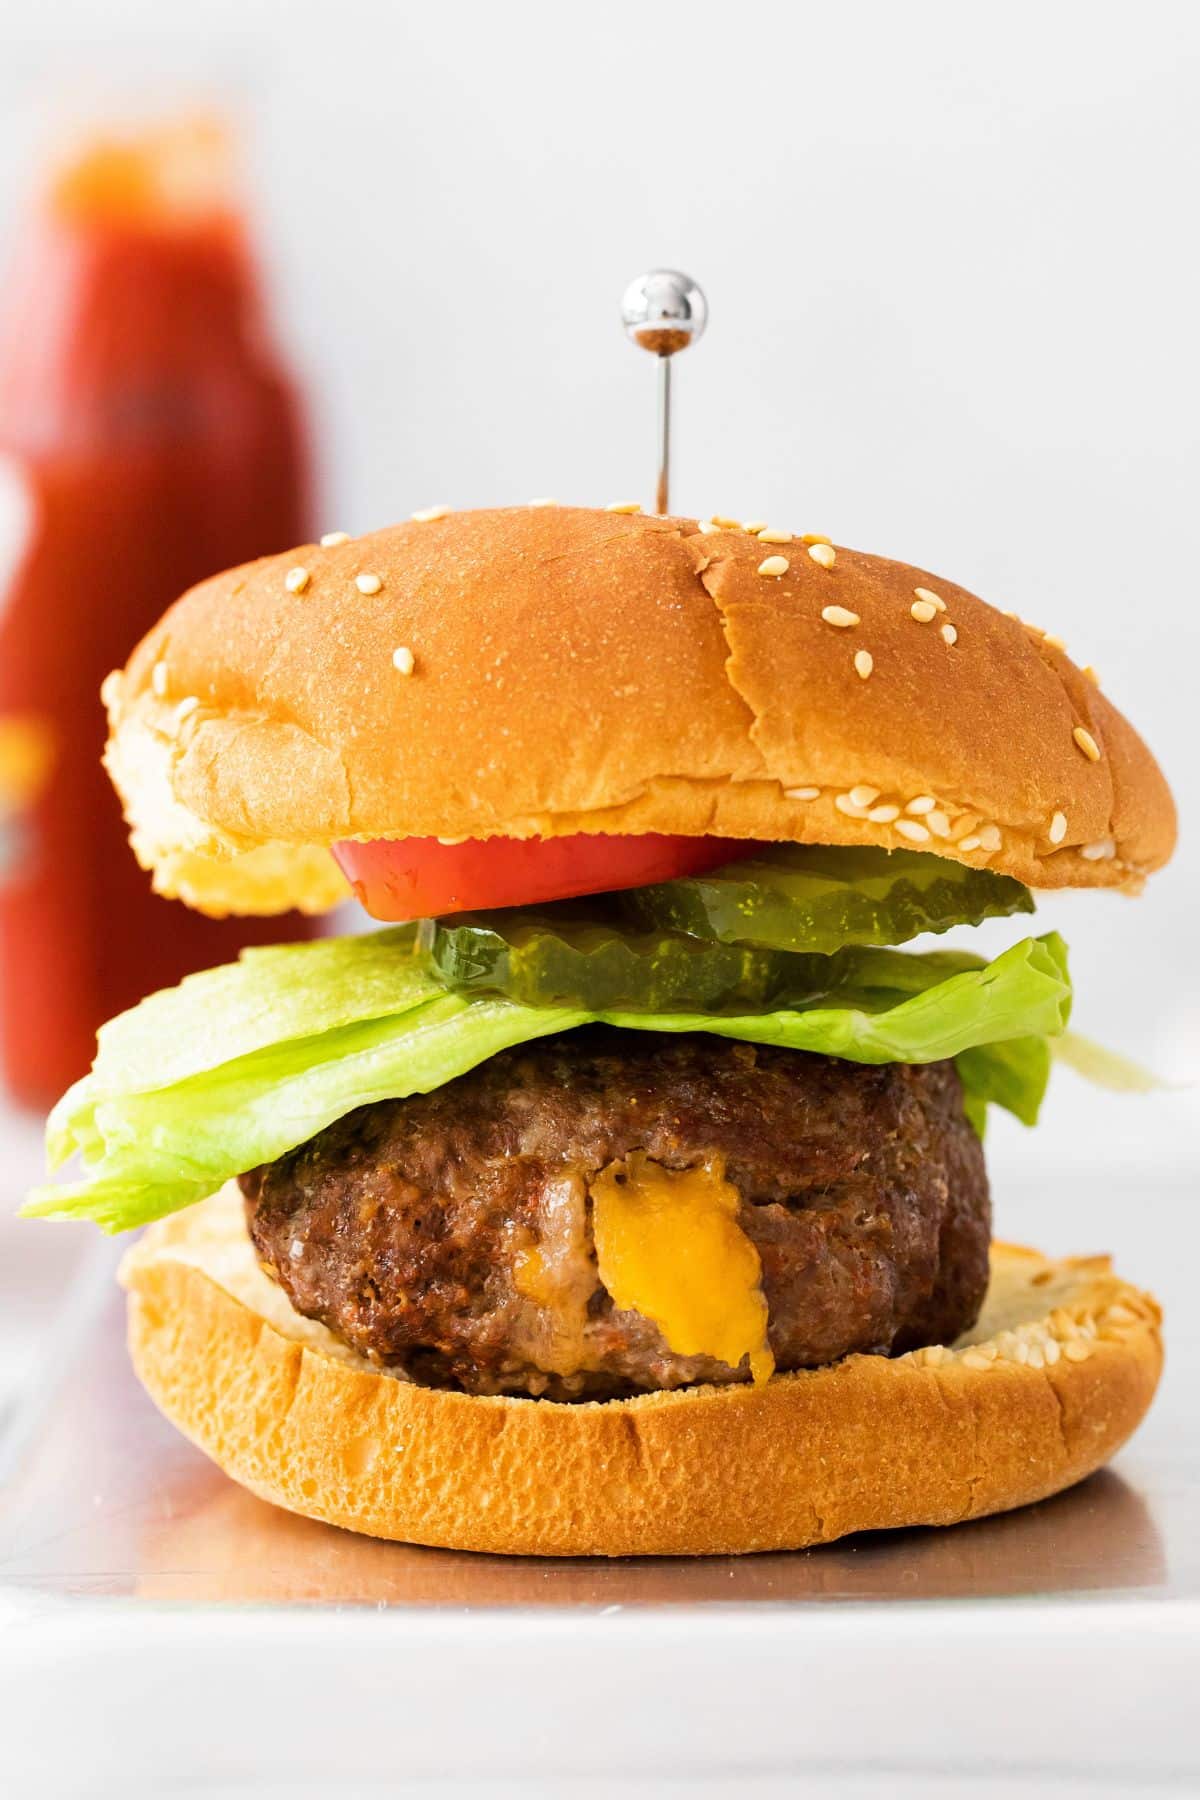
These air fryer Juicy Lucy burgers are an upgraded version of the classic cookout favorite – and they really live up to the ‘juicy’ part of their name. Hearty seasoned beef patties are made extra tender and juicy with the addition of a thick and gooey melted cheese center. Once you try these, you won’t want to make your burgers any other way!
Air Fryer Juicy Lucy Burgers
If you thought you needed a grill or griddle to make restaurant-quality burgers, think again. These air fryer Juicy Lucy burgers are some of the easiest and most delicious burgers you’ll ever make. Unlike a regular cheeseburger, the cheese in a Juicy Lucy goes inside the burger instead of on top, resulting in a delicious cheesy surprise in the center.
Perfect for parties and game day festivities, these are also easy enough for a quick weeknight dinner – you can even prep them in advance. Have fun trying different types of cheese and adding additional ingredients like onion or jalapenos. You can’t go wrong with this delicious and crowd-pleasing recipe.
💗 Why We Love This Recipe
- It makes a great burger even better with the addition of a gooey melted cheese center.
- Air fryer cooking makes this recipe super easy – no need to stand over a hot stove or grill.
- You can serve these burgers without a bun for a delicious low-carb option. They’re so hearty and flavorful that you won’t even miss the bread.
- You can also cook them on the grill when you need an amazing treat for cookouts and tailgate parties.
Recommended Tools
- Air fryer
- Mixing bowl
- Measuring spoons
- Measuring cups
- Instant read thermometer
🛒 Ingredients
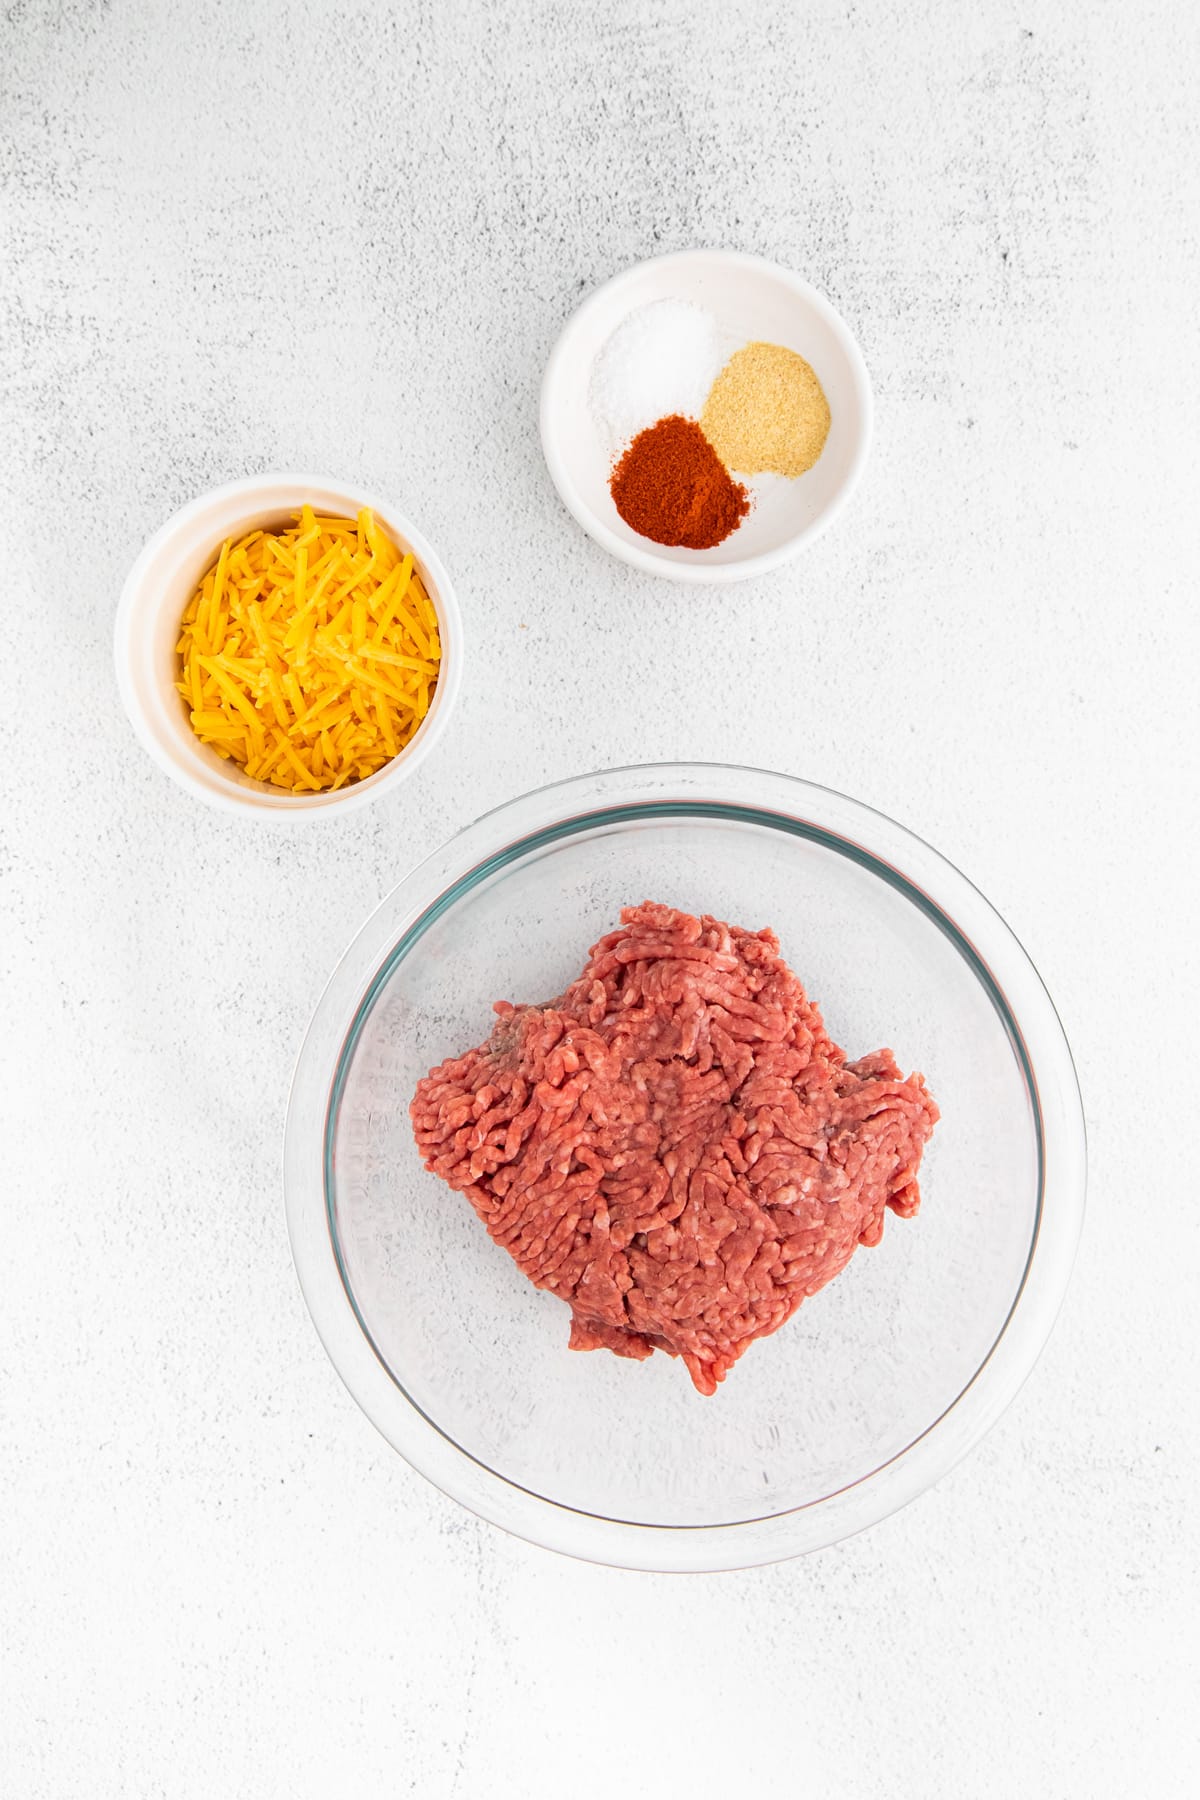
- Ground beef
- Kosher salt
- Garlic powder
- Paprika
- Cheddar cheese, shredded
🥄 How to Make Air Fryer Juicy Lucy Burgers
Step One: Form the Patties

- In a medium bowl, combine the beef, garlic powder, paprika, and salt.
- Divide the mixture into 8 equal portions, and then flatten each into a patty about a quarter inch thick.
- Place 2 tablespoons of shredded cheese into the center of 4 of the patties, then place a second patty on top and press the edges together to seal them.
Step Two: Cook the Burgers
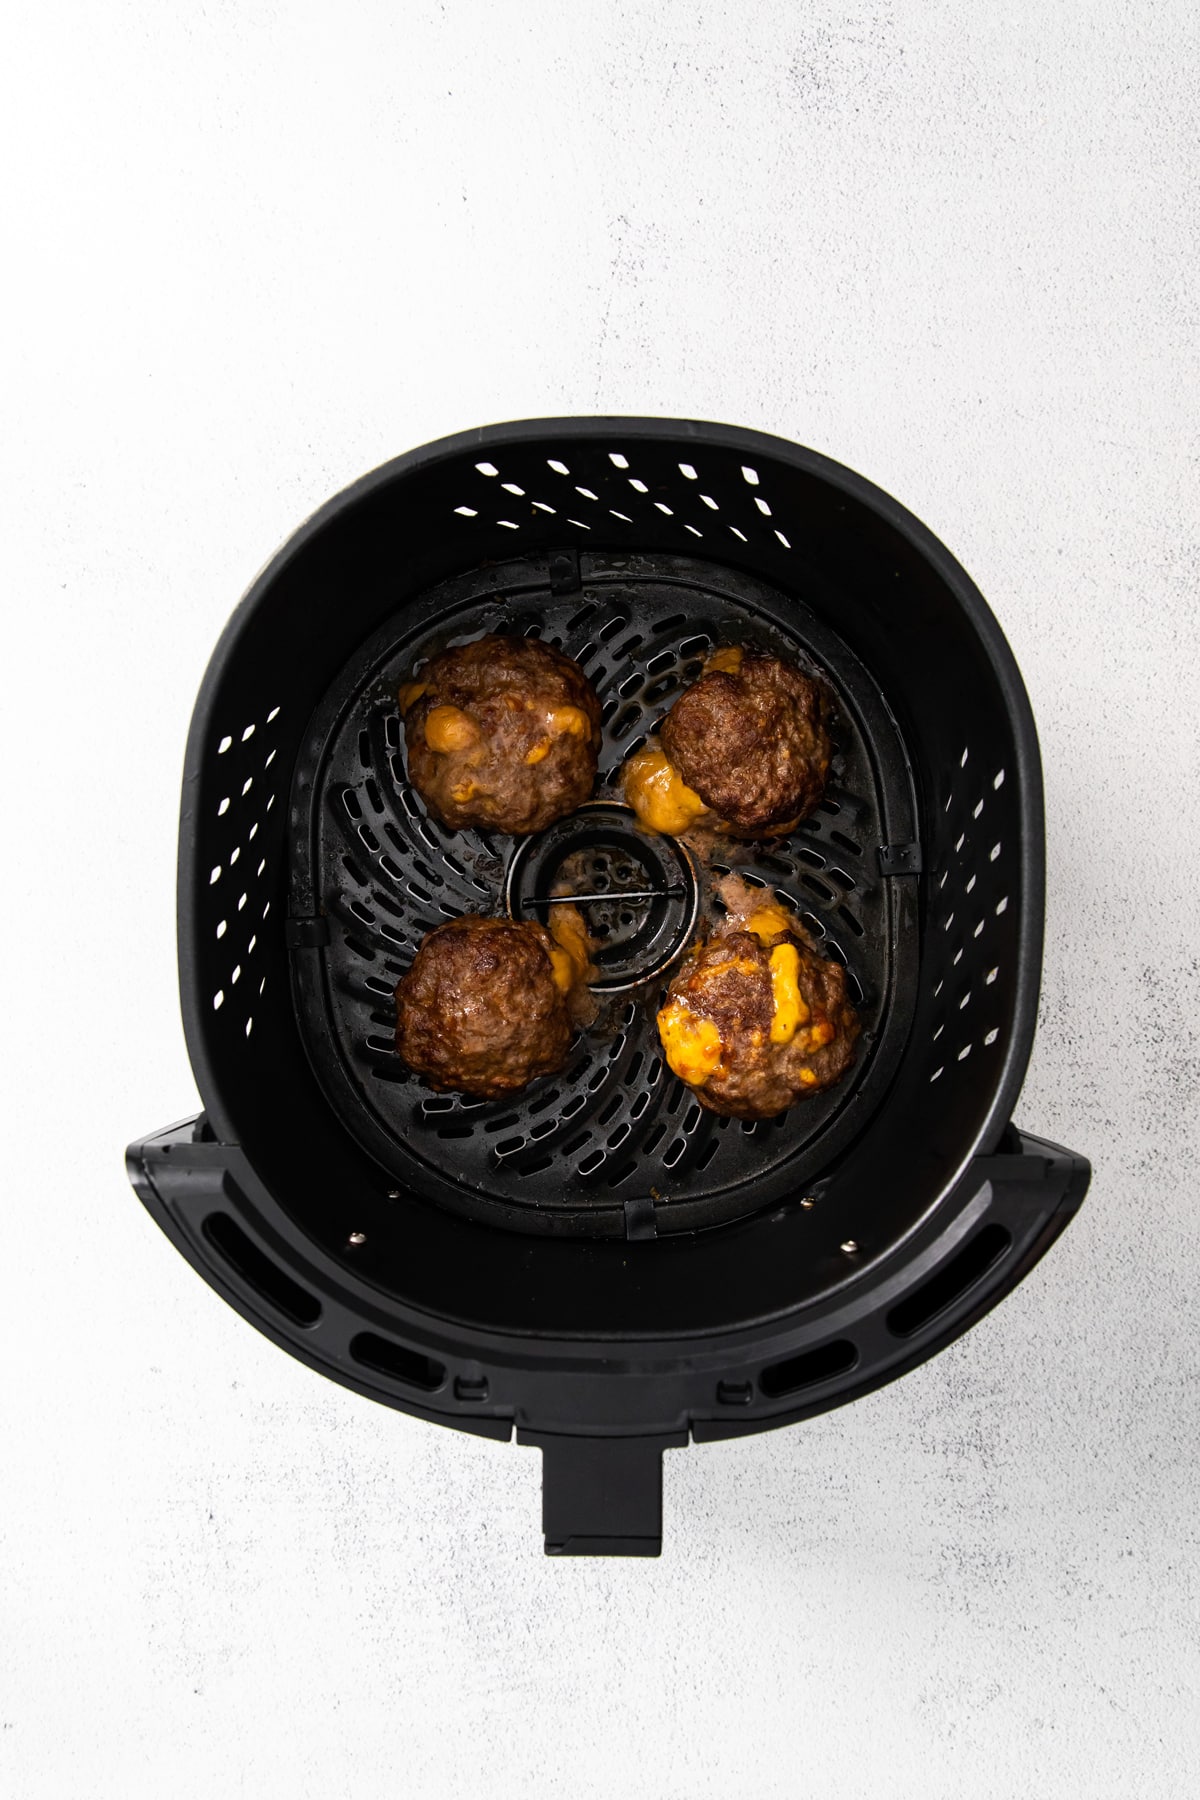
- Spray the air fryer basket lightly with non-stick cooking spray and place the patties into the basket.
- Cook at 375F for 8-10 minutes. The burgers will register 165F on an instant read thermometer when done – just make sure you’re testing the beef temperature, and not the cheese.
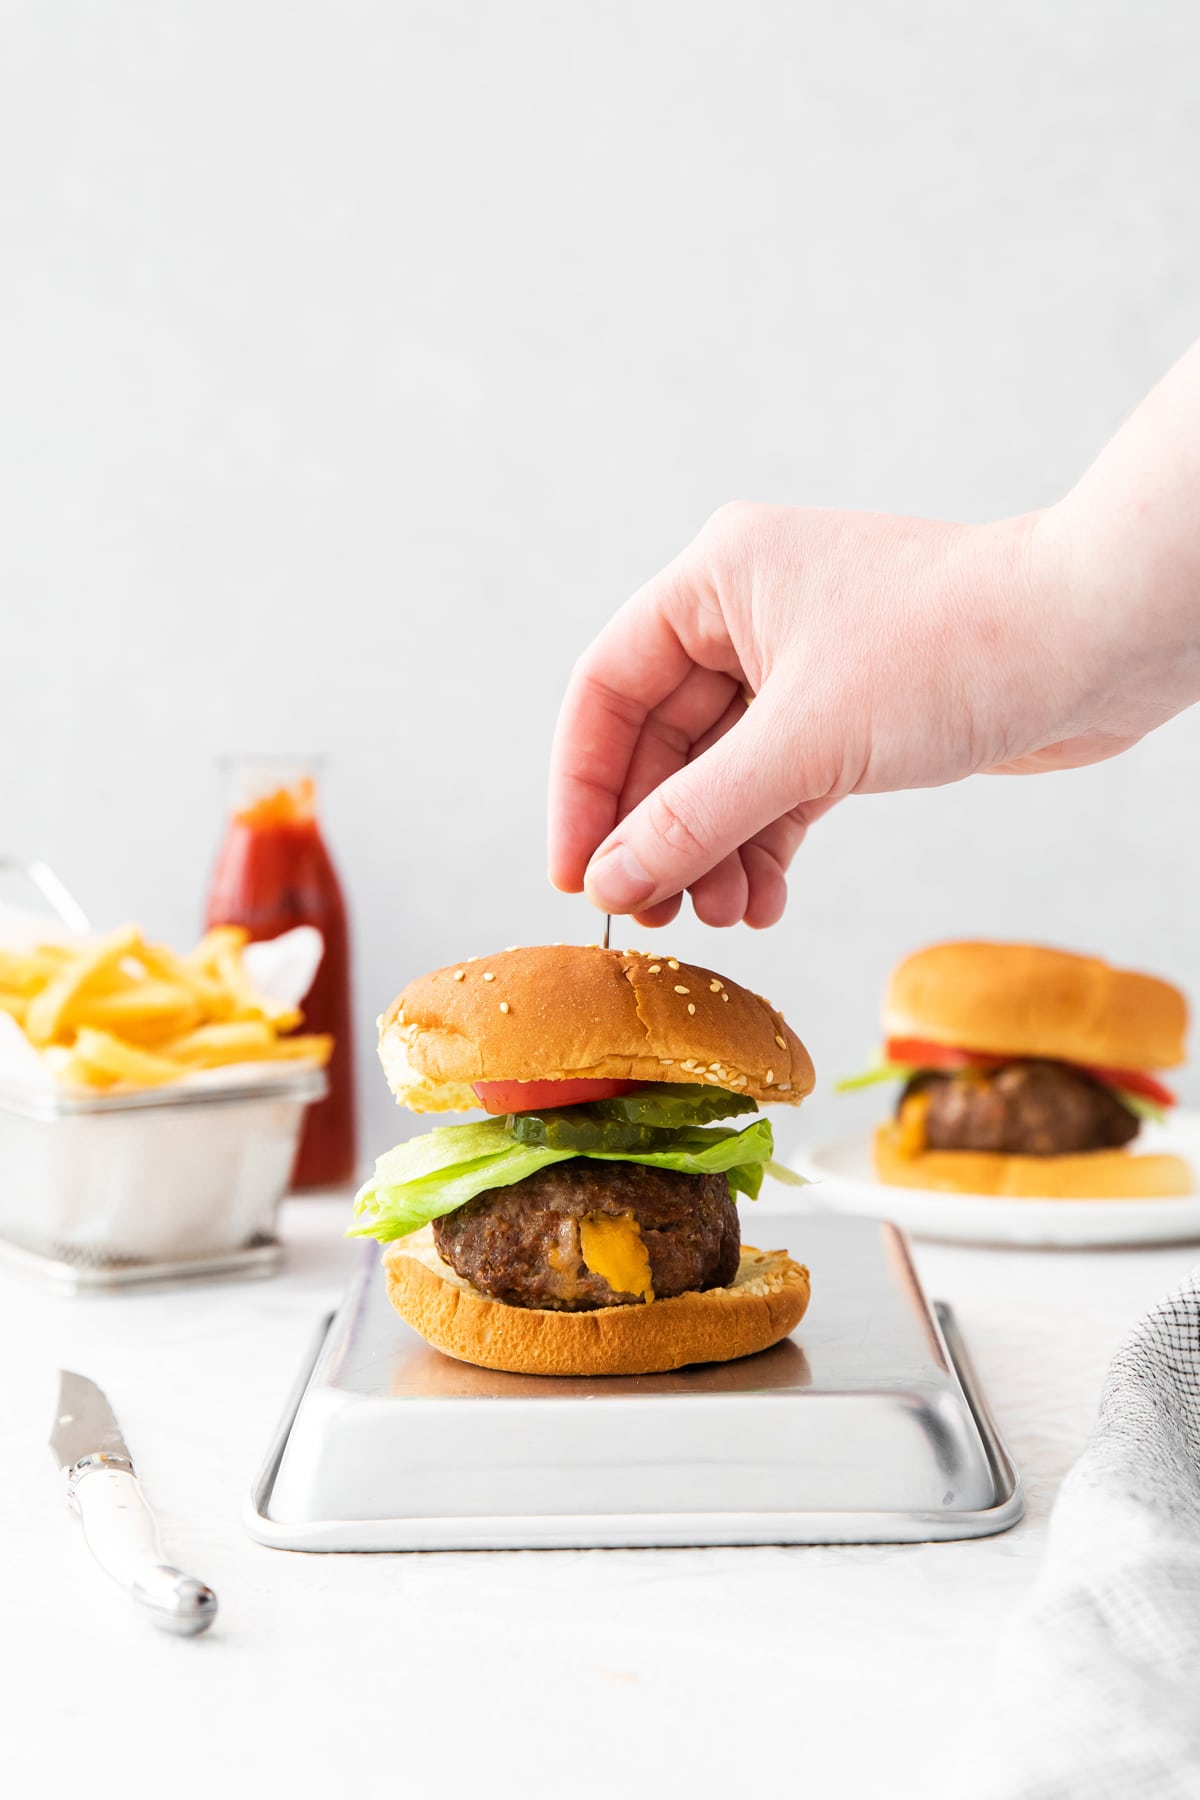
- Serve with your favorite toppings and enjoy!
Tips and Suggestions
- Be careful when serving these – the melted cheese is super hot. You may want to let the burgers rest for a few minutes and let cheese cool just a bit before you eat them.
- Leftover queso dip works great in place of the shredded cheese. The trick is to pour a little queso in the bottom of muffin cups and freeze it, then place the frozen discs in between your two burger patties. The cheese will melt while your burger cooks.
- Don’t overmix the seasonings into the ground meat – this can cause your burgers to have a drier texture
Variations
- Try some other types of cheeses in place of the cheddar. Swiss, Provolone, or Gouda would all be delicious, but just about any type of cheese will work.
- Add some sliced Jalapenos with the cheese to give your burger a delicious spicy kick.
- Add cheese to the top of the burger as well as the inside for an extra cheesy version. Once the burgers are cooked through, add the cheese slices on top and cook for one additional minute.
- Try using ground turkey or bison if you’re looking to make a leaner burger.
How Do I Store Air Fryer Juicy Lucy Burgers?
Store any leftover burgers in an airtight container in the refrigerator and they’ll last for up to three days.
Can I Freeze Air Fryer Juicy Lucy Burgers?
You can freeze the prepared, uncooked burgers after stuffing them with cheese. Place them in an airtight container with wax paper in between layers and they should keep for about 3 months in the freezer.
More Air Fryer Recipes


Air Fryer Juicy Lucy Burgers
Ingredients
- 1 pound ground beef I used 80/20
- 1 teaspoon kosher salt
- ½ teaspoon garlic powder
- ½ teaspoon paprika
- ½ cup cheddar cheese shredded
Instructions
- In a medium sized bowl, combine the beef, salt, garlic powder, and paprika.1 pound ground beef, 1 teaspoon kosher salt, ½ teaspoon garlic powder, ½ teaspoon paprika
- Divide the mixture into 8ths and flatten each into a disc about ¼” thick.
- Place 2 tablespoons of shredded cheese into the center of 4 of the patties.½ cup cheddar cheese
- Place another patty on top of the cheese and seal the edges.
- Spray the air fryer basket lightly with olive oil spray and place the patties into the basket.
- Cook at 375F for 8-10 minutes, or until the burgers register 165F on an instant read thermometer (just make sure you’re testing the beef temperature, not the cheese).
- Serve with your choice of toppings and enjoy!
- Store any leftover hamburgers in an airtight container in the fridge for up to three days.
Notes
Nutrition
Did You Make This Recipe?
Don’t forget to share it with me on @thebalancingmom and follow on Tiktok @balancingmotherhood and Pinterest @thebalancingmom for more!