
Red Velvet Thumbprint Cookies
This post may contain affiliate links, read our disclosure policy.

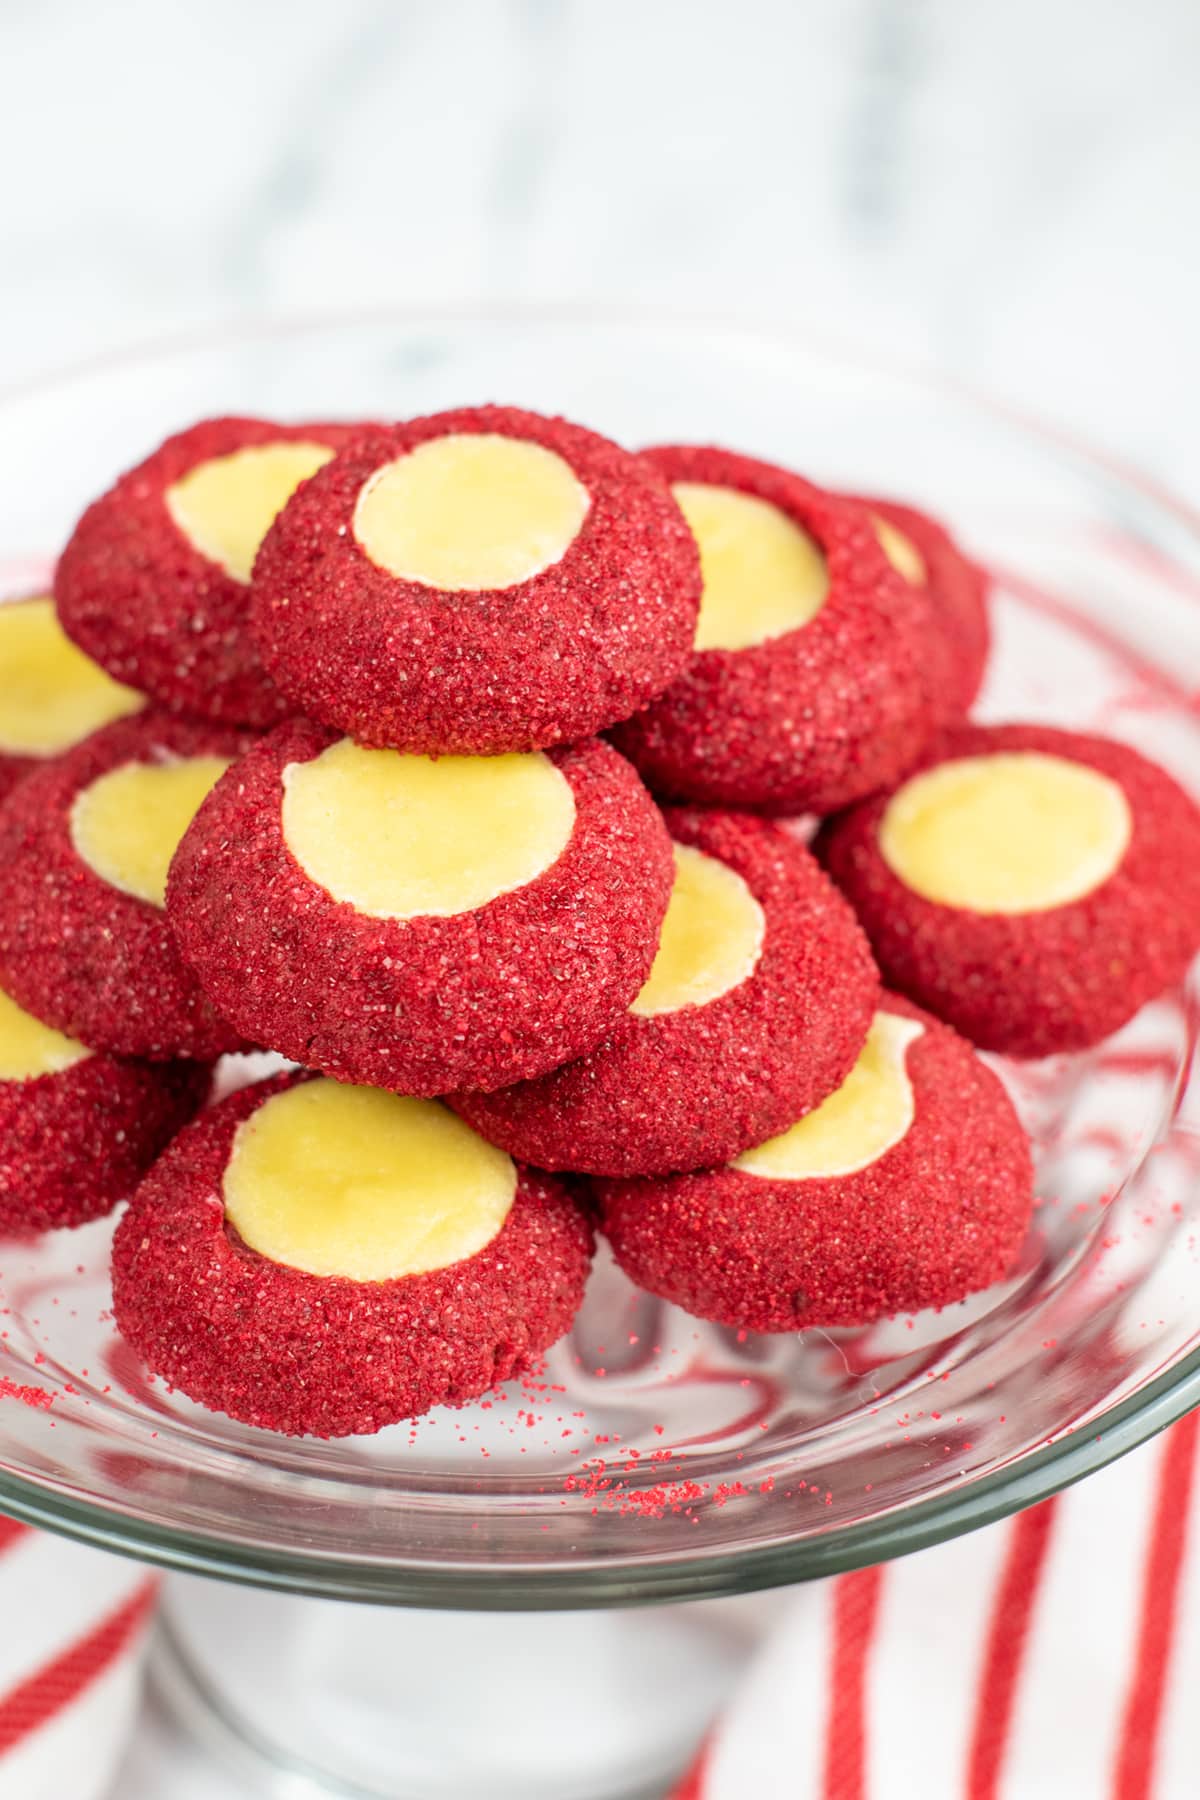
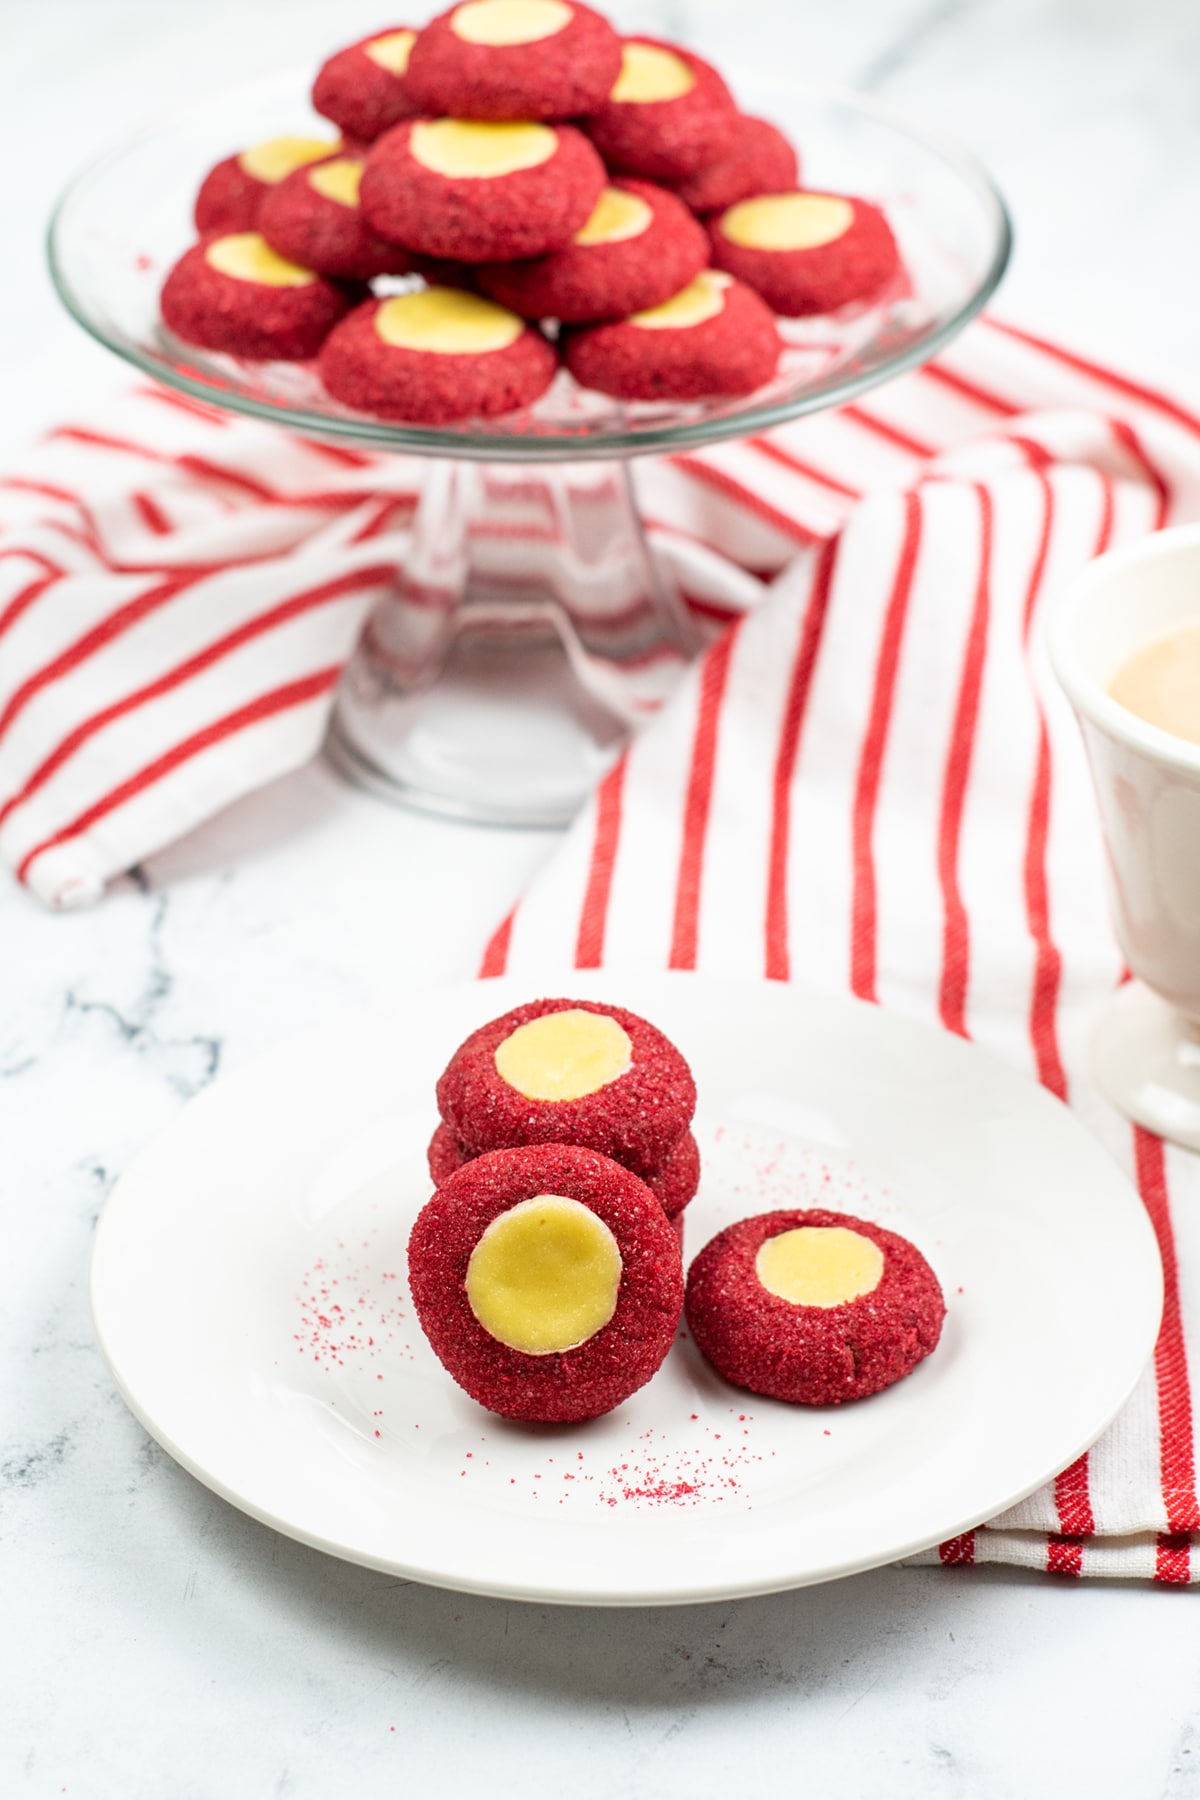
These from-scratch Red Velvet Thumbprint Cookies are soft and chewy, with a subtle hint of chocolate and sweet cream cheese center. They’re the perfect cookie to add to any holiday baking lineup.
Red Velvet Thumbprint Cookie Recipe
If you’re looking for a new and delicious recipe to add to your list of favorite Christmas Cookies, you’re going to love these red velvet thumbprint cookies. They’re a delightful combination of red velvet cake and old-fashioned thumbprint cookies. They have a moist and chewy texture with just a touch of cocoa flavor, while the centers are sweet and creamy. Not only are they beautiful, but these cookies are also completely irresistible.
Valentine’s Day and Christmas are the ideal times to break out all your favorite red velvet desserts. From Red Velvet Brownies and Red Velvet Fudge to these easy Red Velvet Rice Krispie Treats, the festive red color just puts everyone in a holiday mood. Add some (or all) of them, along with these red velvet cookies to a cookie platter for an impressive holiday presentation that’s sure to get rave reviews.
💗 Why We Love This Recipe
- Easy – Super easy recipe that gives you all the same delicious flavors of red velvet cake but in cookie form.
- Beautiful – Beautiful red color makes them perfect cookies for a Christmas party this holiday season (or for Valentine’s Day).
- Fun – This is a delicious cookie recipe that puts a fun twist to classic thumbprint cookies.
Recommended Tools
- Sheet pan
- Large mixing bowl
- Electric mixer
- Measuring cups
- Measuring spoons
- Wire cooling rack
🛒 What’s Needed to Make Homemade Thumbprint Cookies
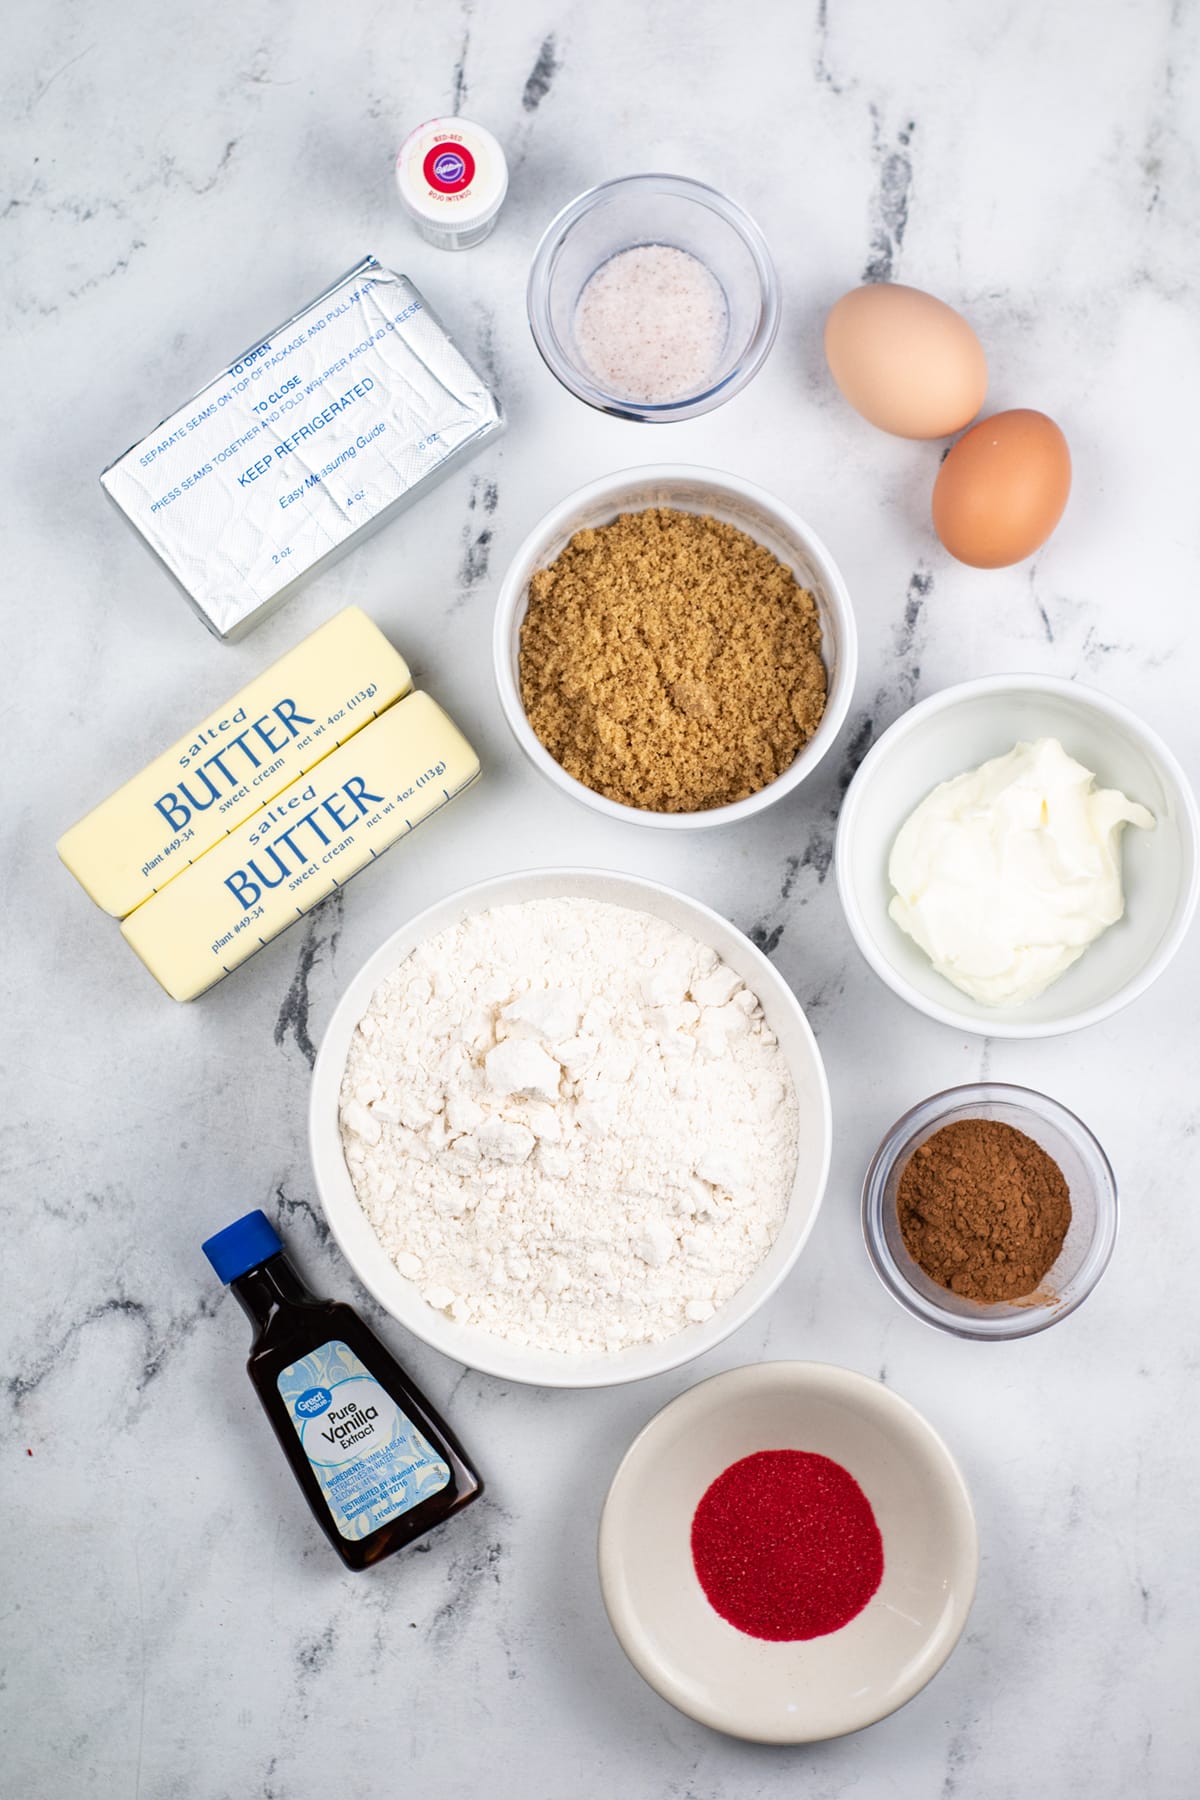
For the Cookies
- Butter (softened)
- Brown sugar
- Egg yolk
- Vanilla extract
- Flour
- Cocoa powder
- Salt
- Red gel food coloring
- Red sanding sugar
For the Filling
- Cream cheese (room temperature)
- Sugar
- Salt
- Egg yolk
- Sour cream
- Vanilla
🥄 How to Make Delicious Red Velvet Cookies
Heat oven to 300 °F. Line cookie sheet with parchment paper.
Step One: Make the Filling
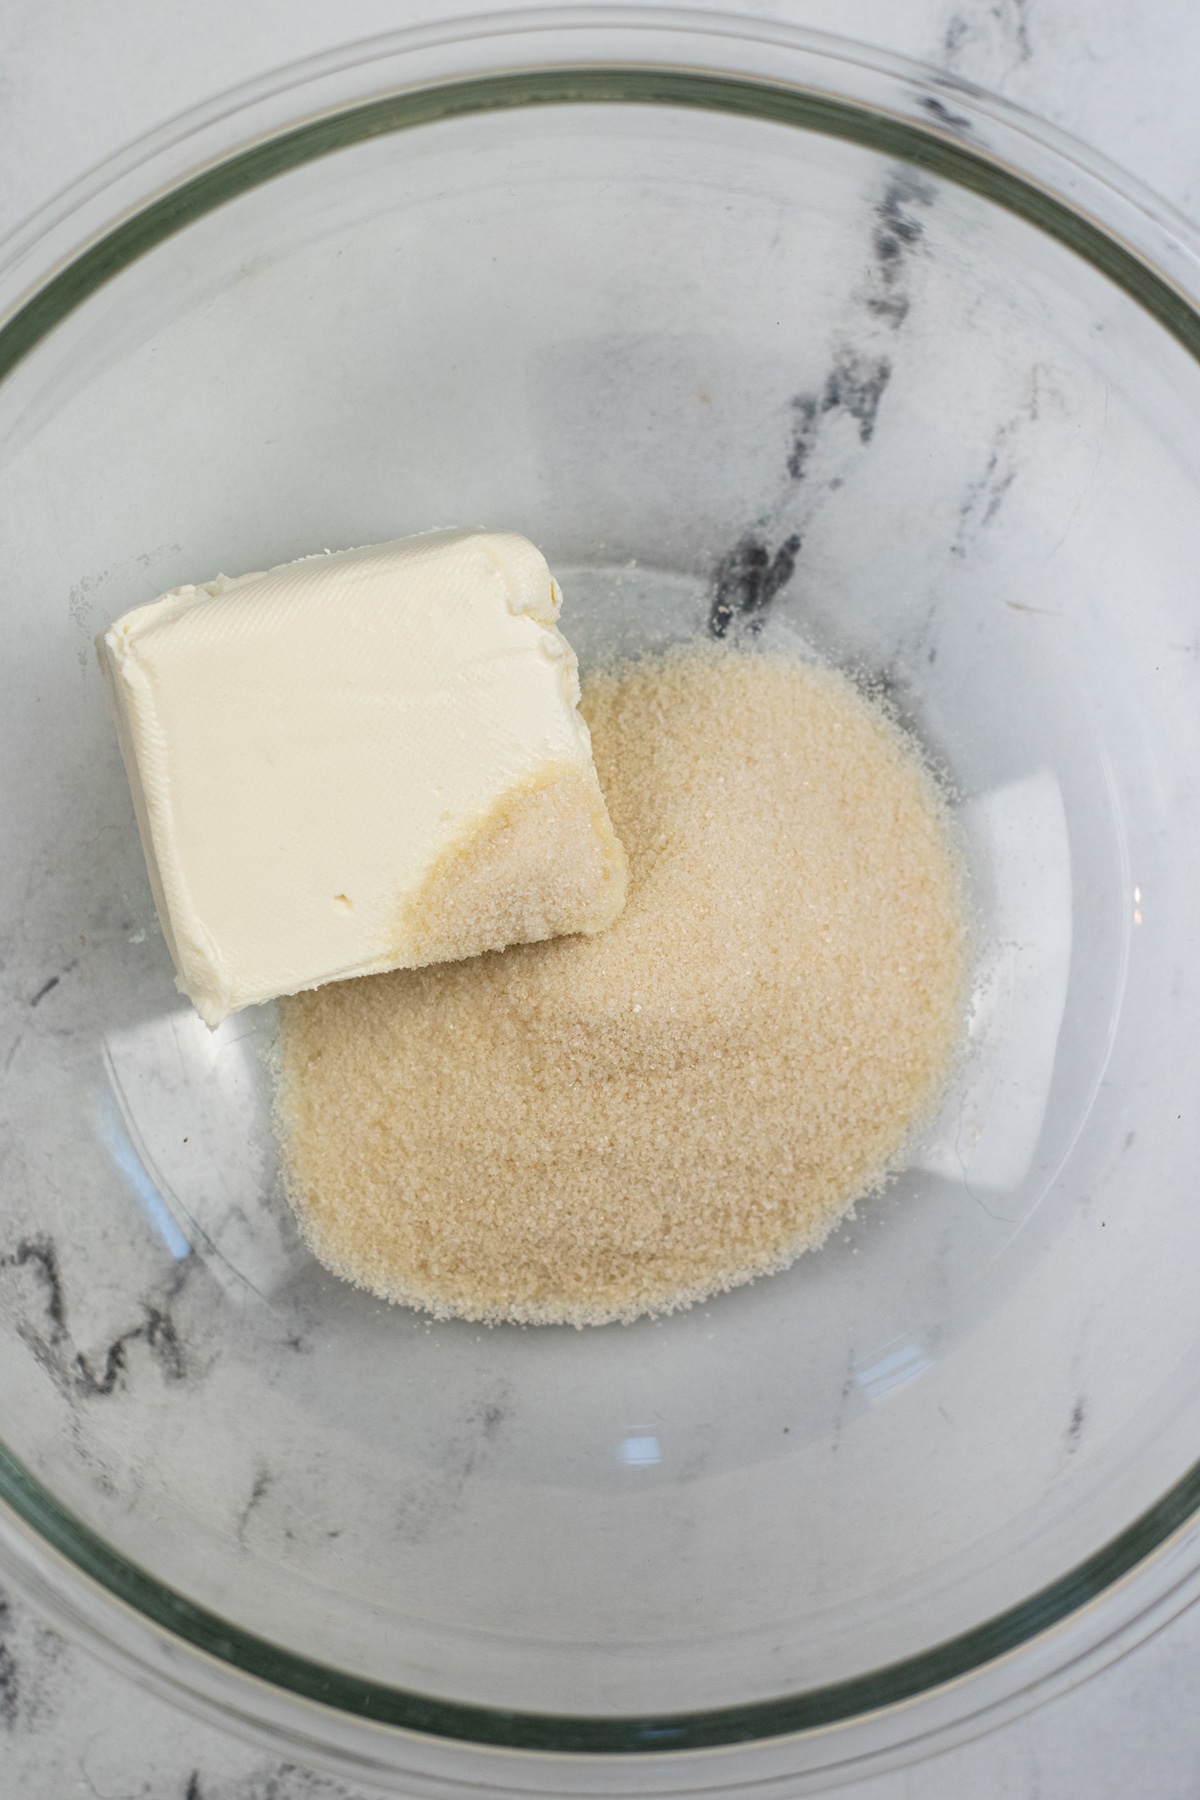
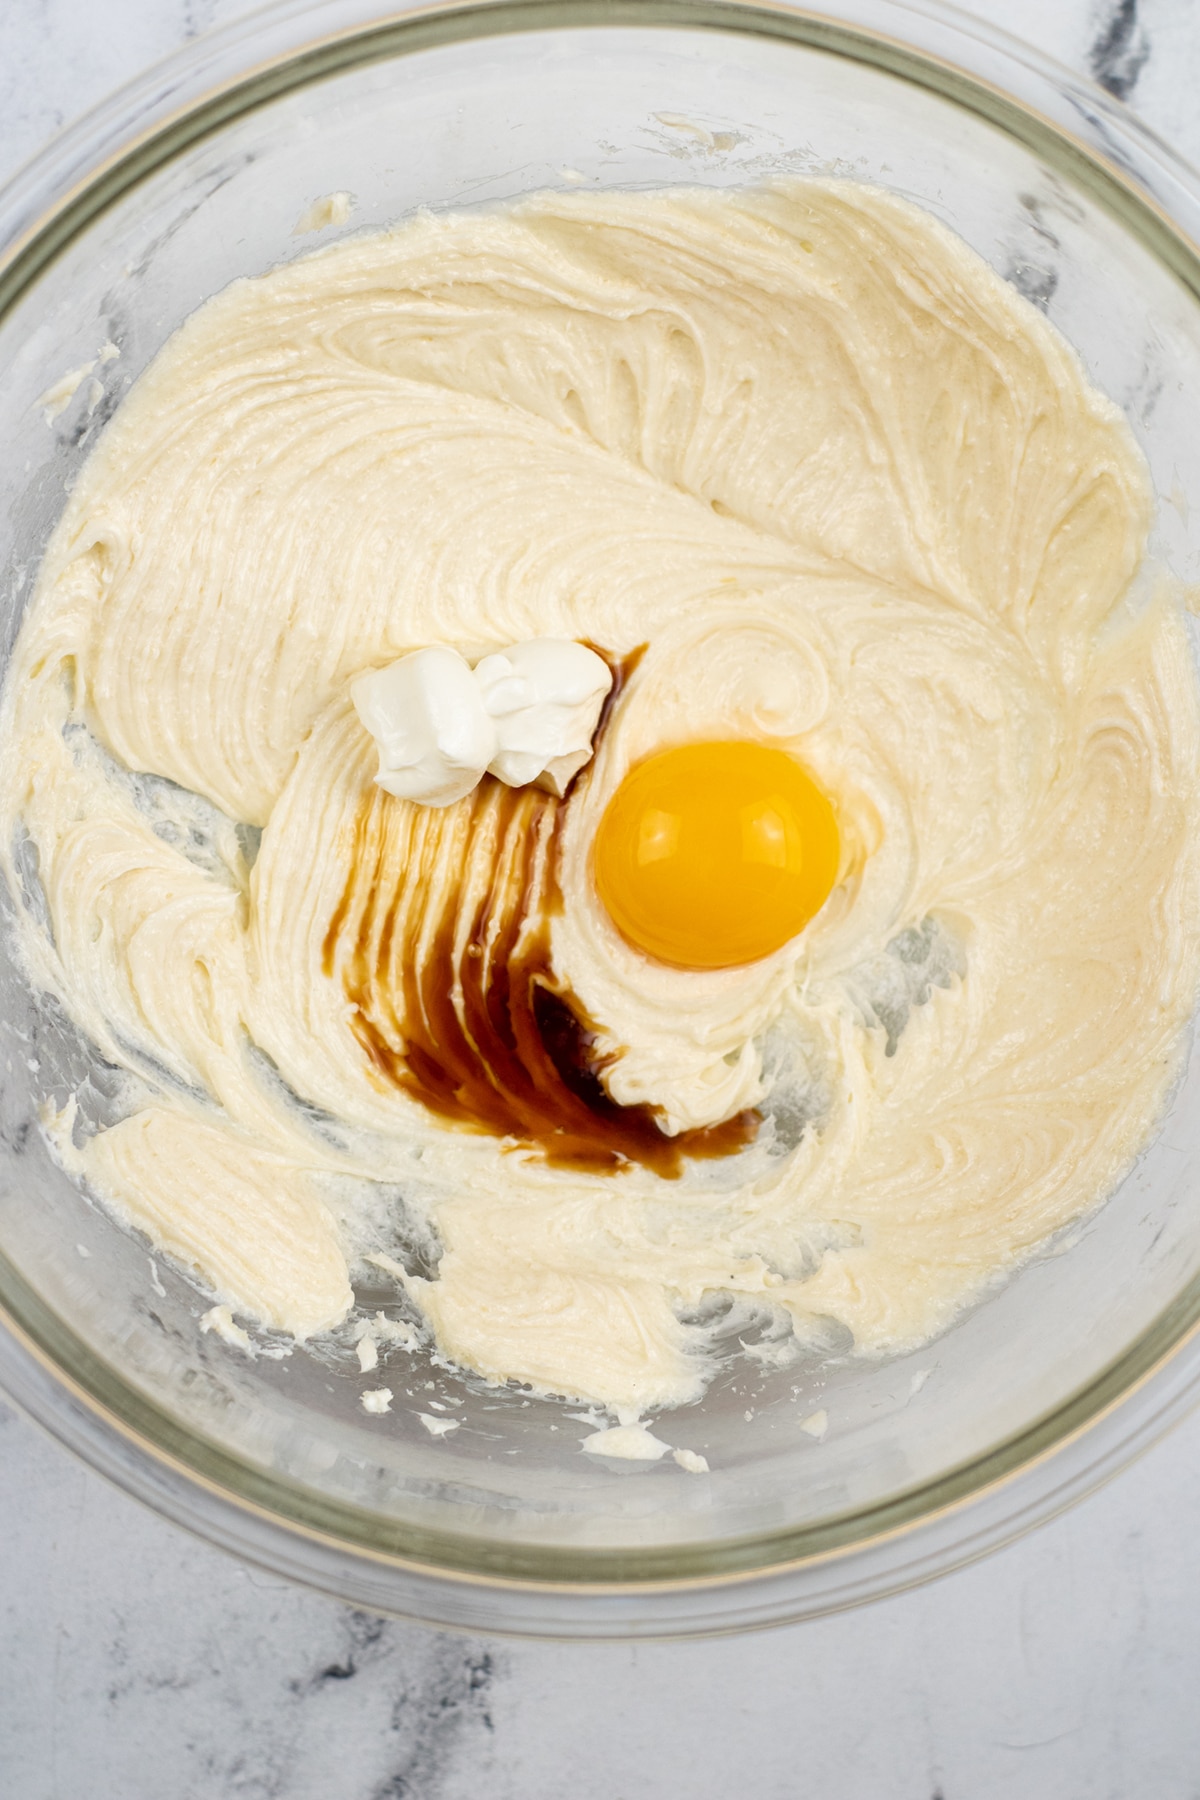
- In a large bowl with an electric mixer, blend the cream cheese and sugar on medium speed until well blended.
- Add in salt, vanilla, egg yolk, and sour cream and continue mixing until everything is combined.
- Cover the bowl with plastic wrap and place in the refrigerator for at least 30 minutes to allow the filling to set up.
Step Two: Combine Dry Ingredients for the Cookies
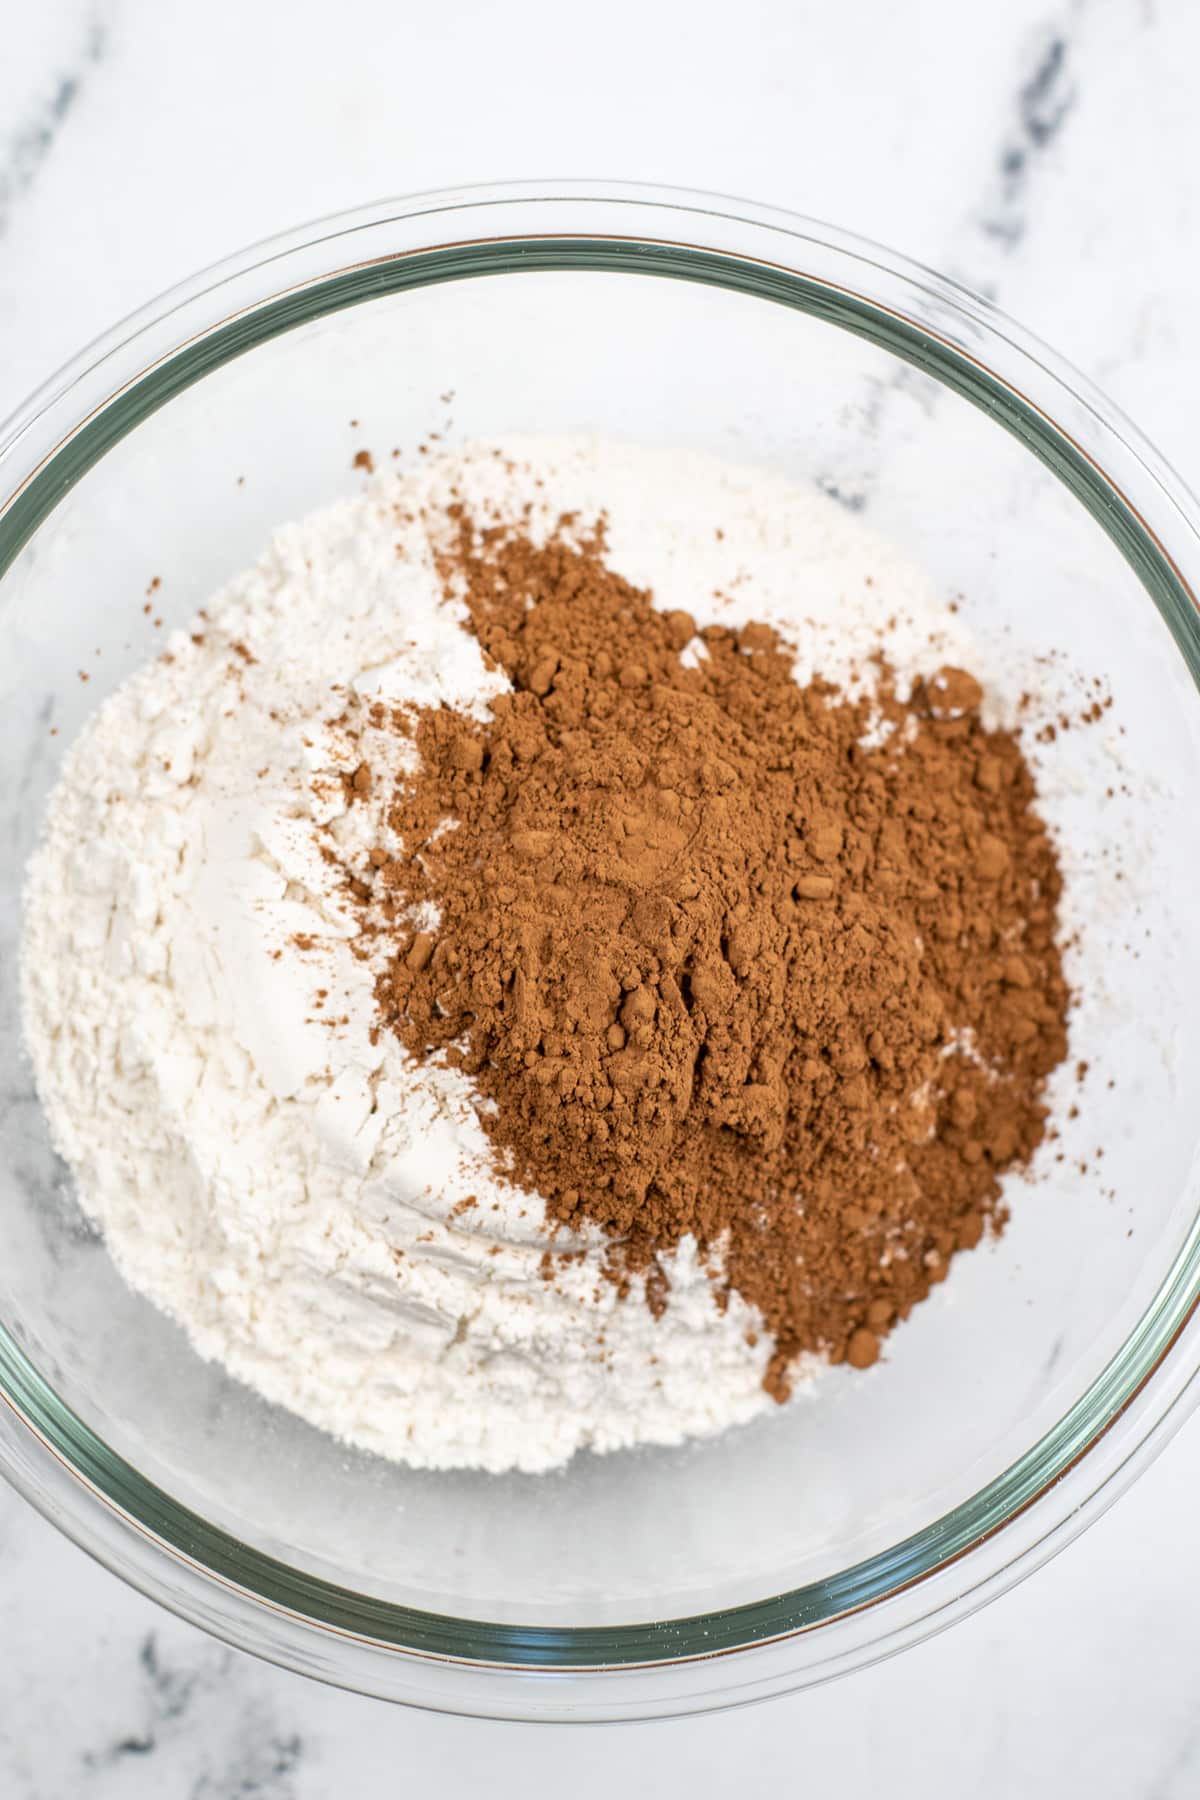
- In a medium-sized mixing bowl combine flour, cocoa powder, and salt and mix until well incorporated.
Step Three: Beat Butter and Sugar
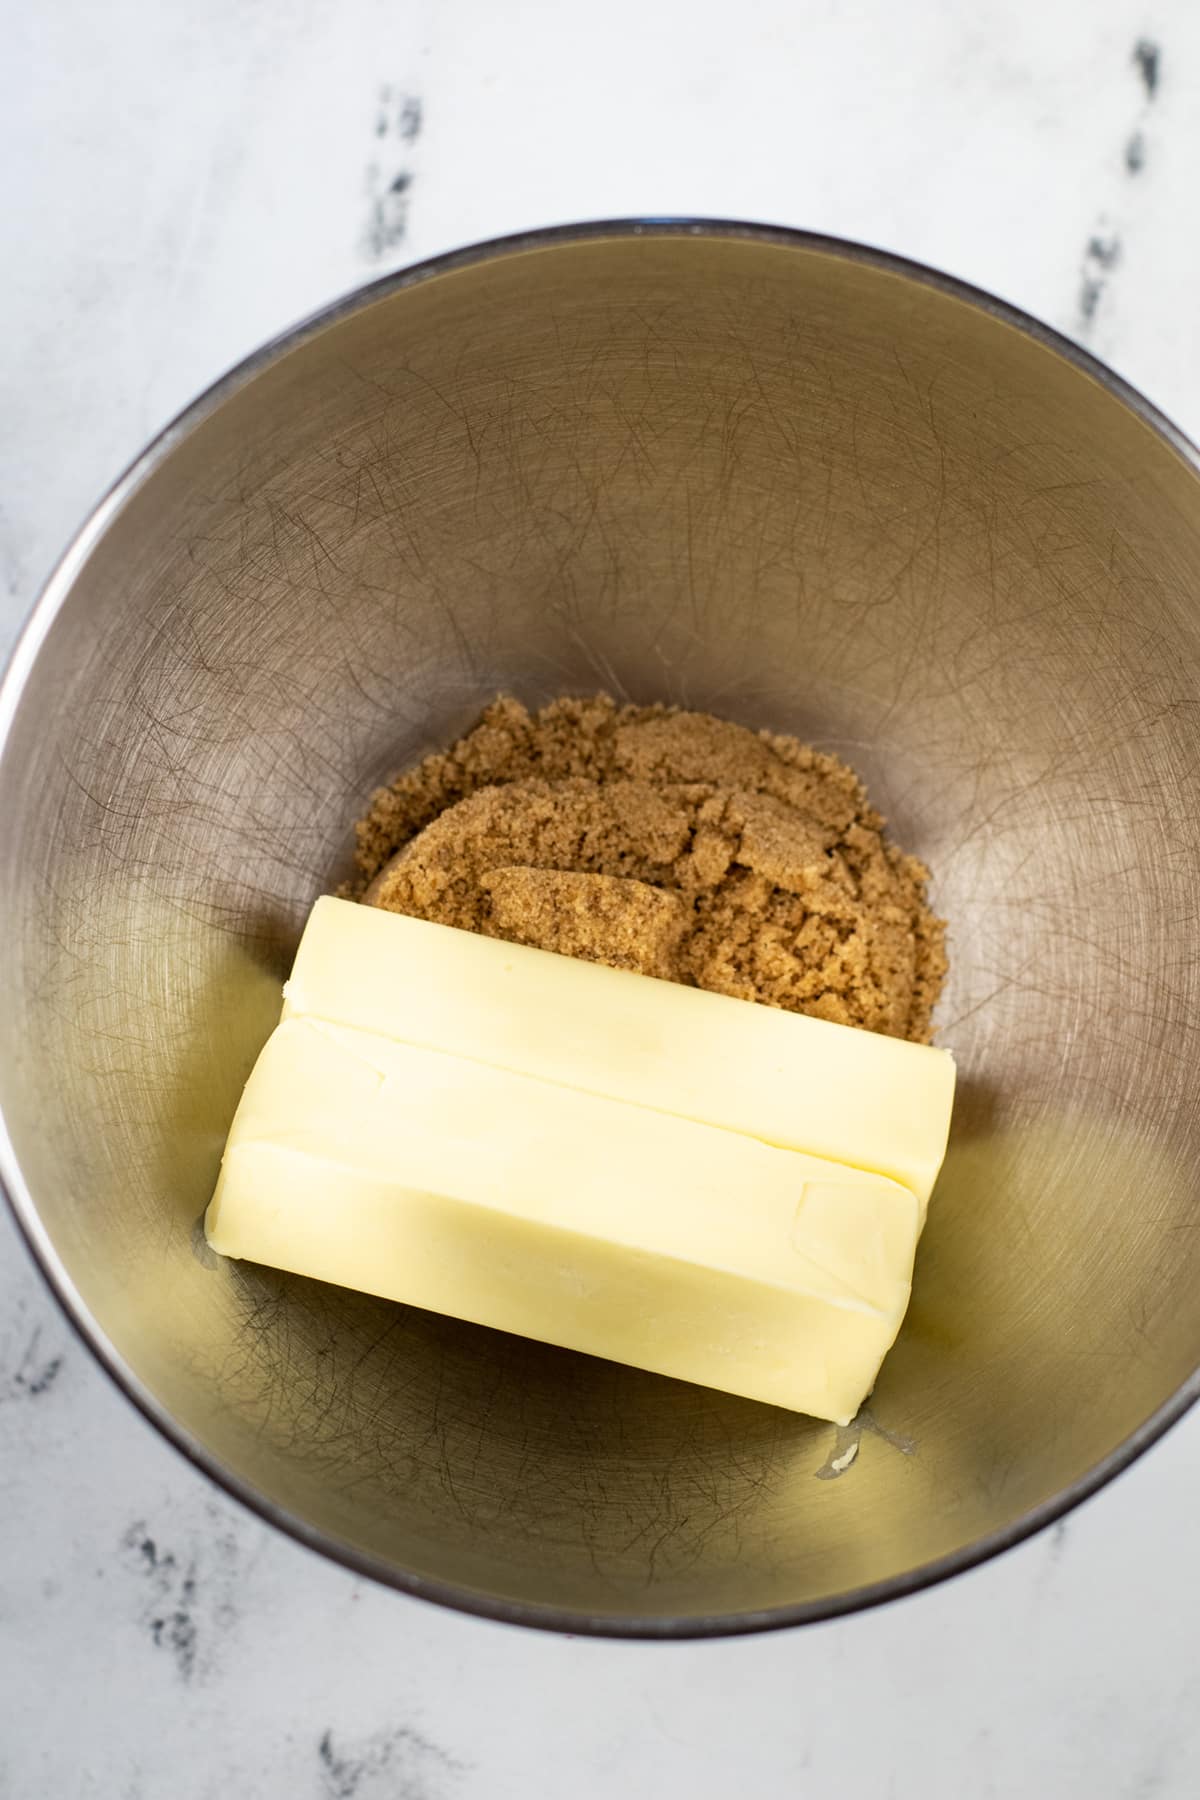
- Using the paddle attachment of a stand mixer, beat butter and sugar until well incorporated.
Step Four: Add the Egg Yolk
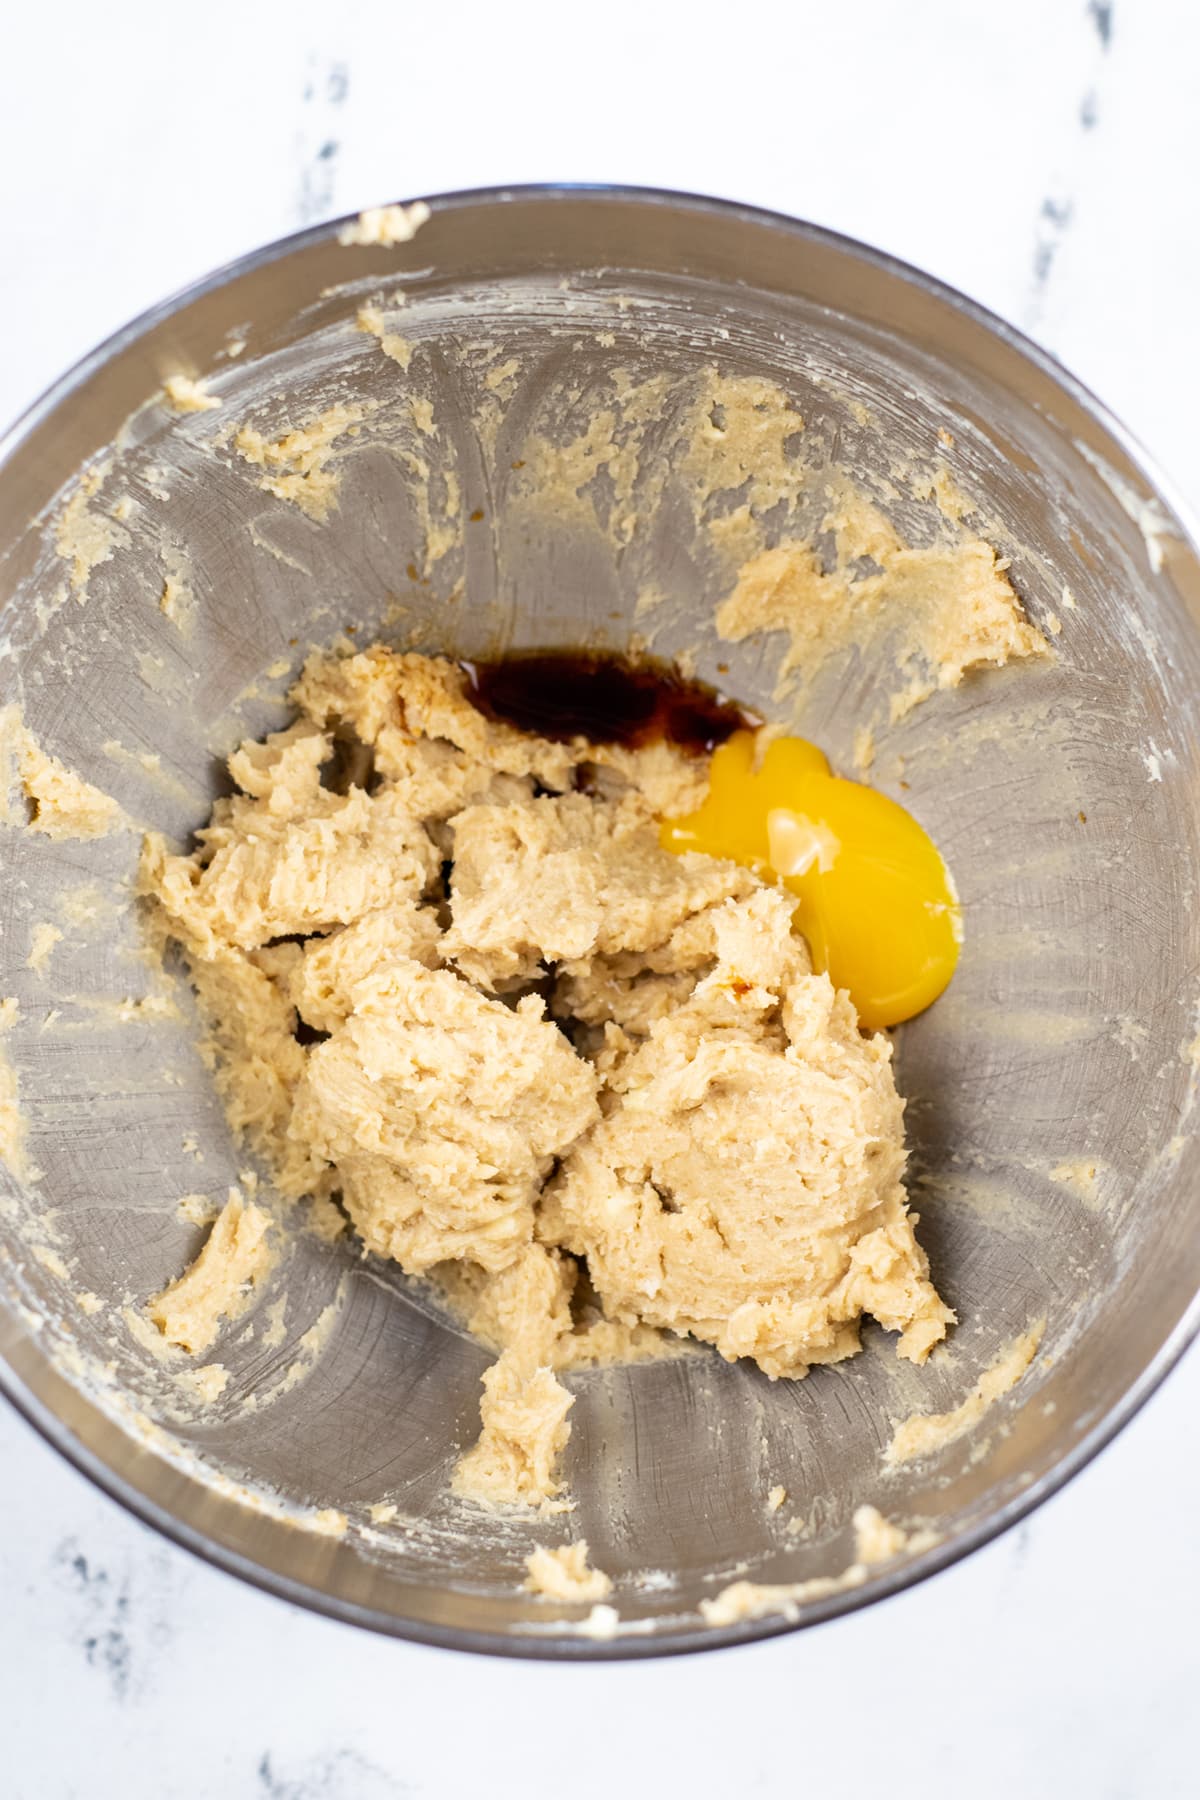
- Add in egg yolk and the teaspoon of vanilla extract and continue mixing until incorporated.
Step Five: Form the Dough
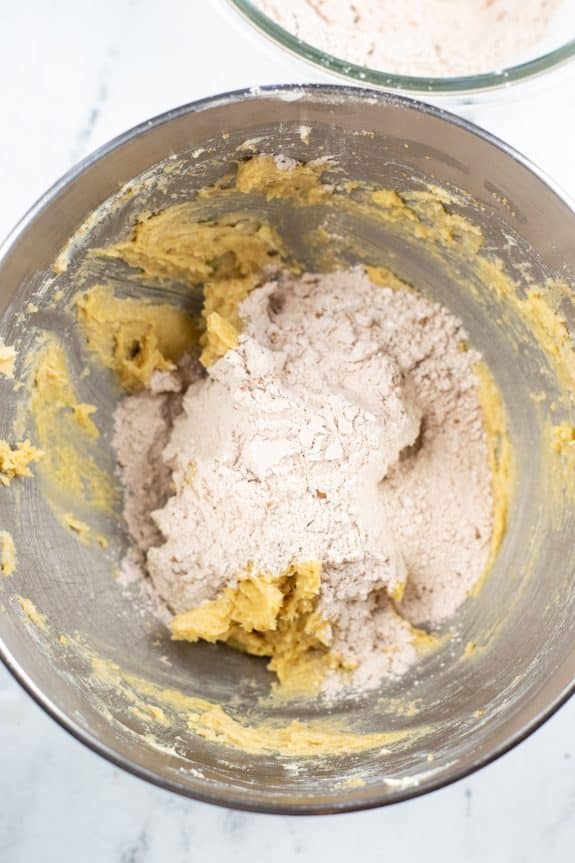
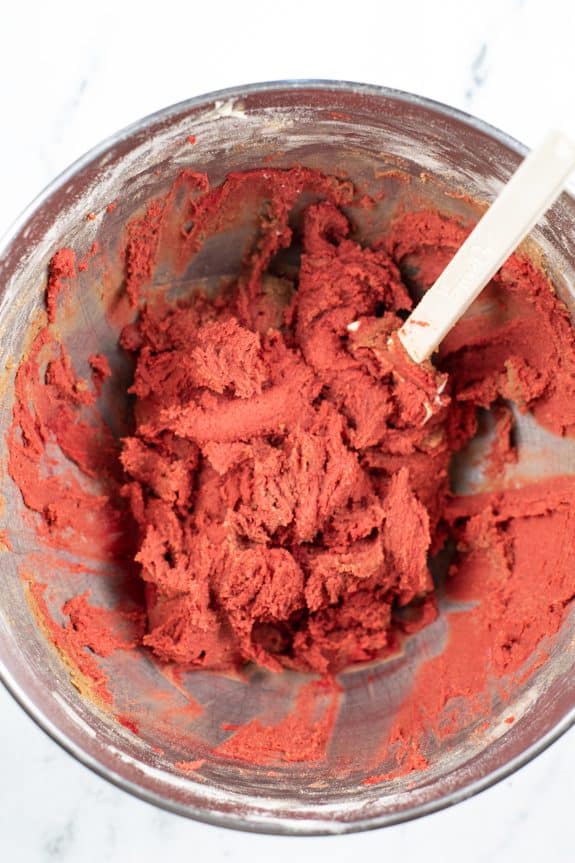
- Add the flour mixture in gradually, mixing after each addition, until it’s all added and the soft dough forms.
- Add in about 1/8 teaspoon red gel food coloring and continue mixing until the color is evenly distributed. Add more food coloring if a deeper color is desired.
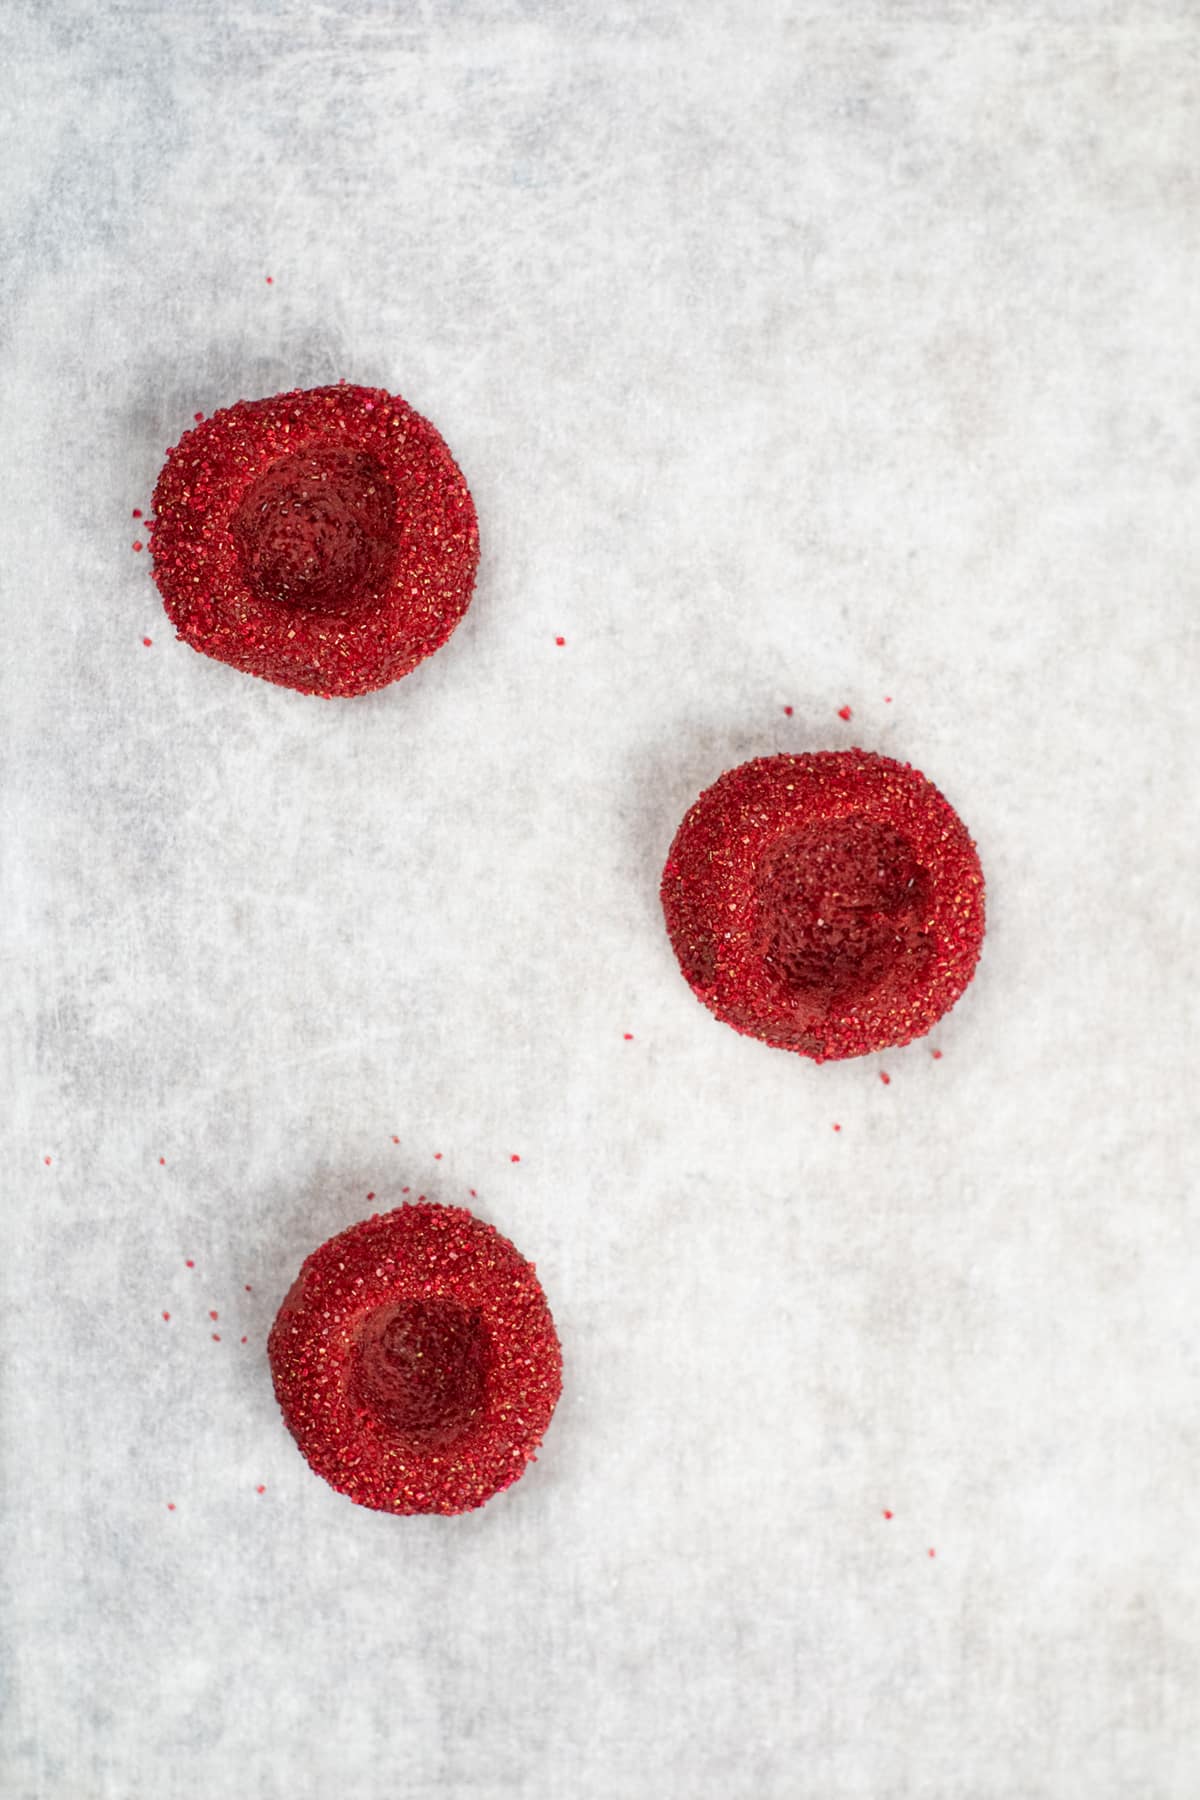
Step Six: Shape the Dough and Thumbprint
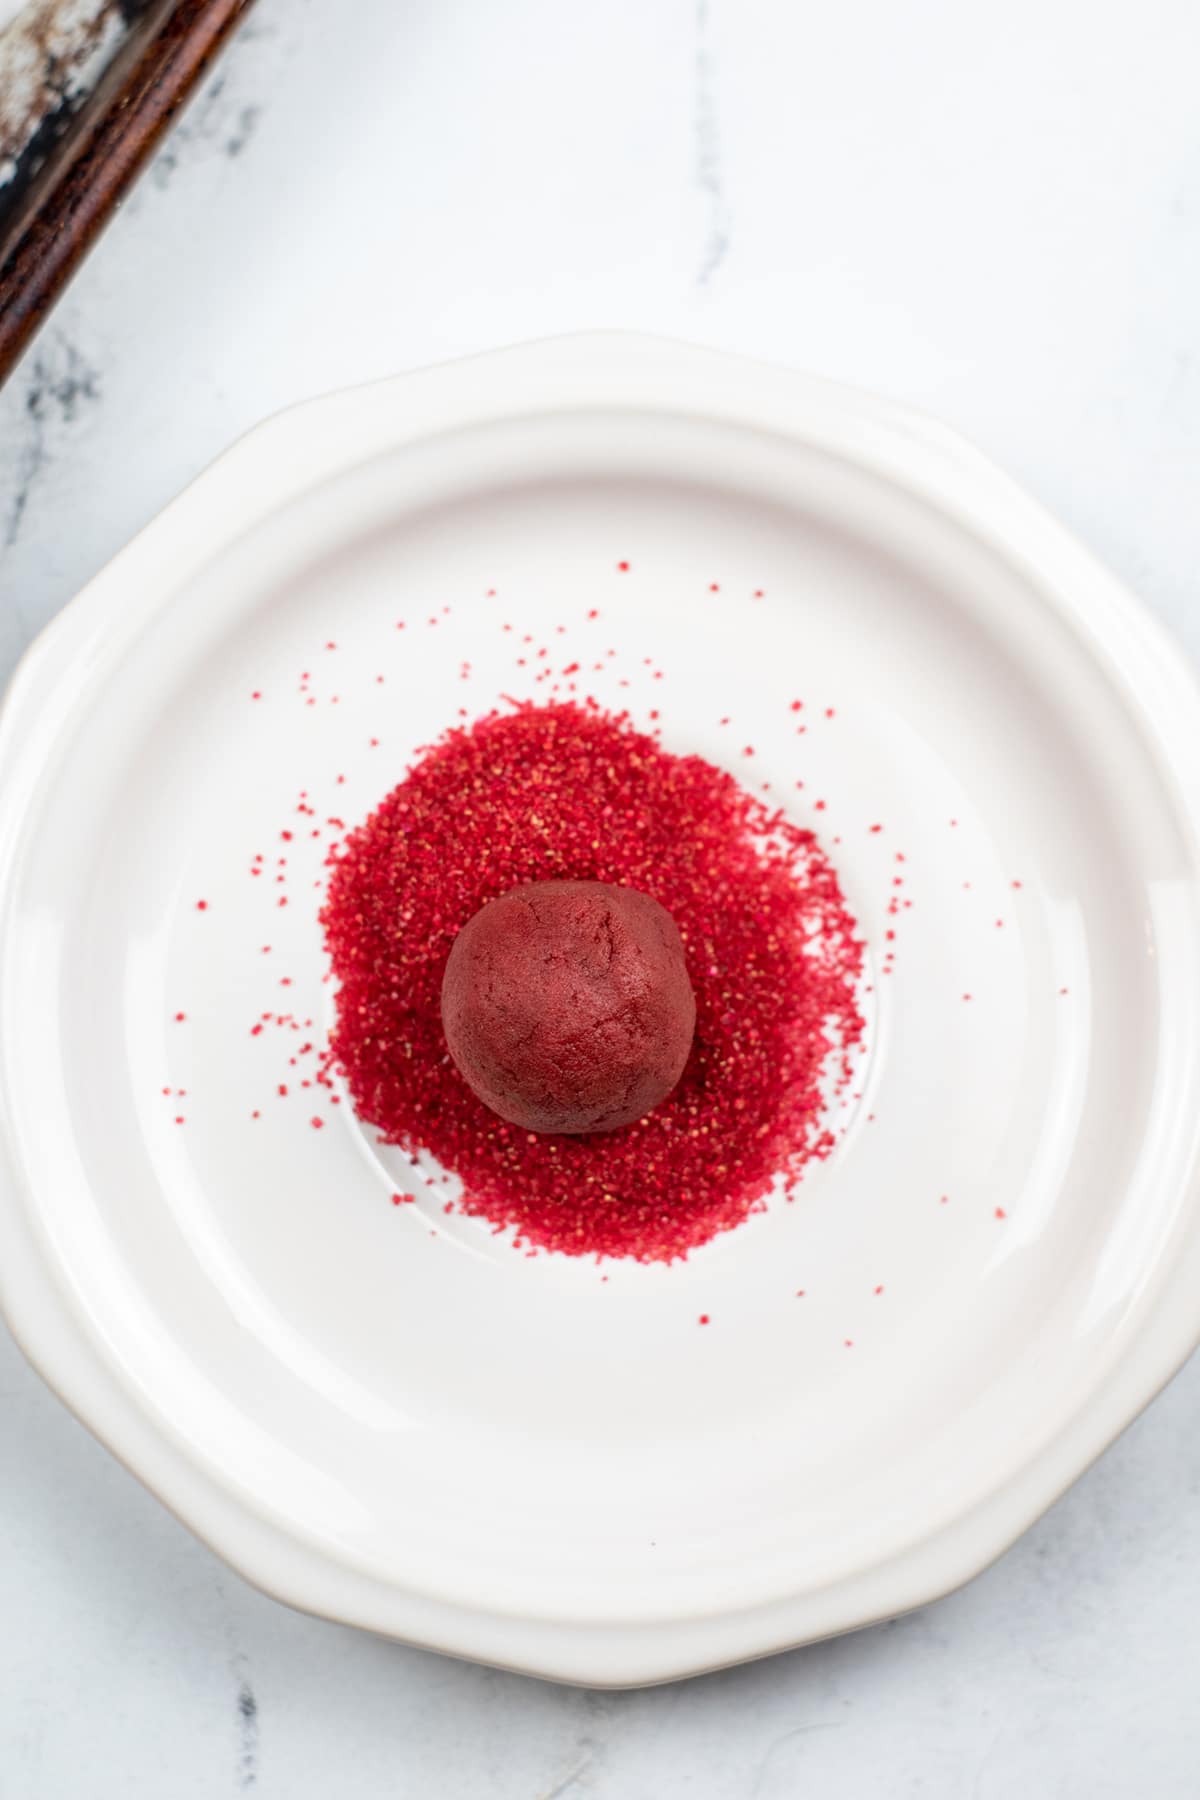
- Place red sanding sugar in a shallow dish or small bowl.
- Scoop cookie dough in tablespoon-size scoops and roll into balls (should be about 1-inch balls).
- Roll dough balls in the sanding sugar to evenly coat them.
- Place on the prepared baking sheet.
- Using the handle of a wooden spoon press a hole in the center of each ball.
Step Seven: Bake and Fill
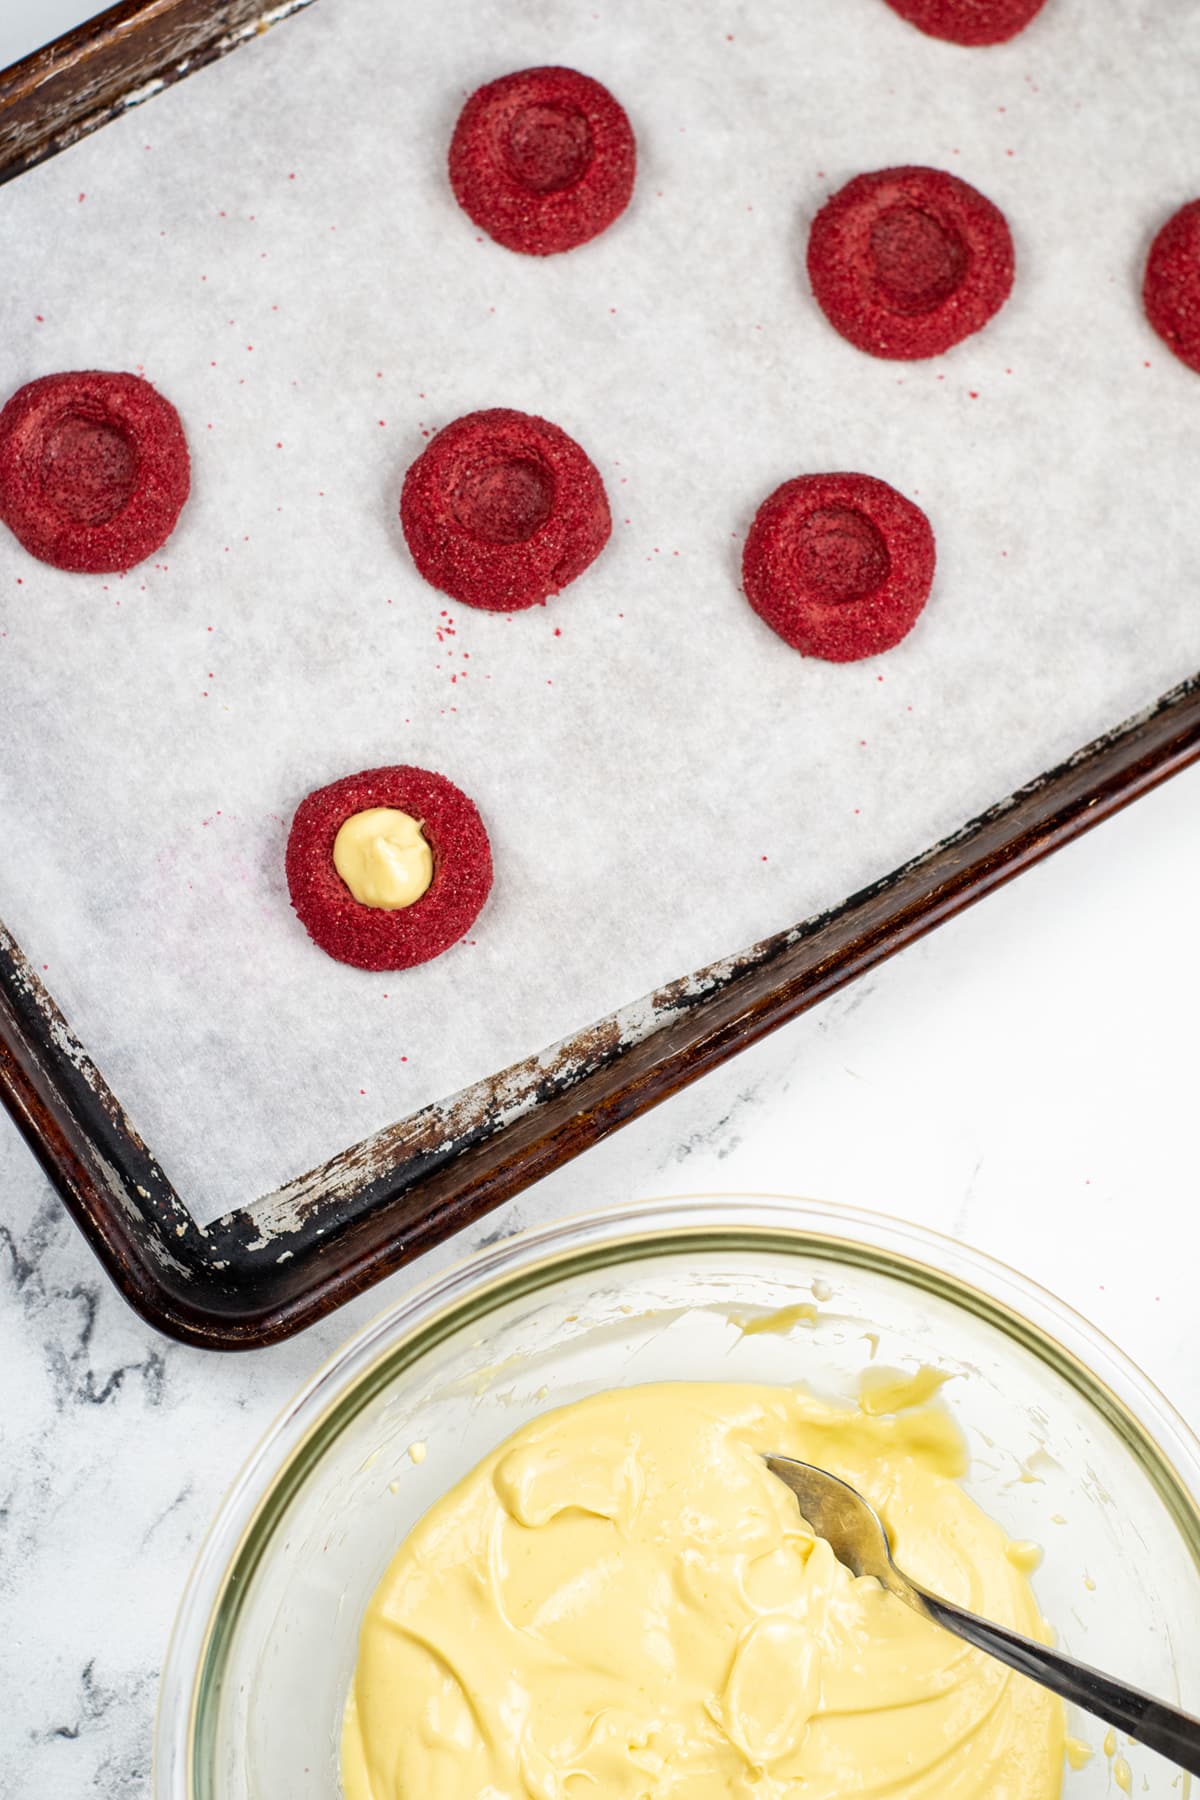
- Bake cookies for 10 minutes.
- Remove from the oven, gently press in the center of each cookie again and fill with the cream cheese filling.
- Place the soft red velvet thumbprint cookies back in the oven and bake 10-12 minutes or until the filling is set.
- Cool cookies on the baking sheet for 2-3 minutes before removing to a wire rack to cool completely.
Variations of These Chewy Red Velvet Cookies
- Extracts: You can change up the flavor of these cookies by using different extract. A little bit of peppermint extract goes really well with the cocoa in the cookies. You could also use a little rum or almond extract.
- Cream cheese center: The creamy center of these cookies is a take on the cream cheese frosting that’s typically found on red velvet cake. But if you have chocolate lovers in your life, you can always go the more traditional route and make red velvet kiss cookies. Just leave out the filling and press a chocolate candy kiss into the center of each cookie as soon as they come out of the oven.
- Colors: Of course, red velvet cookies usually are red. But you can always half the dough and make some green, using green food coloring. The two different colors look so pretty at Christmas time.
- Topping: The center of these cookies looks really festive but if you want to add a little extra touch, you can drizzle a little melted white chocolate over the tops of the cooled cookies.
How Do I Store Them?
Store the baked thumbprint cookies in an airtight container on the counter for a day or two or in the fridge for up to a week.
You can also freeze them for up to 3 months. First place them in a single layer on a sheet pan and place them in the freezer for about 45 minutes. Then transfer them to a freezer safe zip-top bag and place back in the freezer. Thaw the frozen cookies overnight in the fridge.
Can I Make the Dough in Advance?
You can prepare the dough up to 4-5 days in advance and keep it in the fridge.
If you want freshly baked cookies at the last minute, you can freeze the formed cookie dough. Just form the dough into balls and press the center down where the filling will eventually go. freeze them for about 45 minutes, or just until they are firm enough not to stick together. Then place them in a freezer bag.
You can bake them straight from frozen (add enough cooking time to allow them time to bake) or you can let them thaw in the fridge overnight before baking them.
More Christmas Cookie Recipes
- Christmas Wreath Cornflake Cookies
- Peppermint Bark Cookies
- Chewy Chocolate Peppermint Cookies
- Pinwheel Sugar Cookies
- Cranberry and White Chocolate Cookies
- Peanut butter balls


Red Velvet Thumbprints
Ingredients
- 1 cup butter softened
- ½ cup brown sugar
- 1 egg yolk
- 1 teaspoon vanilla
- 2 cups flour
- 2 teaspoon cocoa powder
- ¼ teaspoon salt
- red gel food coloring
- red sanding sugar
- 4 ounces cream cheese softened
- ¼ cup sugar
- 1/8 teaspoon salt
- 1 egg yolk
- 2 teaspoon sour cream
- ¼ teaspoon vanilla
Instructions
- Preheat the oven to 300 degrees.
- Line a baking sheet with parchment paper and set aside.
For the Filling:
- In a medium size bowl with an electric mix together cream cheese, and sugar until well blended. Add in salt, vanilla, egg yolk, and sour cream, continue mixing until everything is evenly mixed. Cover the bowl and place in the refrigerator for at least 30 minutes.½ cup brown sugar, 1 egg yolk, 1 teaspoon vanilla, ¼ teaspoon salt, 4 ounces cream cheese, 2 teaspoon sour cream
For the Cookies:
- In a medium bowl combine flour, cocoa powder and salt, mix until well incorporated.2 cups flour, 2 teaspoon cocoa powder, 1/8 teaspoon salt
- In the bowl of a stand mixer fitted with a paddle attachment cream together butter and sugar.1 cup butter, ¼ cup sugar
- Add in egg yolk and vanilla and continue mixing until well incorporated.1 egg yolk, ¼ teaspoon vanilla
- Add the flour mixture in gradually, mixing after each addition, until it's all added.
- Add in about 1/8 teaspoon of red gel food coloring and continue mixing until it the color is evenly distributed.red gel food coloring
- Add more food coloring if a deeper color is desired.
- Place red sanding sugar in a shallow dish.red sanding sugar
- Scoop out dough in tablespoon-size scoops and roll into balls.
- Roll the dough balls in the sanding sugar to evenly coat them.
- Place on the prepared cookie sheet.
- Using the handle of a wooden spoon, your finger, or another small round object press a hole in the center of each dough ball.
- Bake for 10 minutes.
- Remove from the oven, gently press the center of each cookie again and fill with the cream cheese filling.
- Place back in the oven and bake 10-12 minutes or until the filling is set.
- Allow to cool on the baking sheet for 2-3 minutes before removing to a wire rack to cool completely.
- Store in an airtight container.
Nutrition
Did You Make This Recipe?
Don’t forget to share it with me on @thebalancingmom and follow on Tiktok @balancingmotherhood and Pinterest @thebalancingmom for more!


