
Cream Cheese Mints
This post may contain affiliate links, read our disclosure policy.

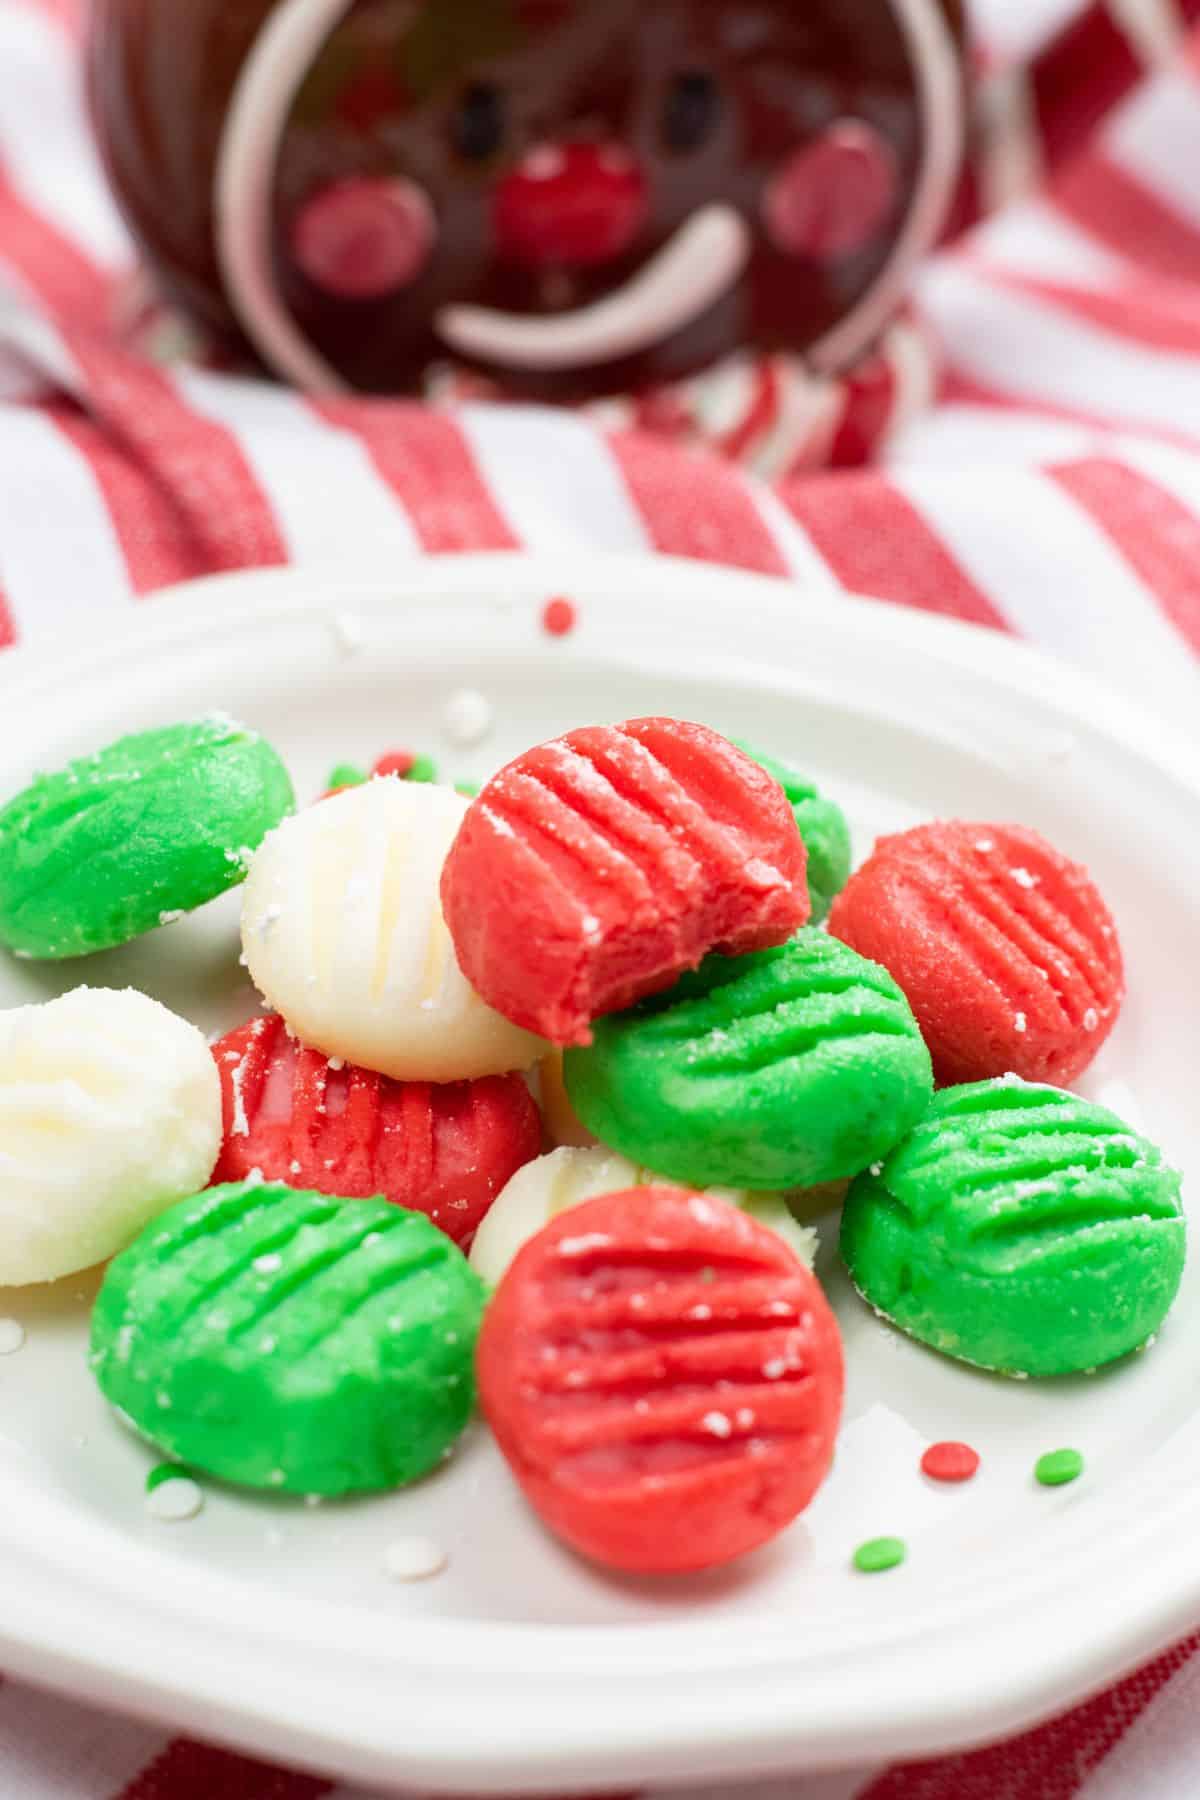
These festive Christmas Cream Cheese Mints make the perfect holiday sweet treat. Made with just a few simple ingredients, they’re creamy and melt-in-your mouth delicious, just as a homemade candy should be.
Easy Cream Cheese Mints Recipe
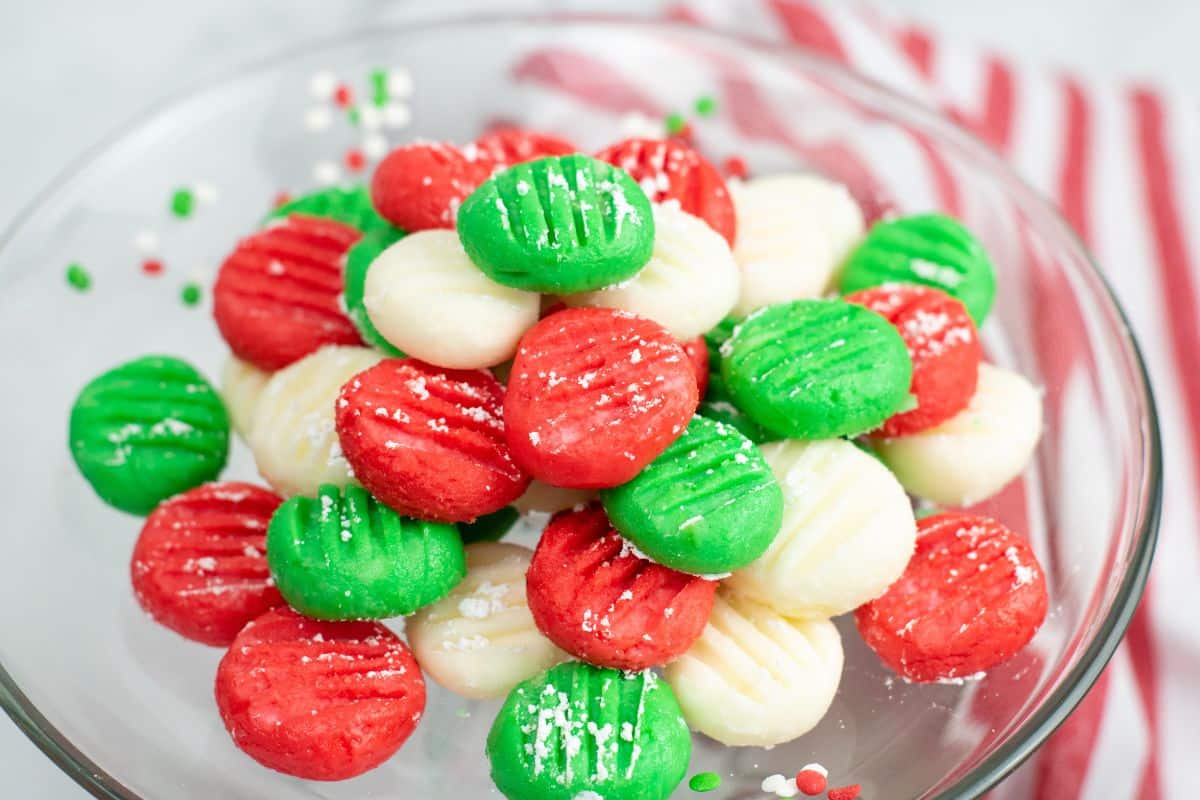
If you are looking for the easiest holiday candy to make this holiday season, you’re going to love these little treats! These old-fashioned butter mints are sometimes called baby shower mints or wedding mints and are usually in shades of different pastel colors. But since it’s the holiday season we are going with vibrant green and red!
They only take about 10 minutes of prep time, require just a few basic pantry staples, and rolling out the dough is so much fun for the kids!
Because these Christmas mints are so beautiful and easy to make, mix up a double batch to give as the perfect gift for teachers, friends, and family. Wrap a few in plastic wrap and add them to clear cellophane bags with some of this Eggnog Fudge and these Fruit Cake Cookies and tie them up with pretty holiday ribbons.
Everyone will love how buttery they are! They’re like eating small bites of cream cheese frosting with a delightful minty flavor.
💓 Why We Love This Recipe
- Simple recipe for light and creamy, melt in your mouth cream cheese mints that are so easy to make.
- You can change up the food coloring to make the for any special occasion any time of year.
- Festive and delicious cream cheese mints make a great addition to your dessert table.
🛒 What’s Need to Make Easy Cream Cheese Mints?
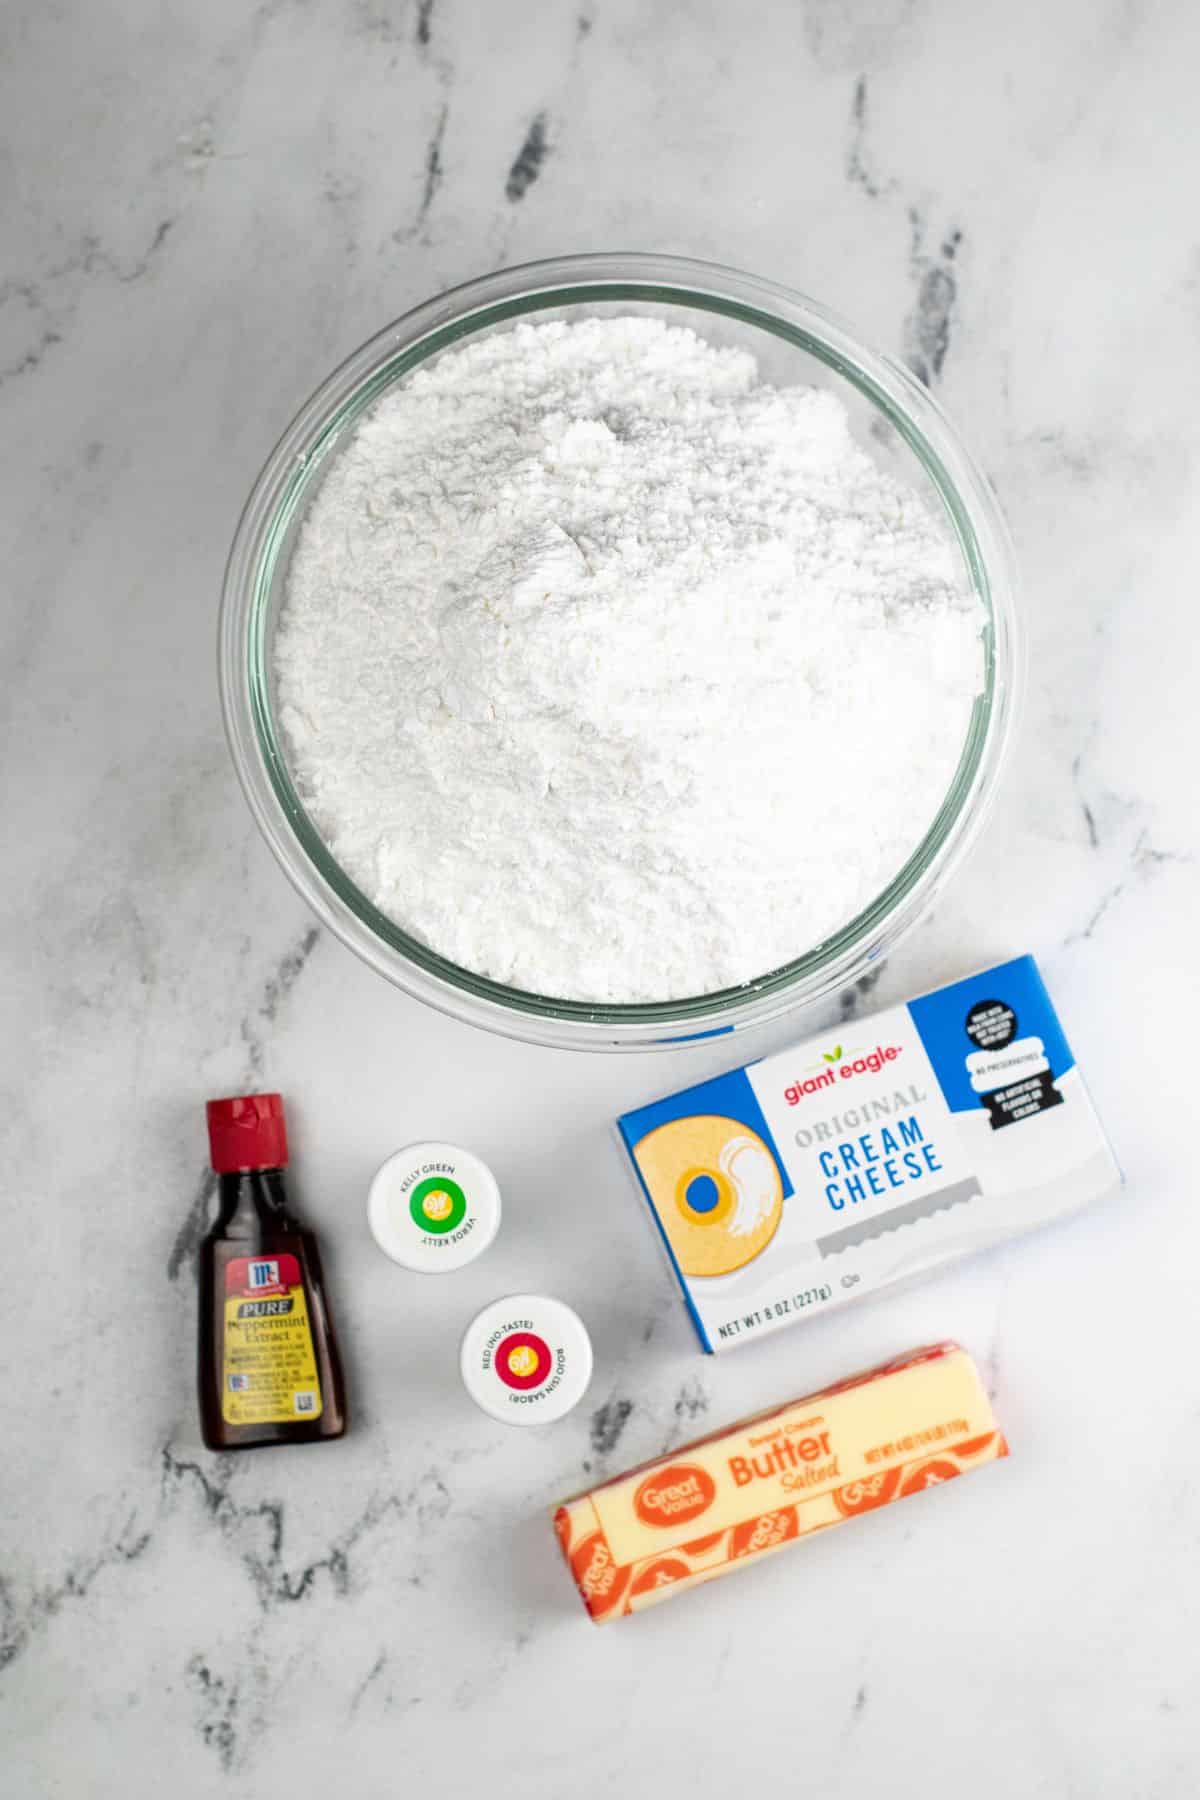
- Cream cheese (softened to room temperature)
- Butter (softened)
- Powdered sugar
- Mint extract (or peppermint extract)
- Powdered sugar (for dusting)
- Green and red gel food coloring
🥄 How to Make Old Fashioned Cream Cheese Mints
Step One: Cream the Butter and Cream Cheese
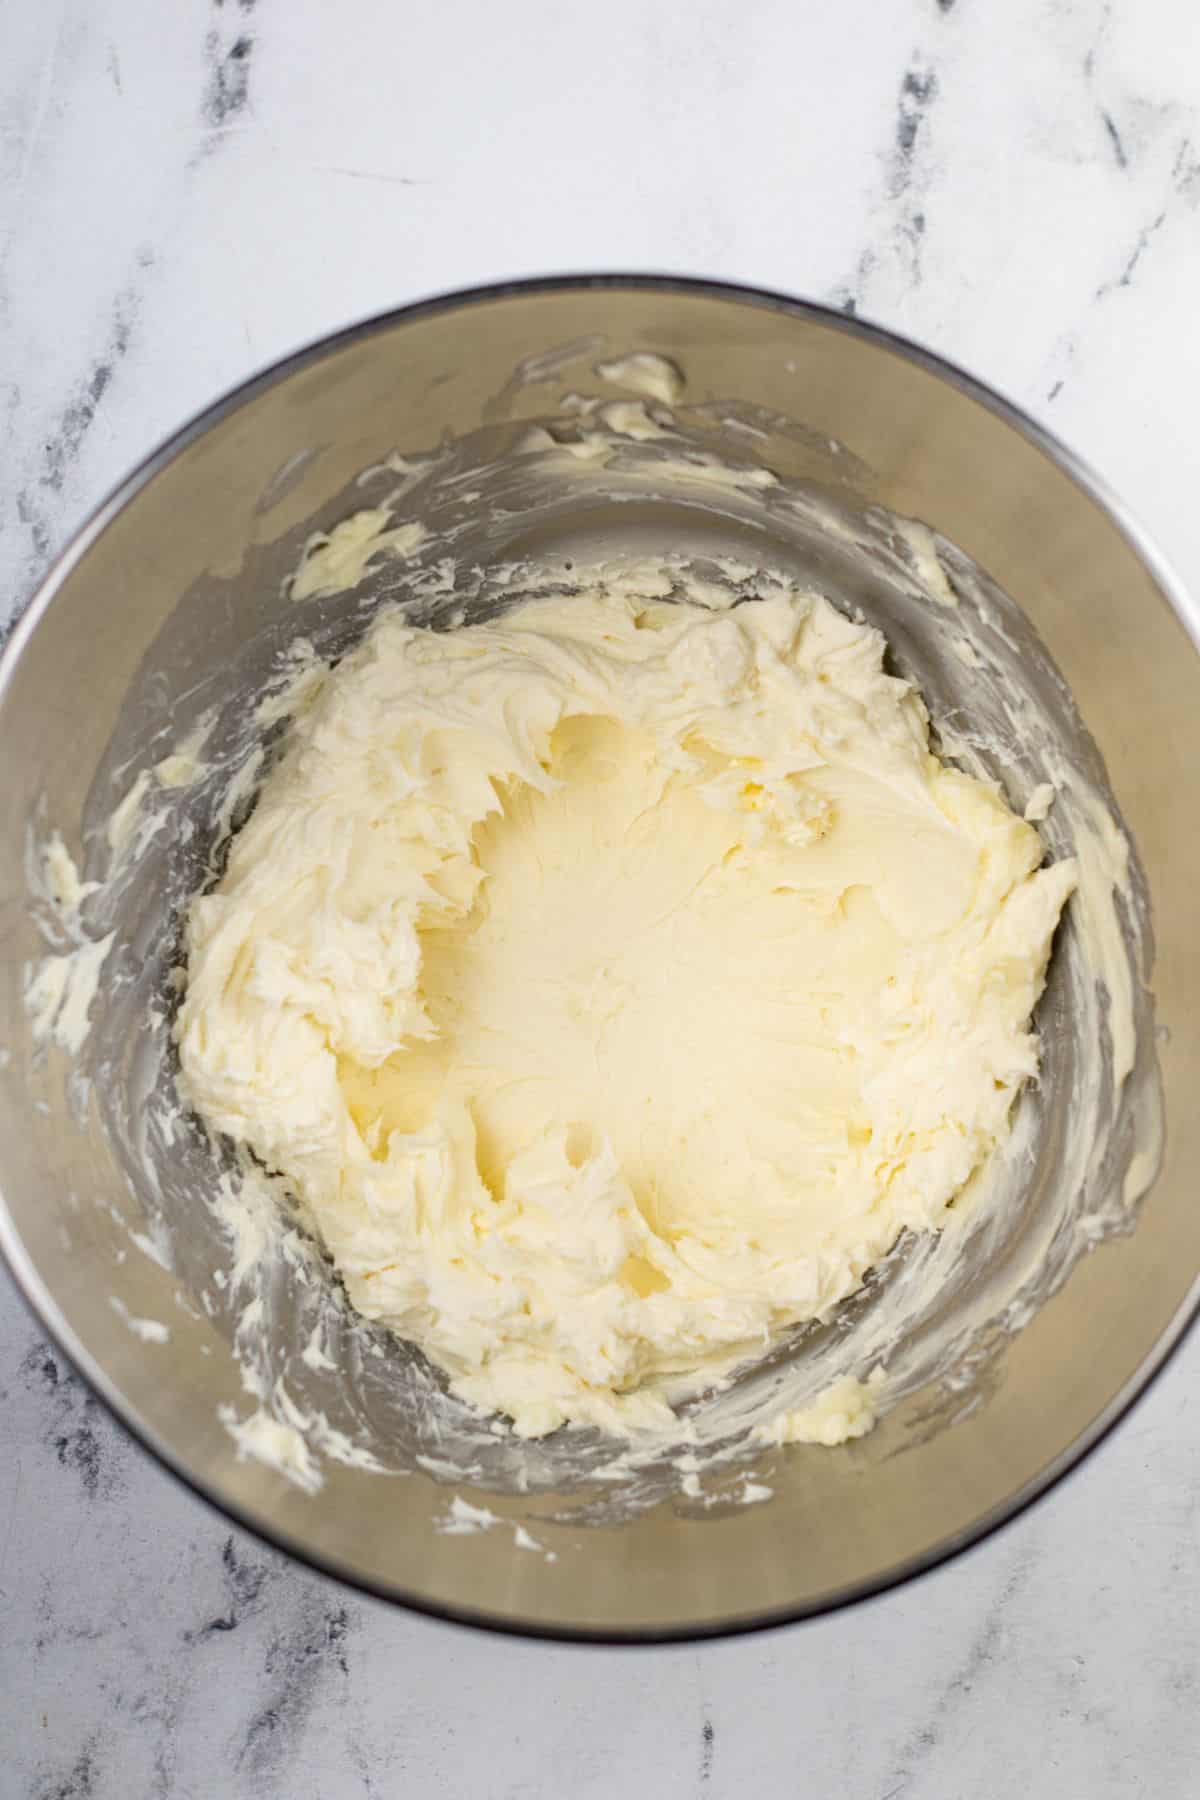
- In the bowl of a stand mixer fitted with a paddle attachment combine cream cheese and butter.
Note: You can also use a hand mixer and large bowl.
Step Two: Mix in Sugar and Extract
- Add in 1 cup of confectioner’s sugar and continue mixing until well incorporated.
- Add in mint extract.
- Add in remaining powdered sugar gradually mixing well after each addition.
Step Three: Color the Dough
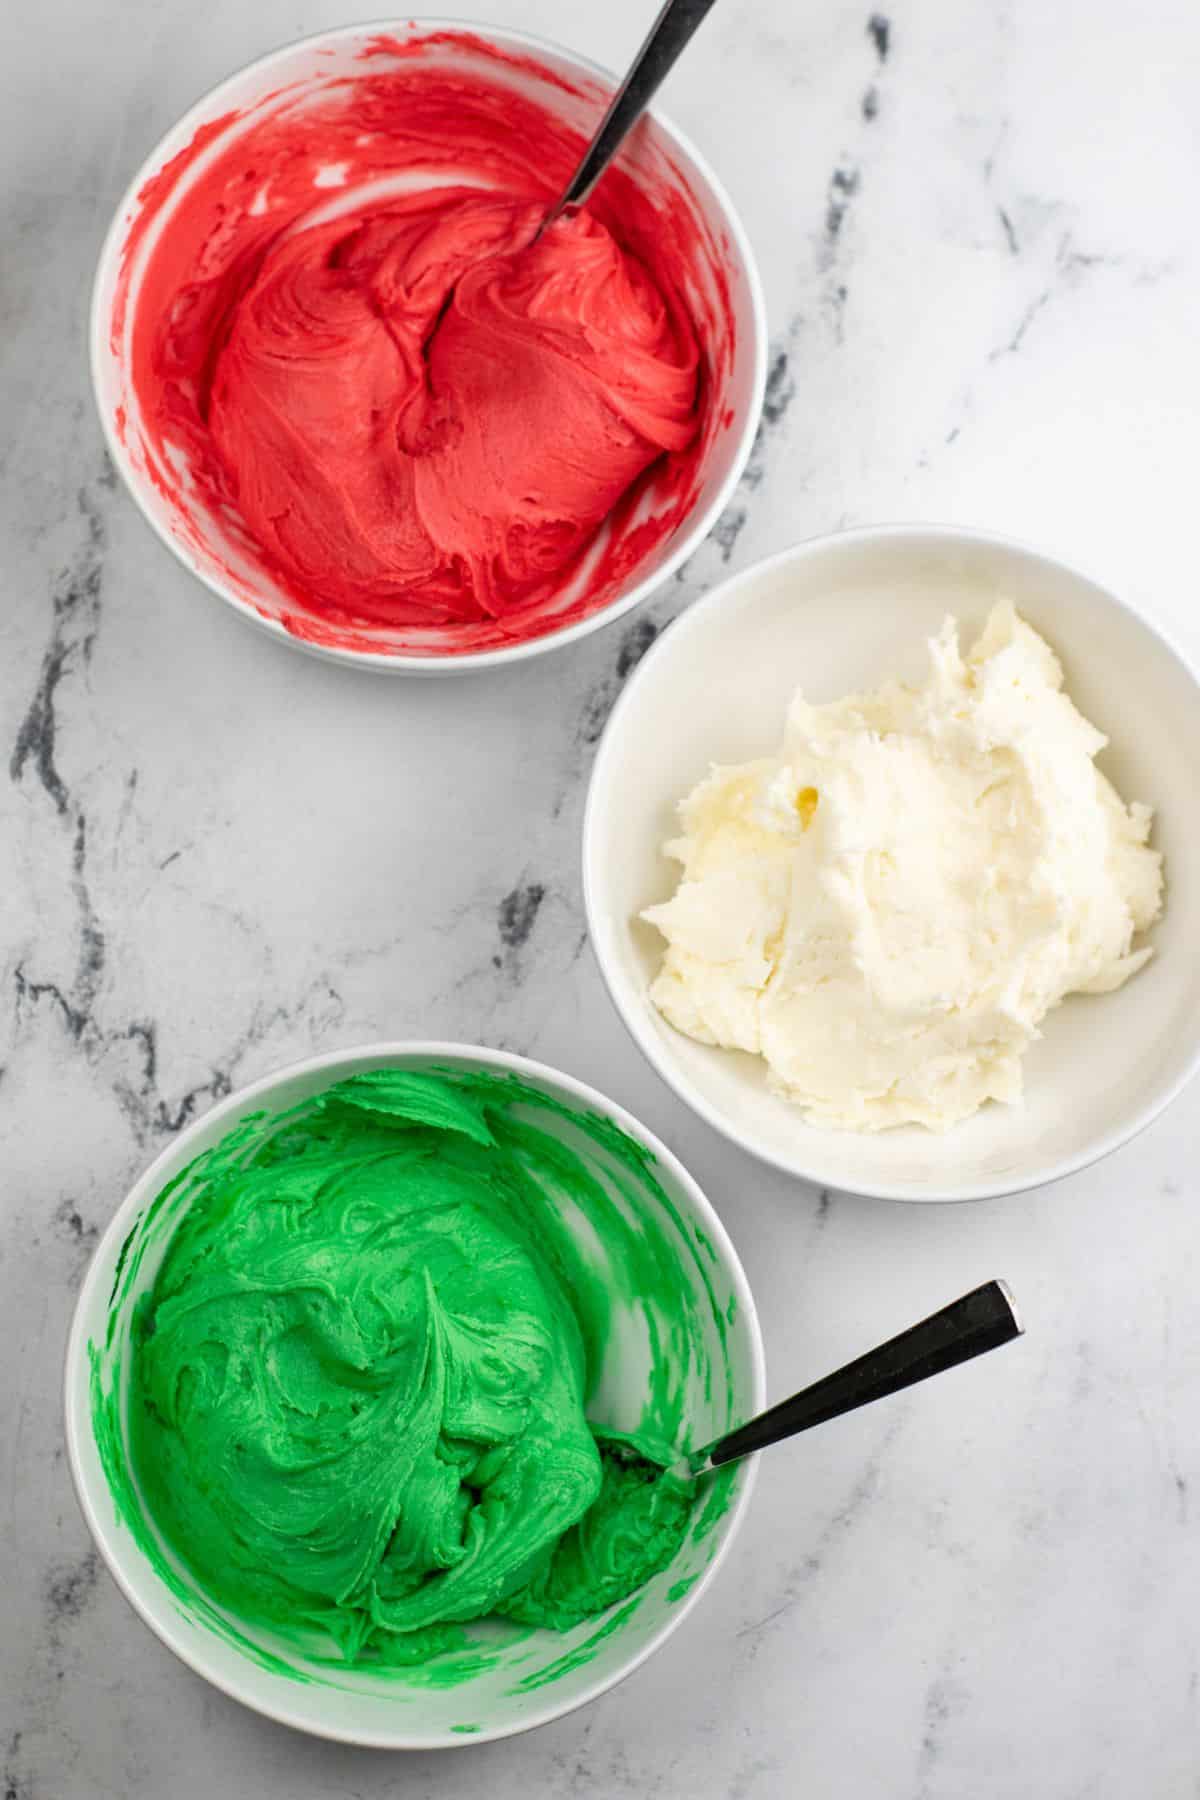
- Separate the dough into 3 sections and place in separate bowls.
- Add green food coloring to one bowl and red to another.
- Knead the dough to incorporate the food coloring until the color is even throughout.
Step Four: Chill to Set
- Cover the bowls and place dough in the fridge for 2 hours.
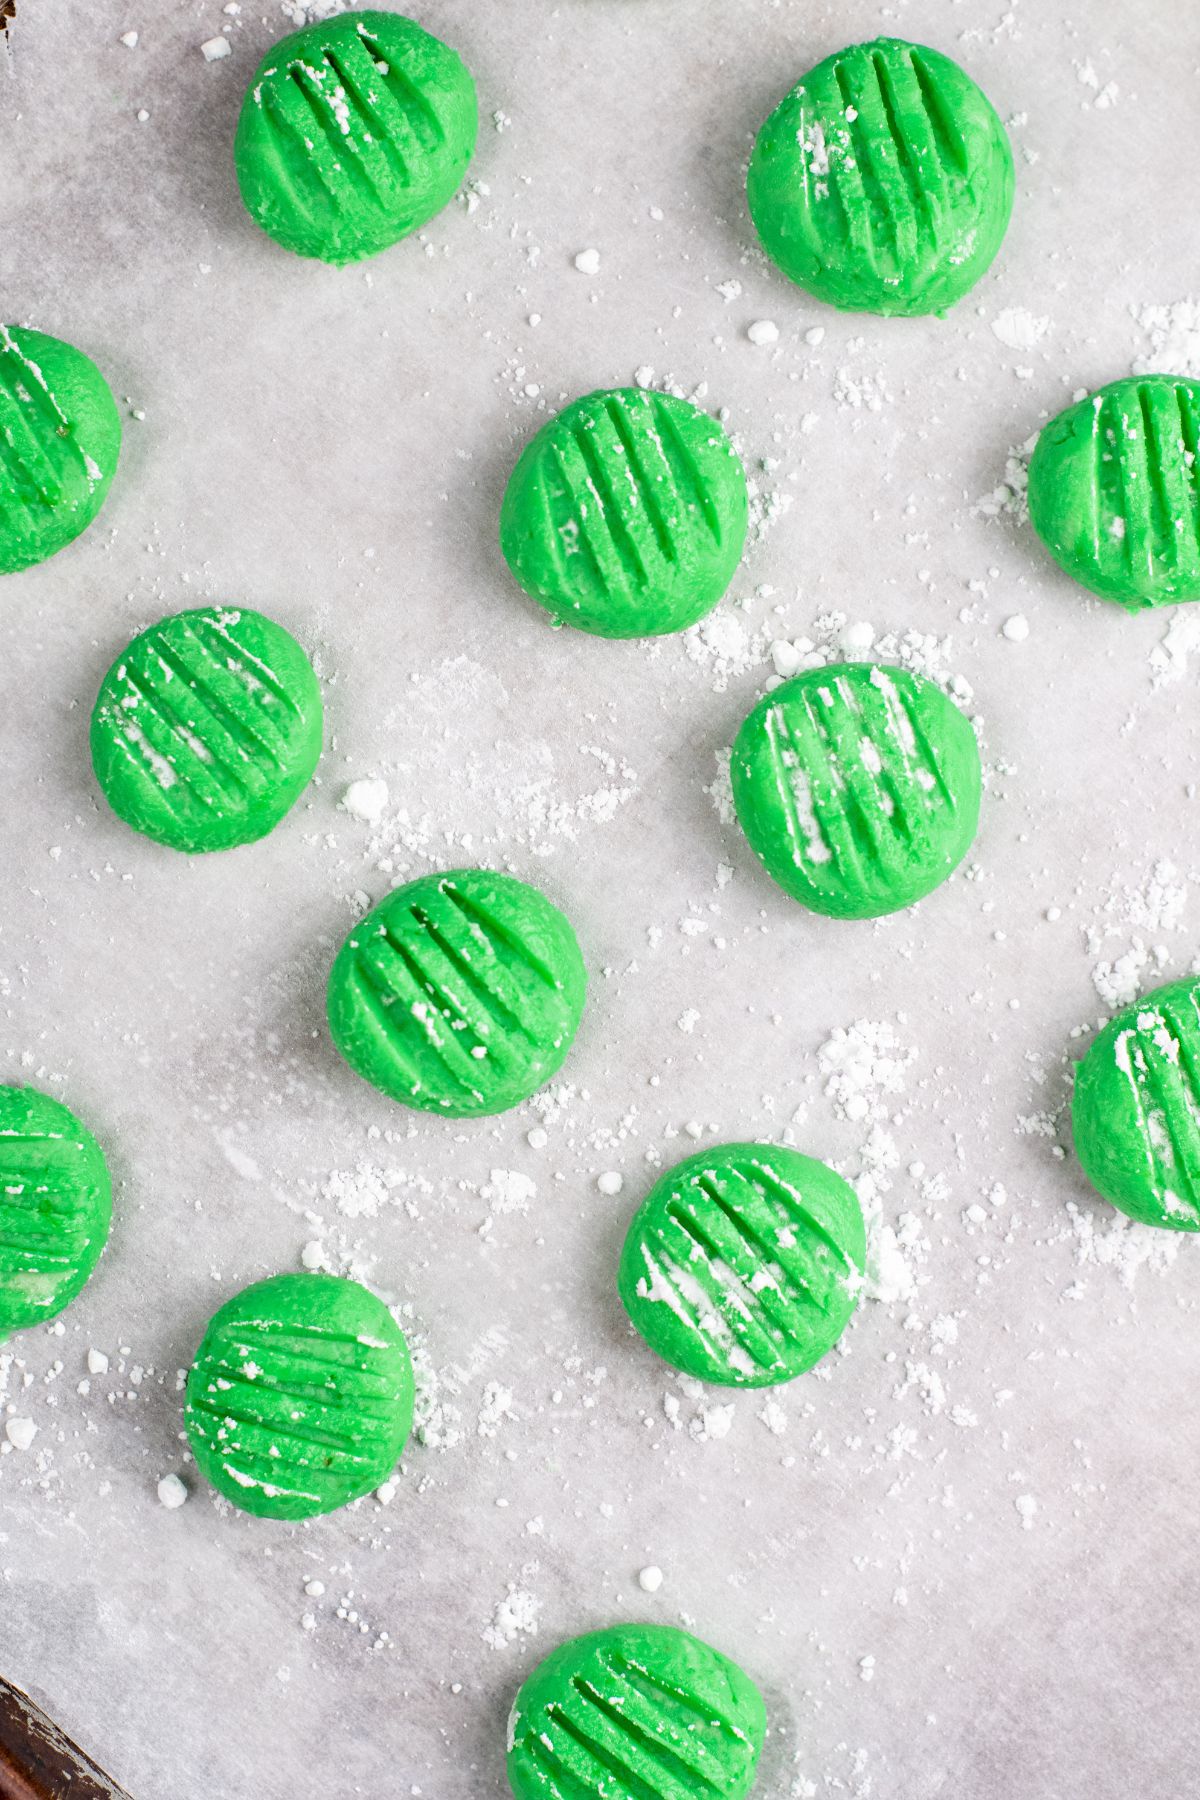
Step Five: Form the Mints
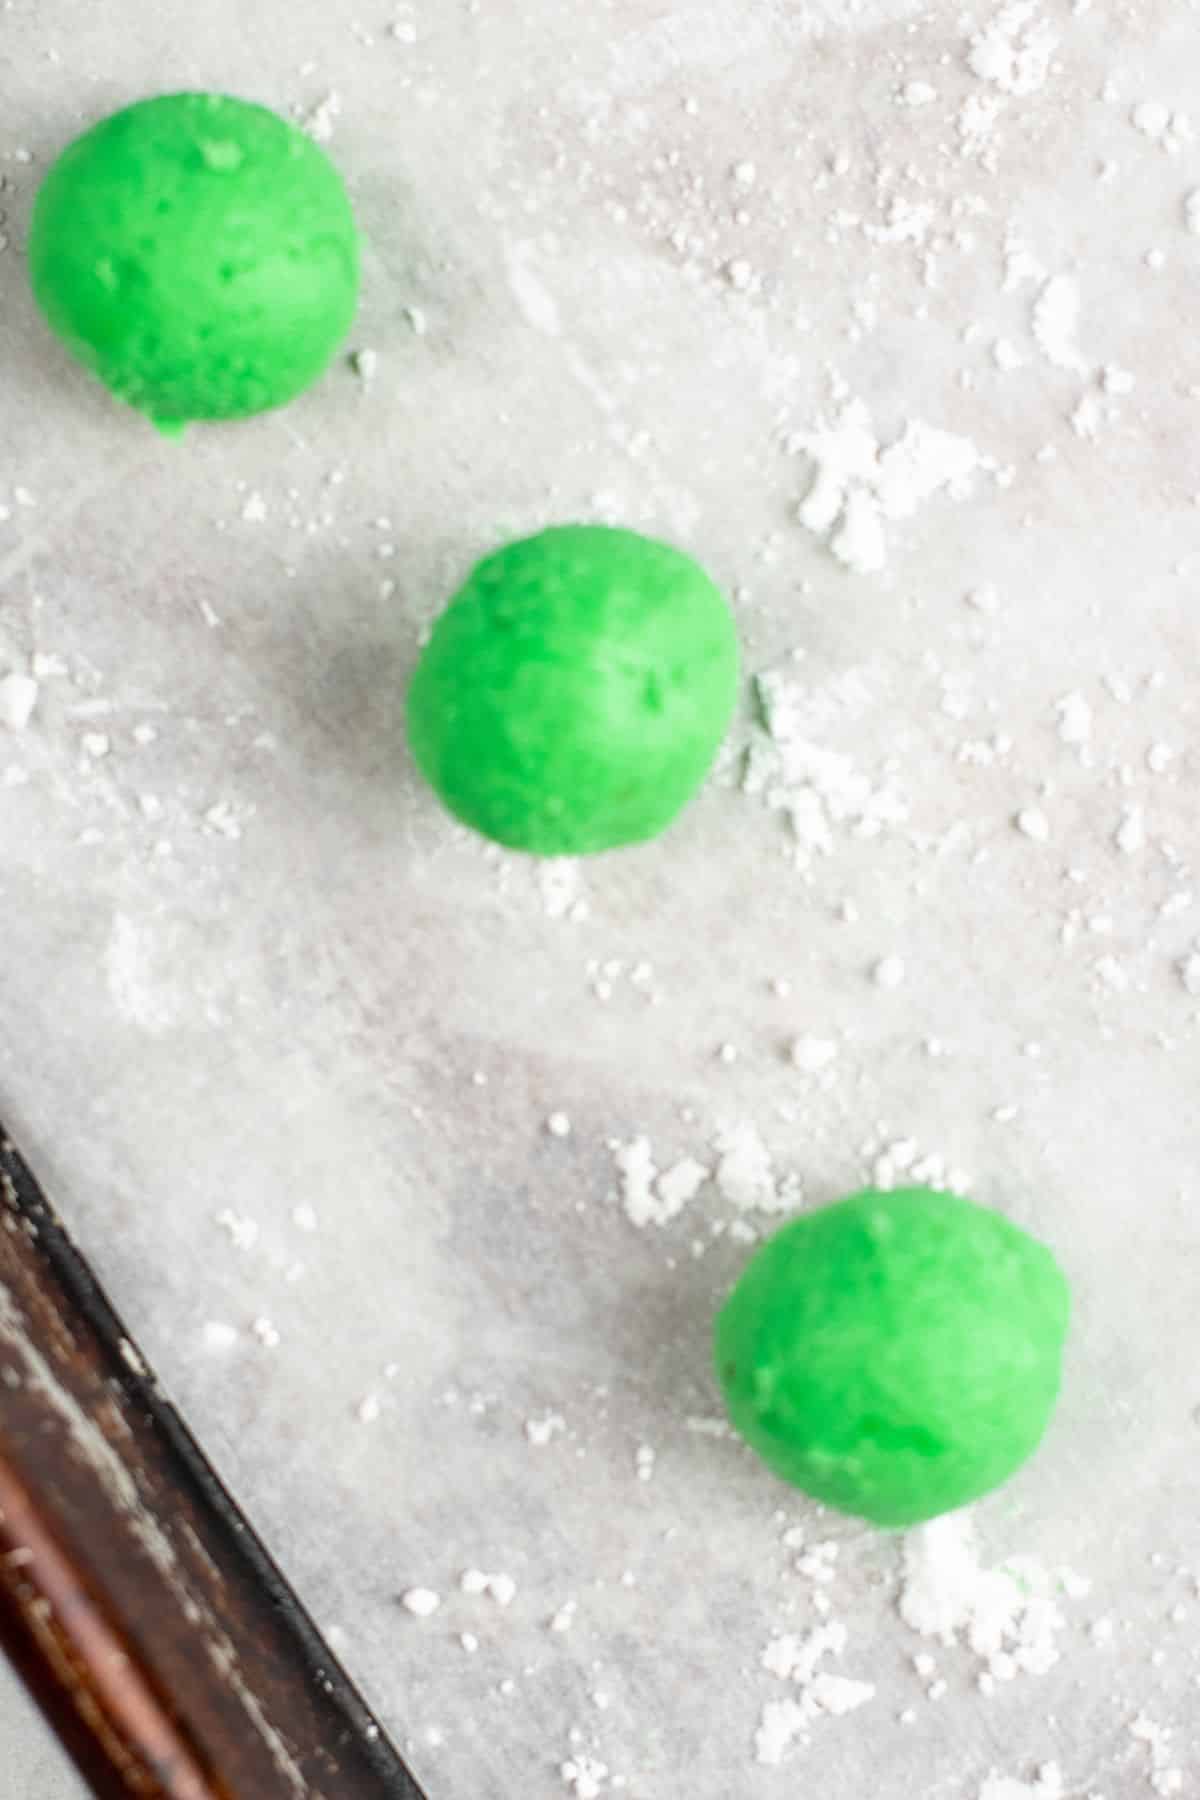
- Line a baking sheet with parchment paper and dust with powdered sugar.
- Scoop out dough in 1 tablespoon scoops and roll into small balls. Place on the cookie sheet.
- Dip the fork tines of a fork into a little powdered sugar and press into the ball to flatten.
Step Six: Allow Mints to Dry
- Once all the dough has been rolled into little balls and pressed allow the little mints to sit out for at least 4 hours or until the outside is hardened.
Note: Sometime the bottom of the mints will still be soft. Just flip the mints over and allow them to sit for additional time.
Variations of Old-Fashioned Cream Cheese Mints
- Use different colors: You can make this mint easy recipe for almost any occasion. They’re great for graduation parties using school colors and pastel colors are great for baby showers and Easter. The dough is an off-white color before adding any food coloring, which would be perfect for bridal showers.
- Extracts: If you’re not a fan of mint flavoring, you can omit the extract or use vanilla extract, almond extract, or your favorite citrus extract. If you want your homemade mints to have a simple butter flavor, you can add a little butter extract.
- Shapes: These mints are free-handed by forming little balls of dough. But you can make them extra fancy by using candy molds. They are fairly delicate mints, so you’ll want to use rubber molds or silicone molds that makes them easy to remove.
How Do I Store Homemade Cream Cheese Mints?
These delicious mints are made with softened cream cheese, so they need to be stored in an airtight container in the fridge when you’re not serving them. Make sure they feel dry to the touch before placing them in single layers with layers of parchment paper between them. They’ll stay fresh for a week or longer as long as they are kept chilled.
You can also freeze them. For best results, freeze them with a sheet of wax paper between the layers of mints just like when they are in the fridge. To thaw the frozen mints, place them in the fridge overnight.
Why Are My Mints Not Firming Up?
When making these mints, you want to use softened cream cheeses and butter. If you melt the butter or cream cheese the dough will never stiffen up. You always want to make sure you add just a little bit of extract because the more liquid you add, the looser the dough will be.
If you’re dough still seems a little loose, add a little more powdered sugar until the consistency is almost like play dough.
More Christmas Treat Recipes
- Grinch Pretzel Bites
- Red Velvet Krispie Treats
- Red Velvet Fudge
- Eggnog Bread
- Hidden Kiss Cookies
- Christmas Tree Meringues
- Christmas Crack


Christmas Cream Cheese Mints
Ingredients
- 8 ounces cream cheese
- 1/4 cup butter
- 2 pounds confectioner's sugar
- 1 teaspoon mint extract
- 1/2 cup powdered sugar for dusting
- red and green gel food coloring
Instructions
- In the bowl of a stand mixer fitted with a paddle attachment combine cream cheese and butter.8 ounces cream cheese, 1/4 cup butter
- Add in mint extract.1 teaspoon mint extract
- Add in remaining powdered sugar gradually mixing well after each addition.2 pounds confectioner's sugar
- Separate the dough into 3 sections and place in separate bowls. Add green food coloring to one bowl and red to another.red and green gel food coloring
- Knead the dough to incorporate the food coloring until the color is even throughout.
- Cover the bowls and place dough in the fridge for 2 hours.
- Line a baking sheet with parchment paper and dust with powdered sugar.1/2 cup powdered sugar
- Scoop out dough in 1 tablespoon scoops and roll into small balls. Place on the cookie sheet.
- Dip the fork tines of a fork into a little powdered sugar and press into the ball to flatten.
- Once all the dough has been rolled into little balls and pressed allow the little mints to sit out for at least 4 hours or until the outside is hardened. (Should make approximately 60 mints.
- If the bottoms of your homemade mints are still soft flip the mints over and allow them to sit for additional time.
Nutrition
Did You Make This Recipe?
Don’t forget to share it with me on @thebalancingmom and follow on Tiktok @balancingmotherhood and Pinterest @thebalancingmom for more!


