
Red Velvet Crinkle Cookies
This post may contain affiliate links, read our disclosure policy.
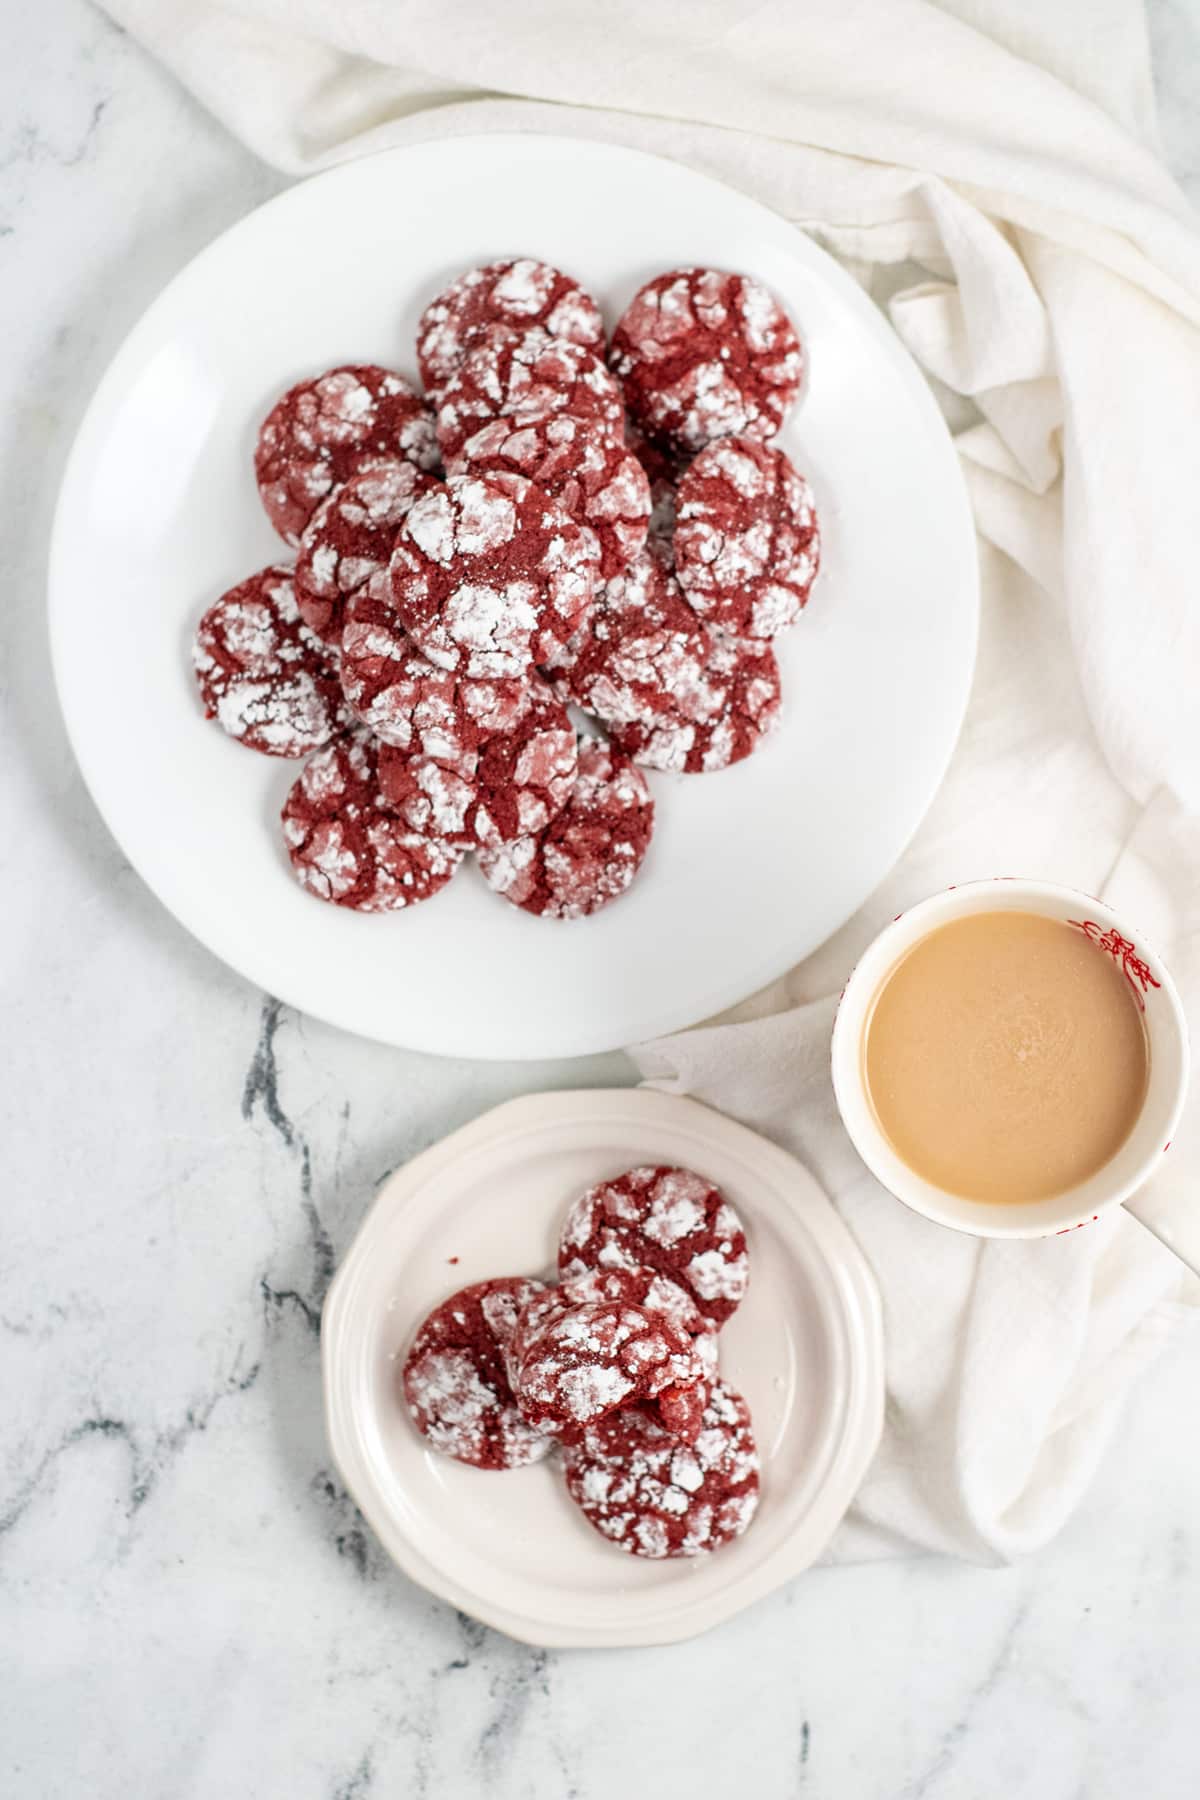
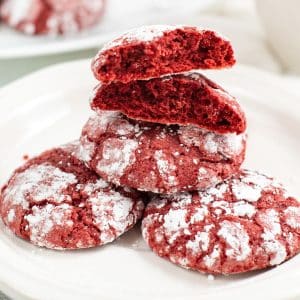
These red velvet crinkle cookies bring the delicious flavor and bright color of red velvet cake to a classic chocolate crinkle cookie. With an intense chocolate flavor and a texture that’s both crispy and chewy at the same time, these irresistible cookies are a holiday favorite that’s sure to satisfy the chocolate lovers in your life.
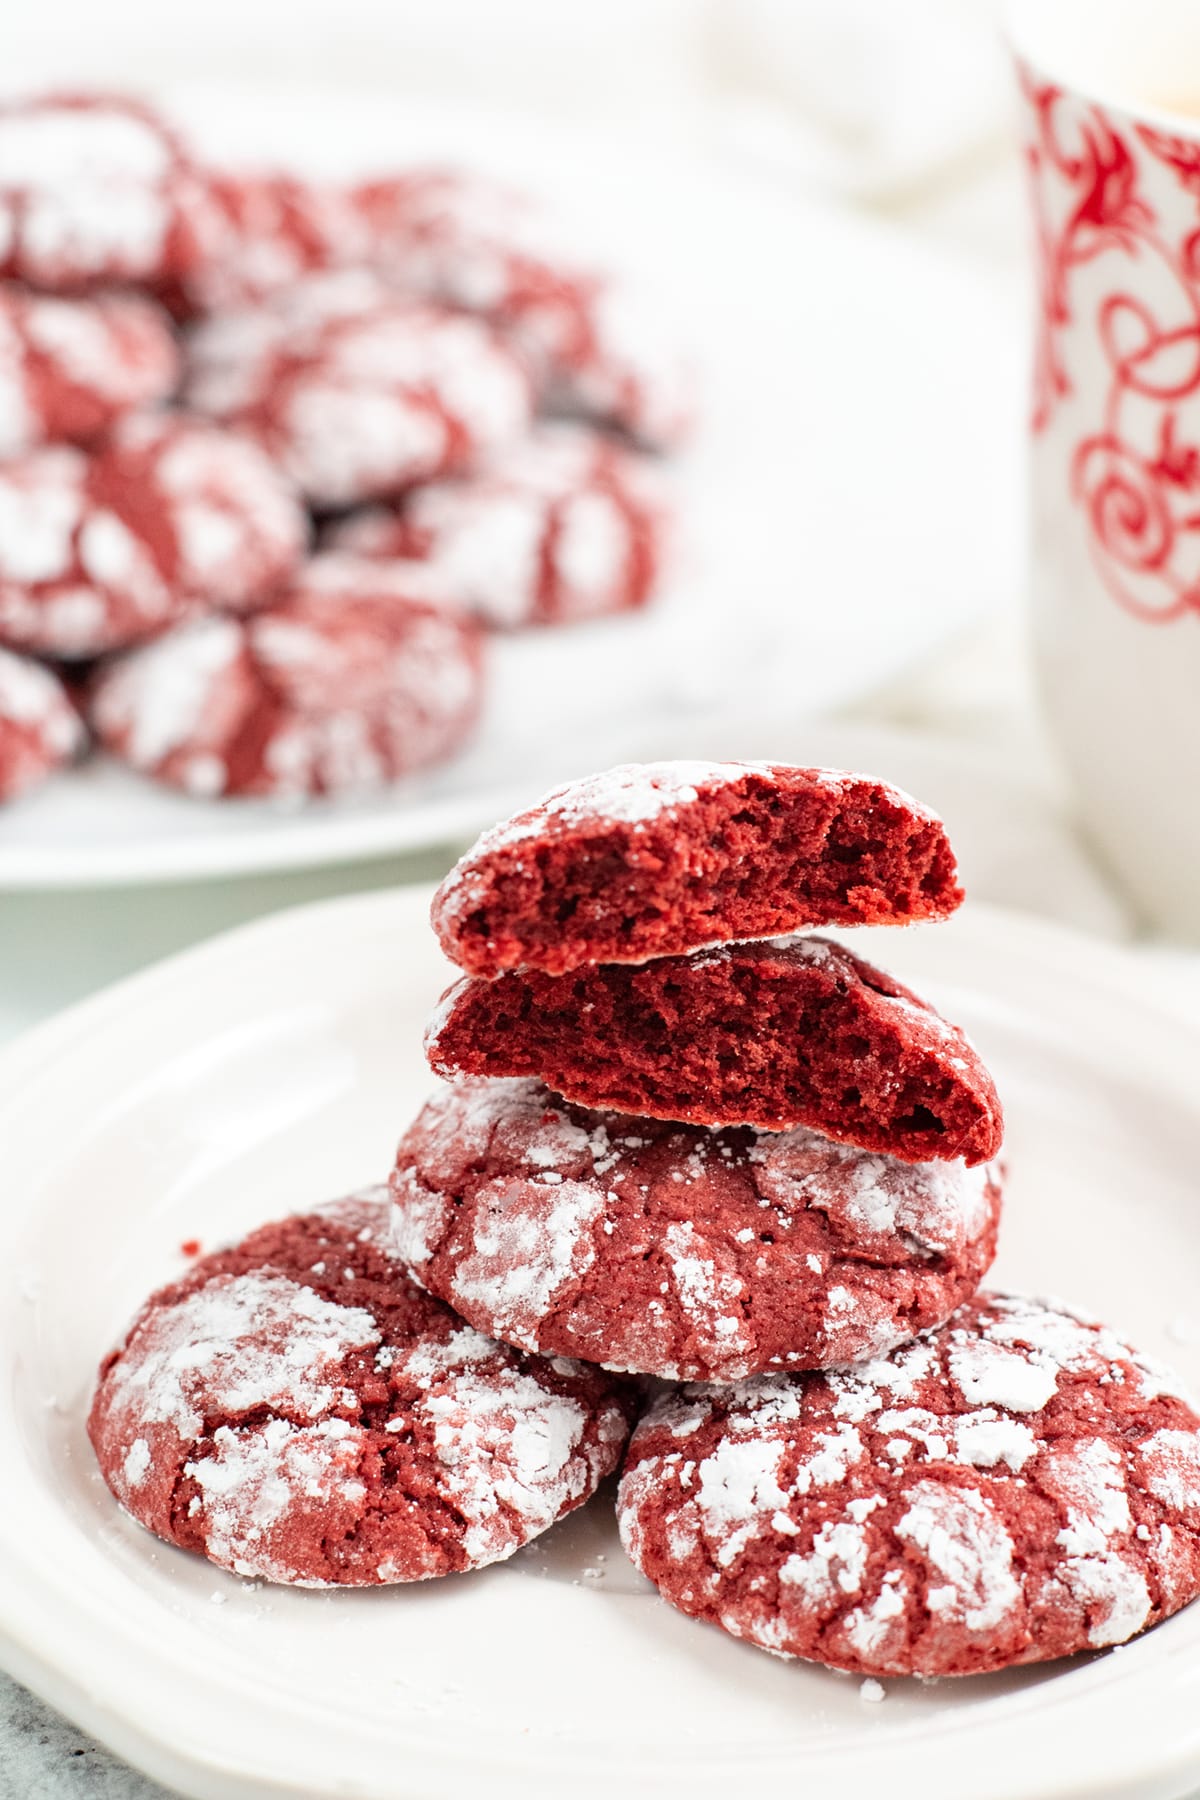
If you’ve never had a chocolate crinkle cookie before, you’ve been missing out. These easy treats are like a cross between a brownie and a cookie, with a perfectly crisp outside and an irresistible fudgy center.
They get their name from the cracks that form in the powdered sugar coating of the cookie during baking. And although there are quite a few different varieties of crinkle cookies out there, this red velvet version might be the prettiest one we’ve seen.
The deep red color makes these festive cookies an ideal treat for a Valentine’s Day party, a school event, or a gift for someone special. But don’t wait for a special occasion to try this easy and delicious recipe – it’s the perfect treat to have on hand anytime those chocolate cravings strike.
You’ll also love our other crinkle cookies: Valentine’s crinkle cookies and Grinch crinkle cookies.
💗 Why We Love This Recipe
- The pretty color and rich chocolate taste of these red velvet cookies makes them a perfect choice for Valentine’s Day.
- The powdered sugar coating and crinkled tops of these cookies gives them a striking appearance that makes them look as good as they taste.
- These cookies are so rich and delicious – the bright red color and red velvet flavor is always a big hit at parties.
- These chewy chocolate cookies make a terrific and indulgent afternoon snack with a cup of hot cocoa.
🛒 Ingredients

- Flour
- Unsweetened cocoa powder
- Butter (softened)
- Sugar
- Salt
- Baking powder
- Eggs
- Vanilla extract
- Apple cider vinegar
- No-Taste red gel food coloring
- Powdered sugar
🥄 How to Make Red Velvet Crinkle Cookies
Step One: Combine the Wet Ingredients
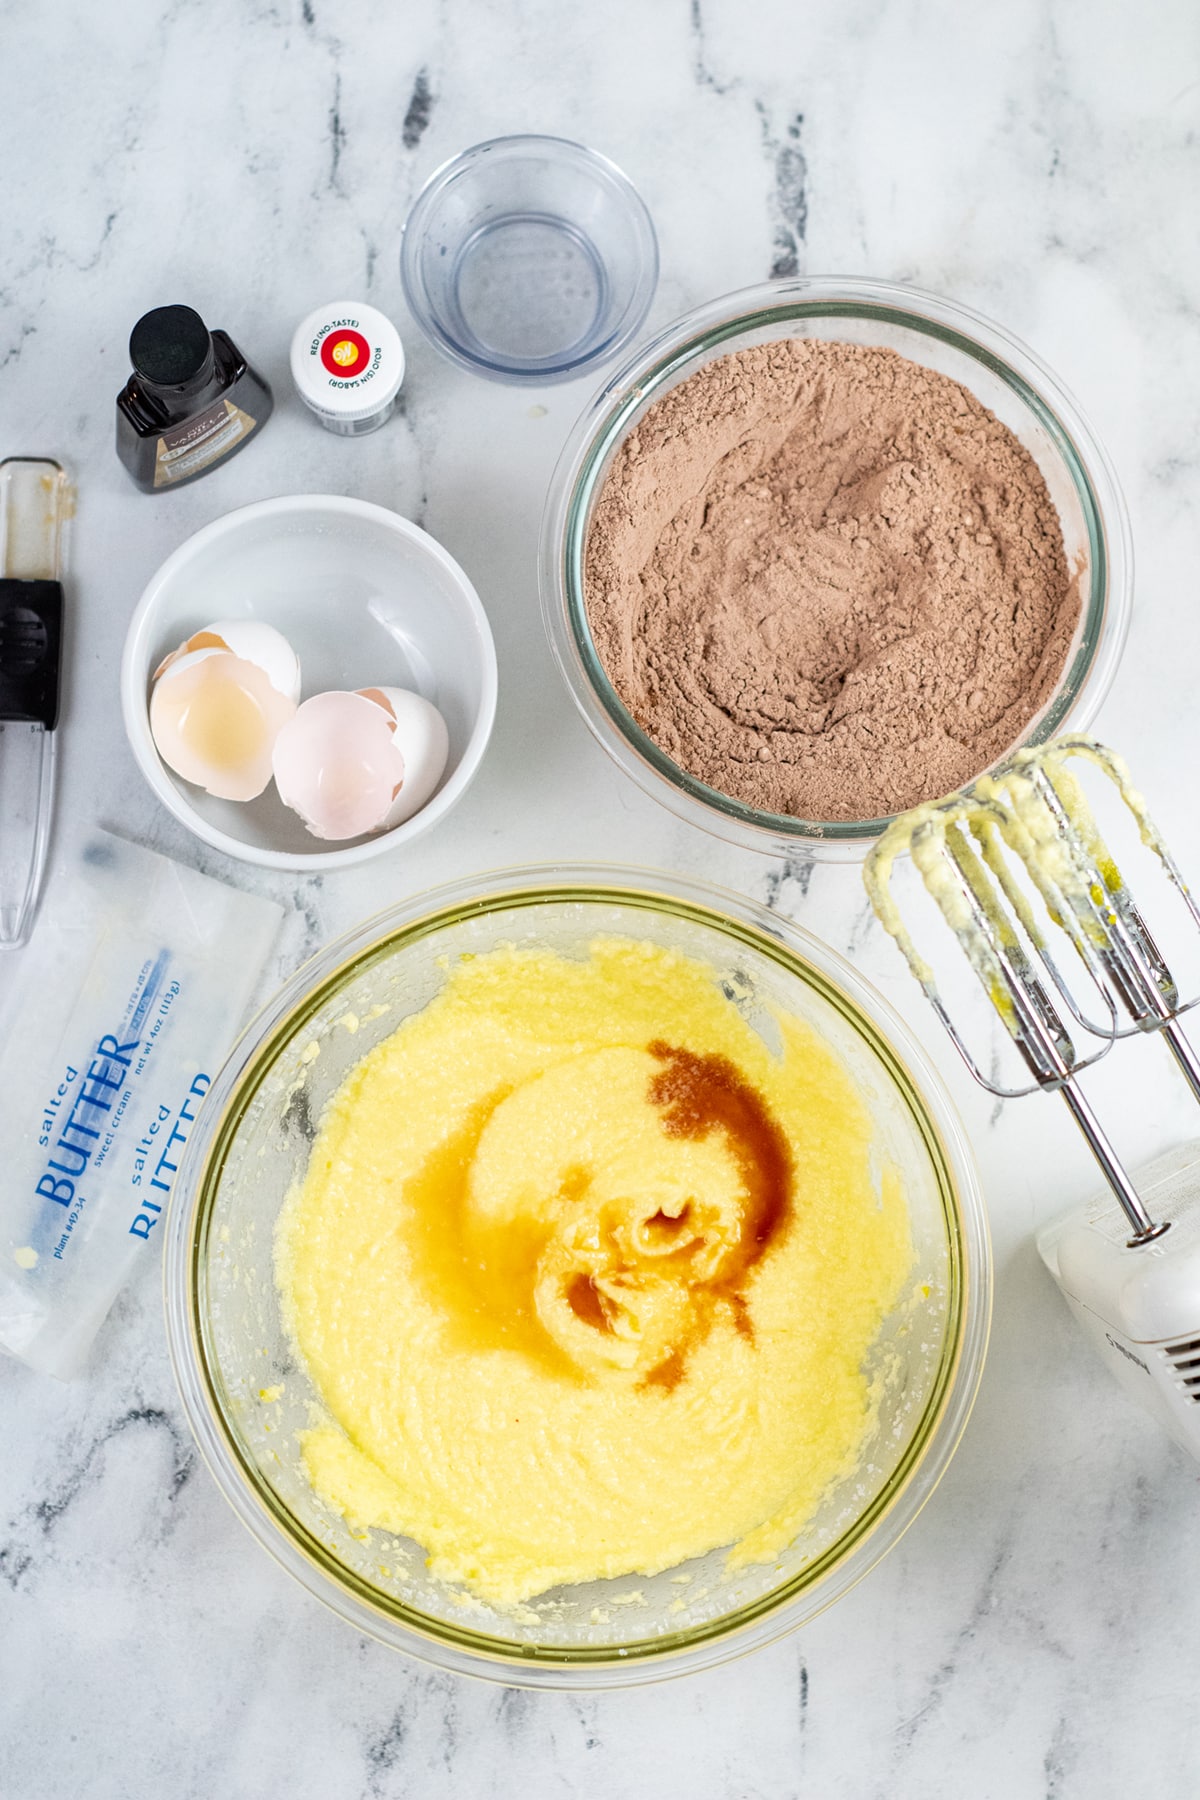
- Heat oven to 350 degrees and line a cookie sheet with parchment paper.
- Cream together butter and sugar in a large mixing bowl using an electric hand or stand mixer.
- Add the eggs one at a time, mixing on low to medium speed in between each, until they are well incorporated.
- Add the vinegar and vanilla extract and continue to mix until everything is well blended.
Step Two: Add the Dry Ingredients and Color
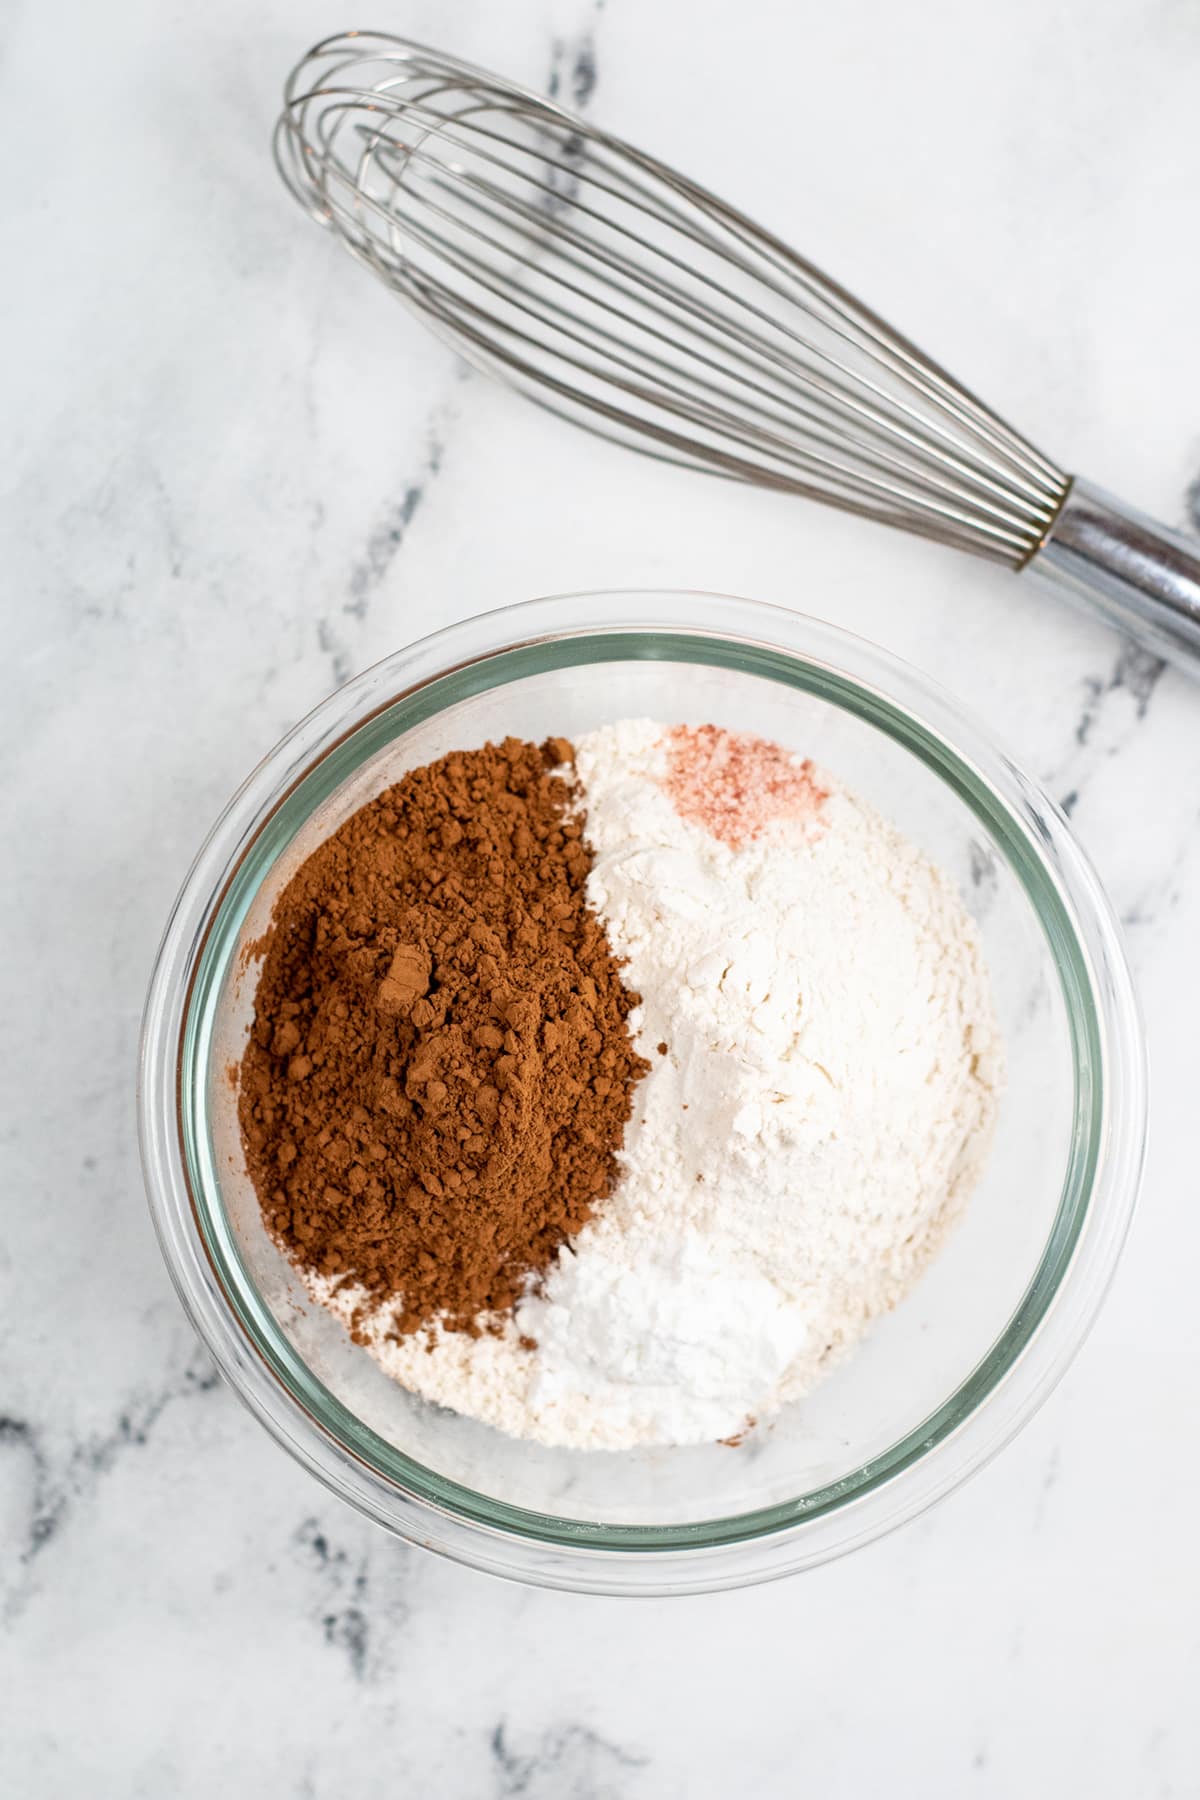

- In a separate mixing bowl, whisk together the flour, baking powder, cocoa, and salt.
- Gradually add the dry ingredients to the wet ingredients, mixing after each addition until all the flour mixture has been added and the batter is well combined.
- Add a teaspoon of red food coloring and mix until the color is evenly distributed throughout the batter. If you’d like a deeper shade of red, add a few more drops and continue mixing until the desired color is achieved.
Step Three: Roll and Bake
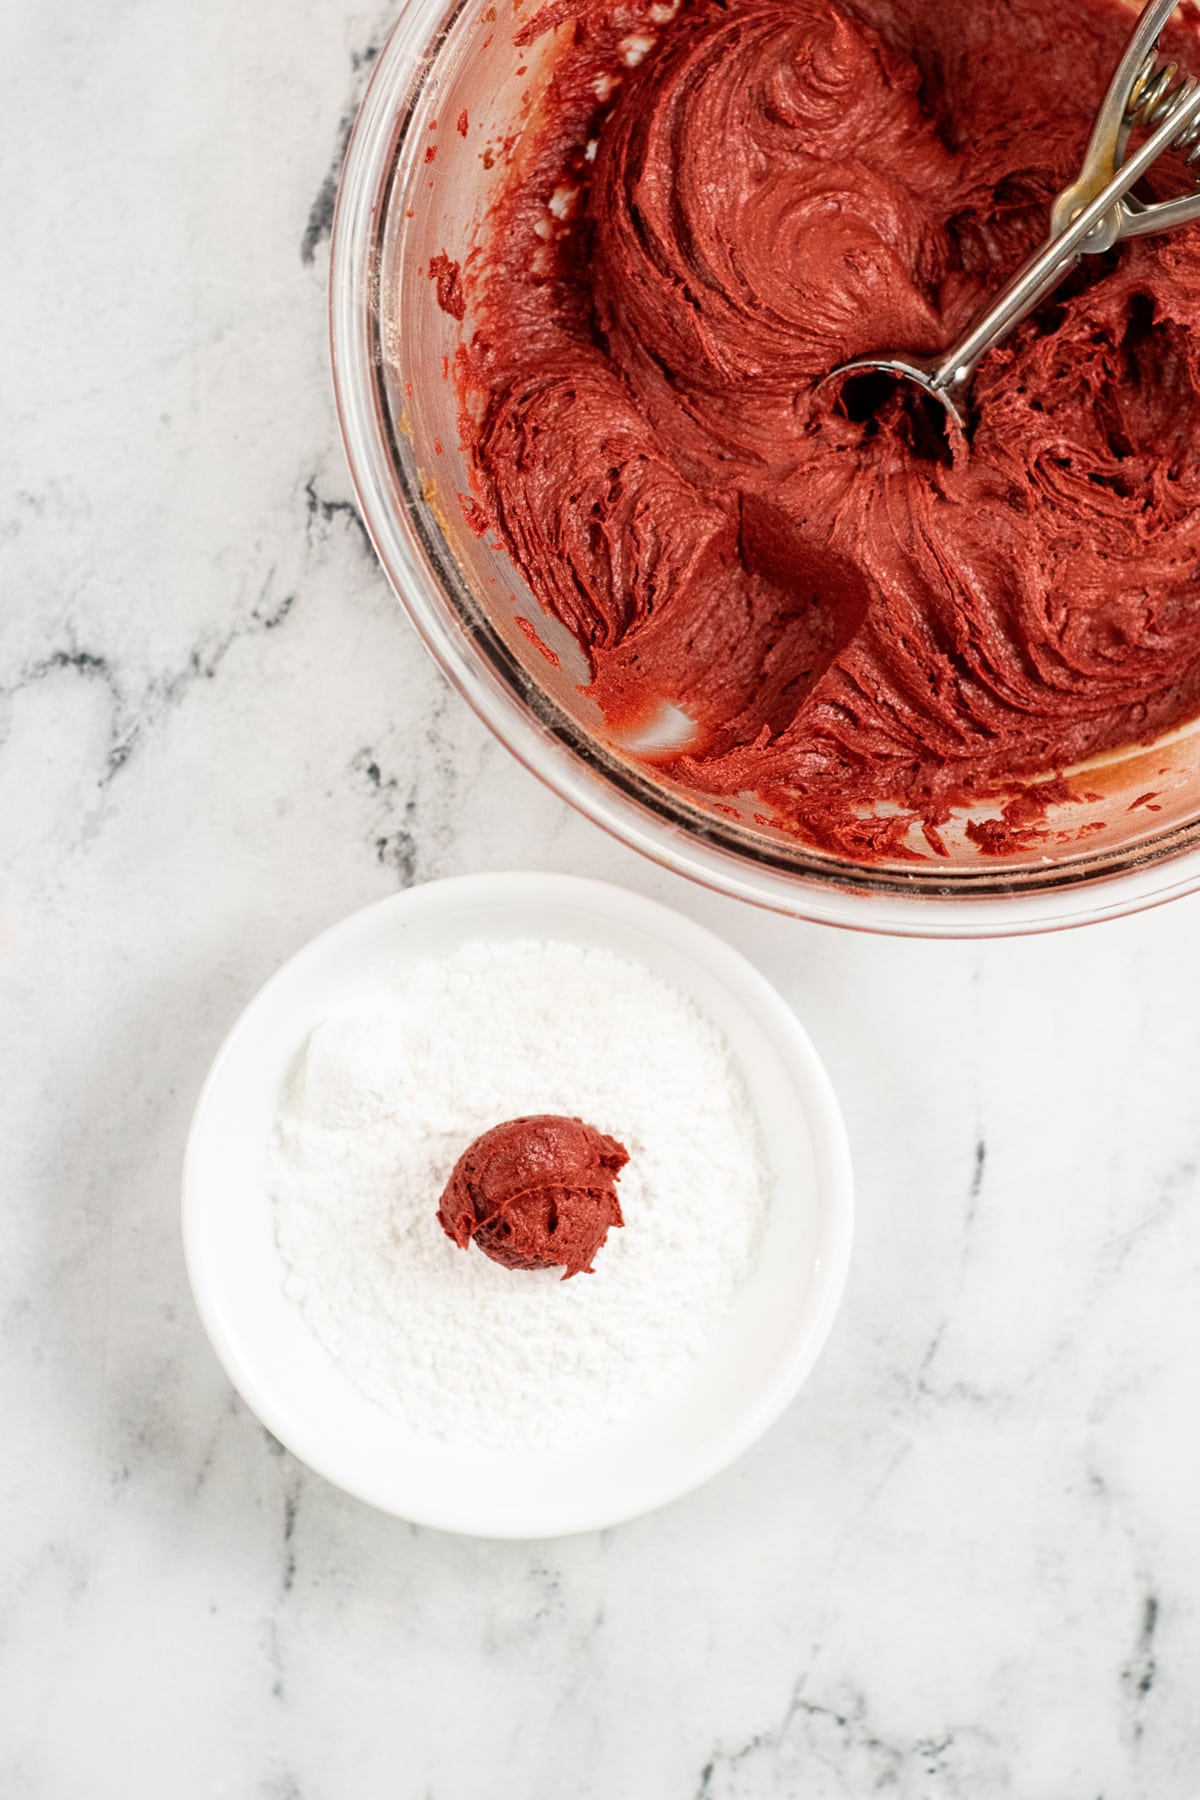
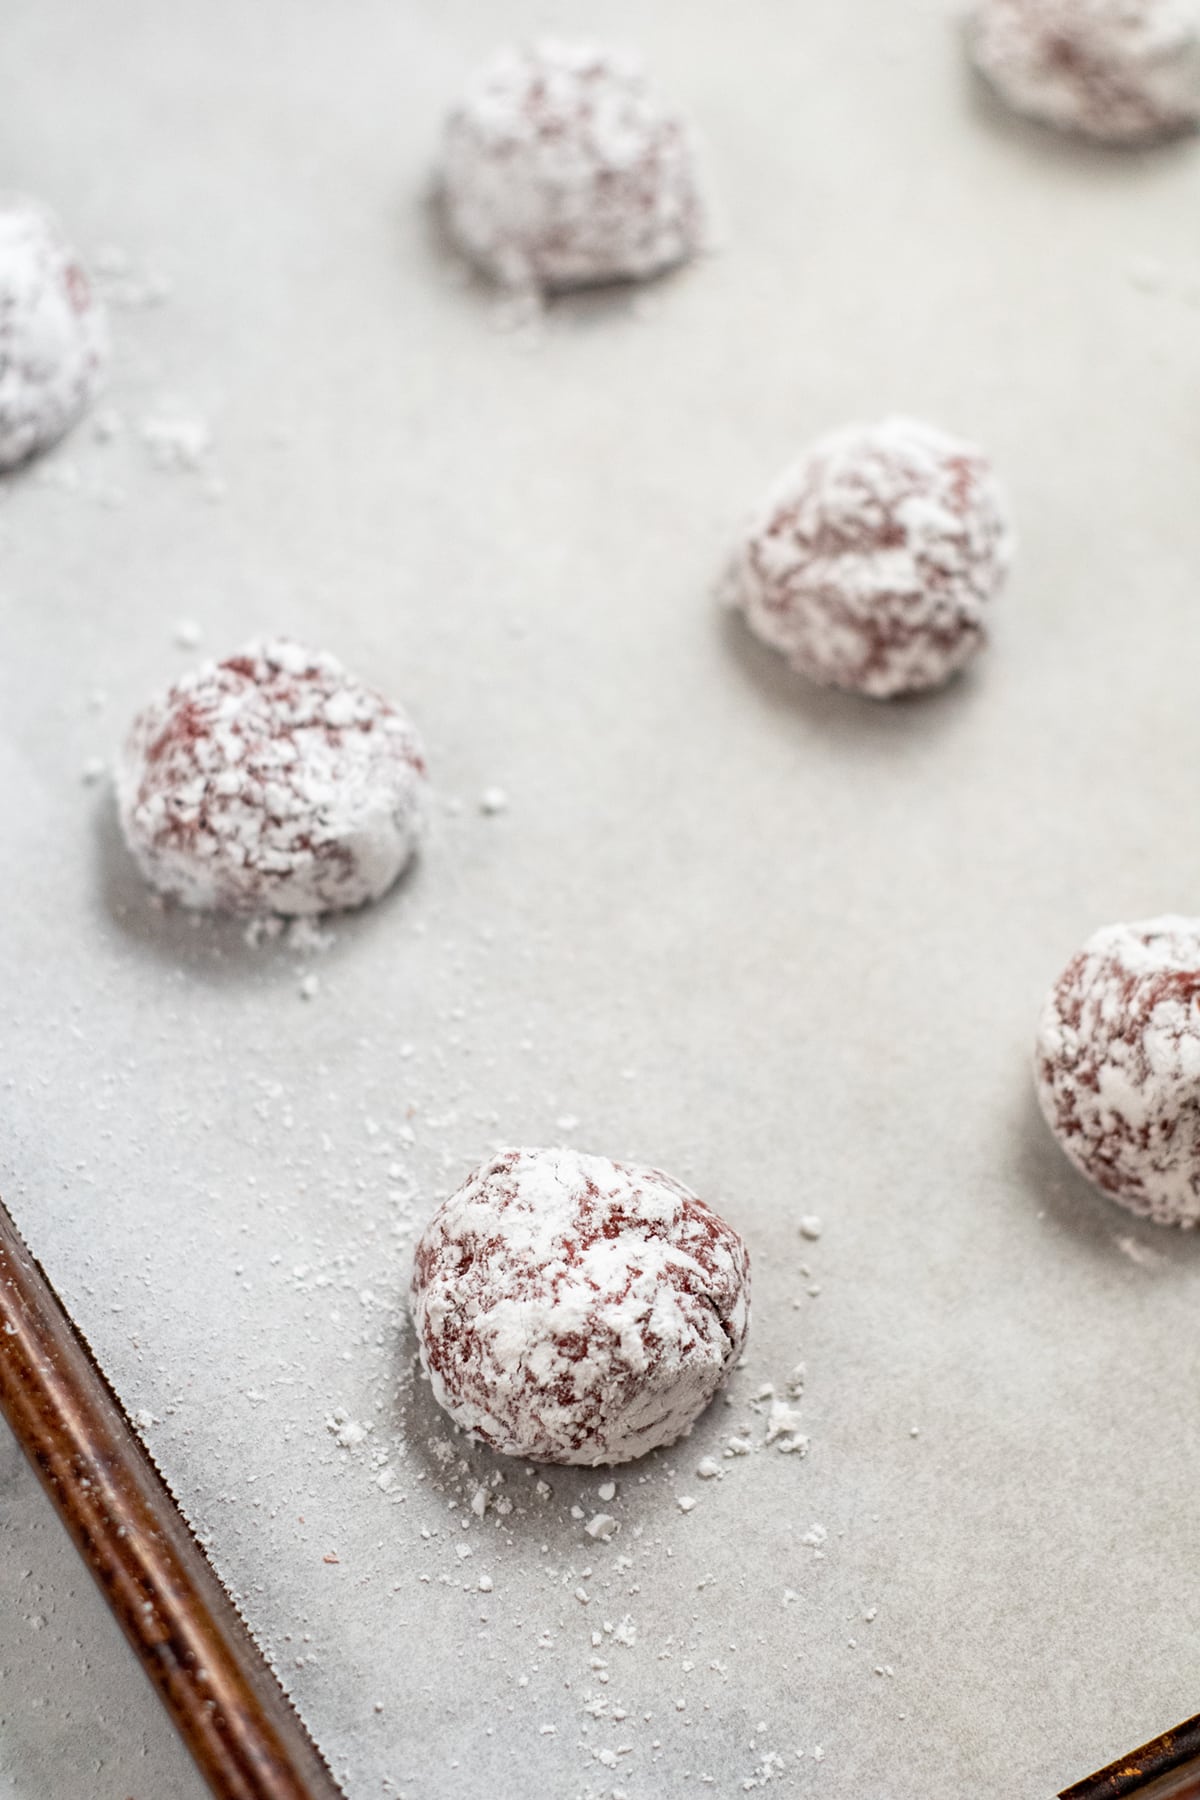
- Place the powdered sugar in a small bowl.
- Scoop about 1 ½ tablespoons of dough and roll it in the powdered sugar until round and evenly coated. Repeat with the remaining dough.
- Place the cookie dough balls on the cookie sheet about two inches apart. Bake for 12-14 minutes or until the tops of the cookies are cracked.
- Remove the cookies from the oven and allow them to cool on the cookie sheet for 2-3 minutes, then transfer them to a wire rack to cool completely.
Tips and Suggestions
- For best results, use no-taste gel food coloring in this recipe. Liquid food coloring or regular gel food coloring can create a bitter taste when used in large quantities.
- If you like your cookies a little more chocolatey, you can replace 2-3 tablespoons of the flour with additional cocoa powder.
- You can roll the cookies in granulated sugar before rolling them in the powdered sugar. This helps to get the perfect cracks in the cookies and also helps the powdered sugar to stay in place.
Variations
- Add some dark or white chocolate chips to the cookie batter for an even richer chocolate taste.
- Drizzle some melted white chocolate over the tops of the cookies after they’ve cooled.
- Make sprinkle crinkle cookies by rolling the dough balls in sprinkles prior to baking.
- Add a cream cheese frosting to make these taste even more like red velvet cake.
How Do I Store Red Velvet Crinkle Cookies?
Store your cookies at room temperature. They should last for about 5 days when kept in an airtight container.
Can I Freeze Red Velvet Crinkle Cookies?
Yes – But first, make sure you allow them to cool completely on a wire rack, then transfer to an airtight container or freezer bag and freeze for up to 2 months.
More Red Velvet Desserts
- Red Velvet Fudge
- Red Velvet Brownies
- Red Velvet Cheesecake Balls
- Red Velvet Rice Krispie Treats
- Red Velvet Candy Cane Cheesecake
- Red Velvet Christmas Poke Cake
- Red Velvet Christmas Lasagna
- Red Velvet Thumbprint Cookies

Red Velvet Crinkle Cookies
Ingredients
- 1 ½ cups all-purpose flour
- ¼ cup cocoa powder
- ½ cup butter softened
- 1 cup sugar
- ¼ teaspoon salt
- 1 ½ teaspoon baking powder
- 2 eggs
- 1 teaspoon vanilal extract
- 1 teaspoon apple cider vinegar
- 1-2 teaspoon red gel food coloring
- ½ cup confectioners sugar
Instructions
- Preheat the oven to 350 and line a baking sheet with parchment paper.
- With an electric mixer in a large mixing bowl or in the bowl of a stand mixer cream together butter and sugar.½ cup butter, 1 cup sugar
- Add in eggs one at a time mixing on med/low in between additions until they are all incorporated.2 eggs
- Add in vanilla and vinegar and continue mixing until well mixed.1 teaspoon vanilal extract, 1 teaspoon apple cider vinegar
- In a separate bowl whisk together flour, cocoa, baking powder and salt until well blended.1 ½ cups all-purpose flour, ¼ cup cocoa powder, ¼ teaspoon salt, 1 ½ teaspoon baking powder
- Gradually add the dry ingredients to the butter mixture mixing after each addition until all the flour mixture has been added and is well incorporated.
- Add in a teaspoon of food coloring and mix until evenly mixed. If a deeper red color is desired add more food coloring and continue mixing.1-2 teaspoon red gel food coloring
- Place powdered sugar in a small bowl or shallow dish.½ cup confectioners sugar
- Scoop about 1 ½ tablespoons of dough at a time and drop into powdered sugar. Roll the dough in the powdered sugar until round and evenly coated.
- Place dough balls on the cookie sheet about two inches apart.
- Bake for 12-14 minutes or until tops are cracked.
- Remove from the oven and allow to cool on the cookie sheet for 2-3 minutes. Move to a wire cooling rack to cool completely.
- Store in an airtight container.
Nutrition
Did You Make This Recipe?
Don’t forget to share it with me on @thebalancingmom and follow on Tiktok @balancingmotherhood and Pinterest @thebalancingmom for more!


On my baking list for sure😋Red Velvet cake is one of my most favorite cakes during the holidays… The cookie recipe did Not say plain flour or self rising? I assume plain flour, just checking.. Tks CC
We used all-purpose flour. I just updated that in the post, thanks for clarifying.