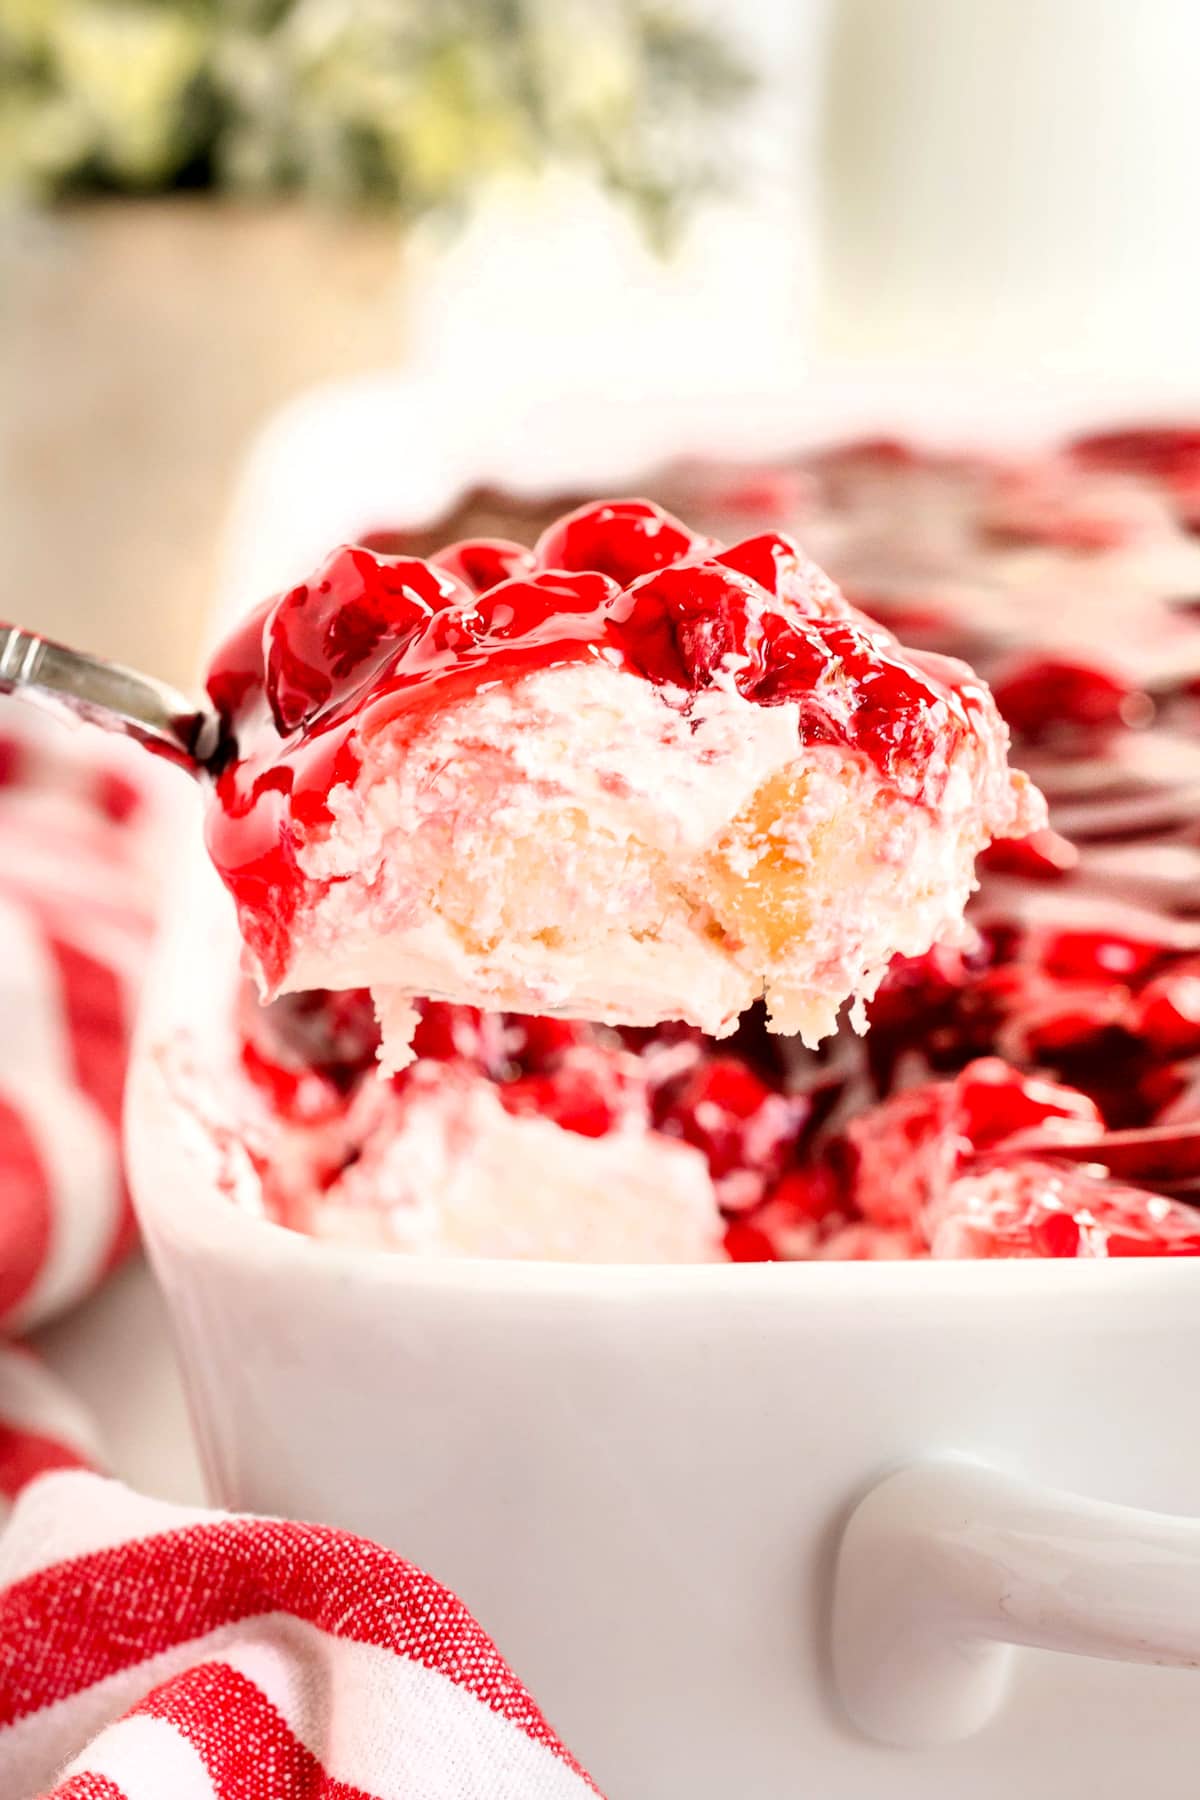
Cherries in the Snow
This post may contain affiliate links, read our disclosure policy.

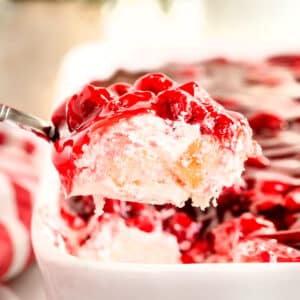
My recipe for Cherries in the Snow takes this vintage dessert and upgrades it with a smoother and richer texture than many older versions. The cake stays incredibly light and fluffy, the cream turns silky smooth, and the cherry topping adds a bright pop of color and tangy sweetness that makes it impossible to resist.
Cherries in the Snow Recipe
Cherries in the Snow is a classic no bake dessert with layers of fluffy cake, silky cream, and sweet cherries. I’ve made several versions but noticed the cake often turns soggy after a day in the refrigerator. So instead of mixing the layers together like most versions, I press the cream gently into the cake so it fills the crevices without soaking it.
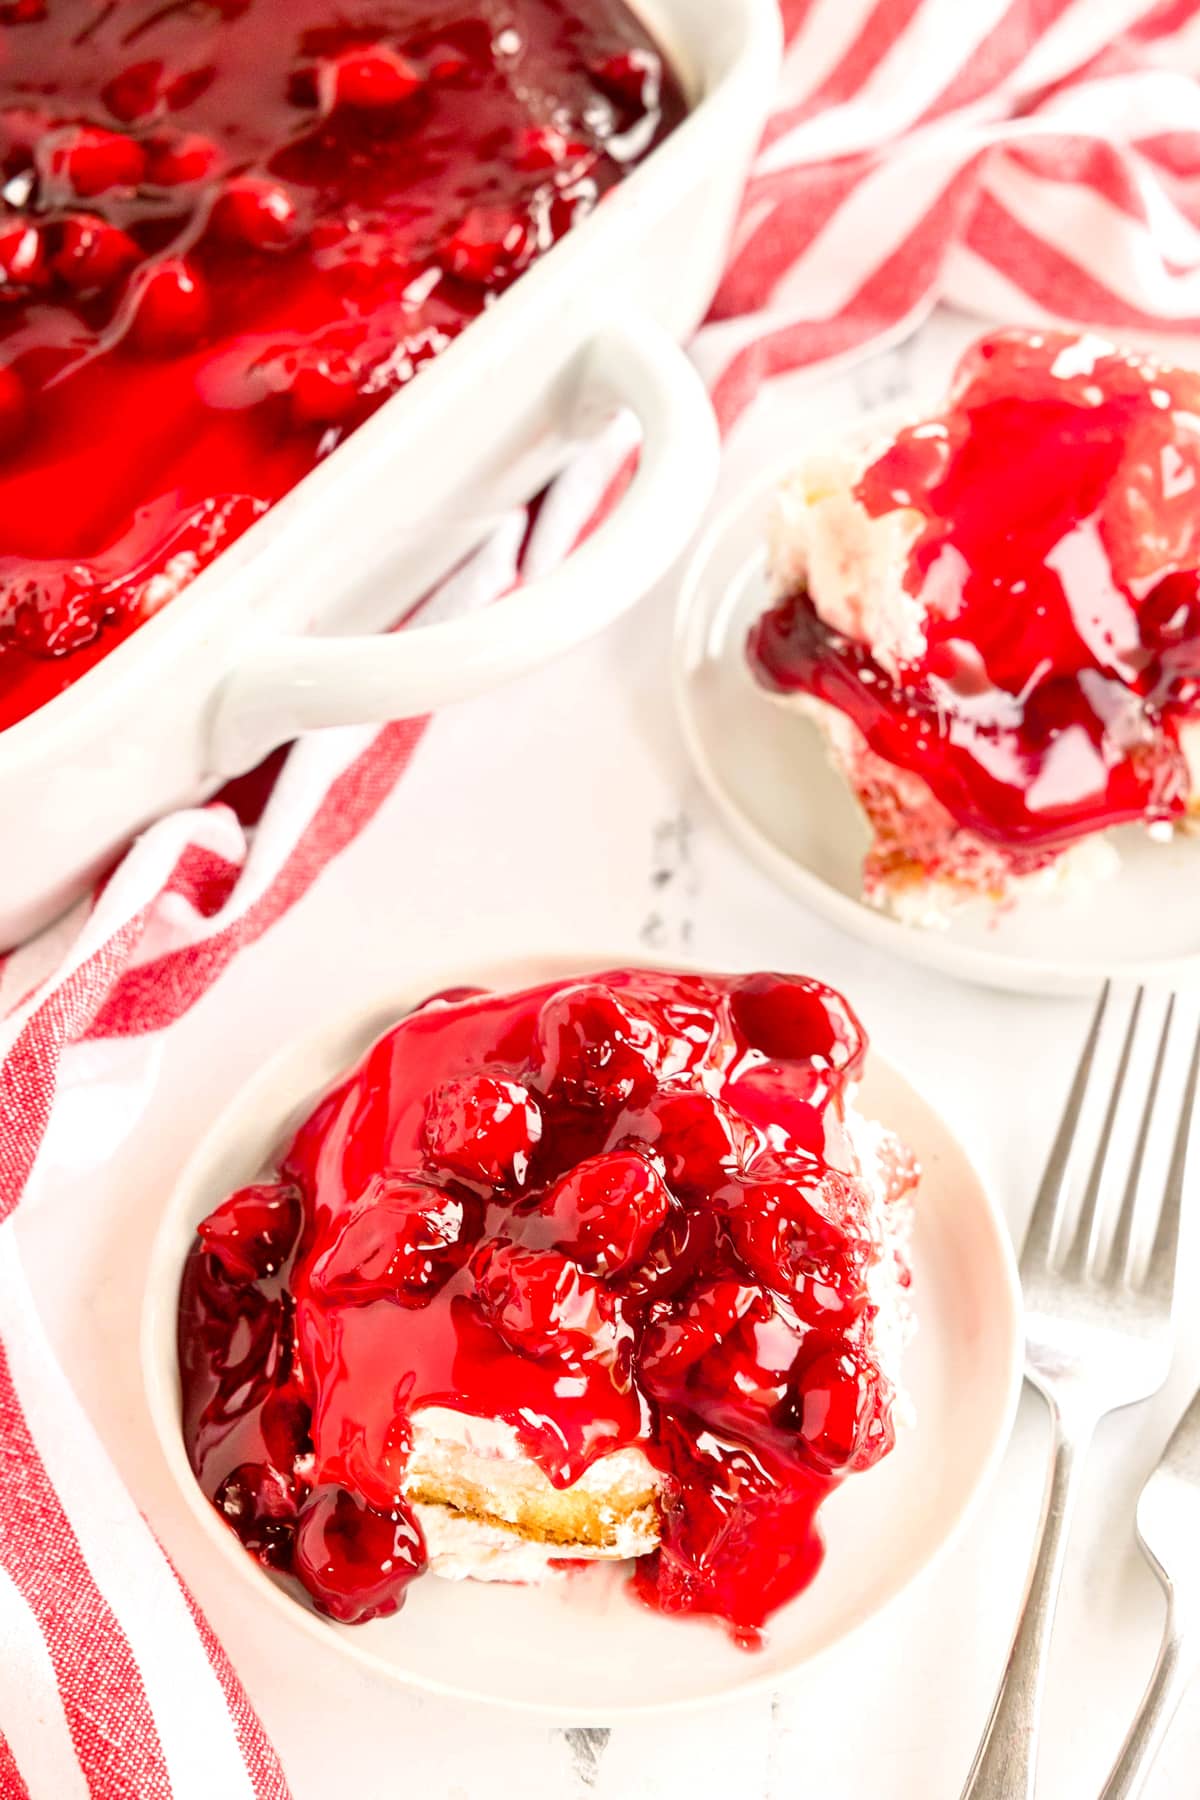
With this improved method, the cake layers neatly with the snowy cream and bright cherries, and holds its texture even after sitting overnight. This beautiful dessert takes about 20 minutes to assemble, sets up perfectly, and is ideal for potlucks, holidays, or any time you need a delicious make-ahead treat.
Why My Cherries in the Snow Dessert is the Best
- Better layering – The way I layer the dessert, it stays picture‑perfect for up to three days. Slices stay neat, the topping stays glossy, and the flavor gets even better as it rests.
- Perfectly creamy – I use a mixture of cream cheese, confectioner’s sugar, milk, and whipped topping to create a velvety layer that sets firm and never turns runny.
- Consistent results – With my easy, foolproof steps, this is the recipe you can trust to come out perfectly each time you make it.
Ingredients To Make Easy Cherries in the Snow
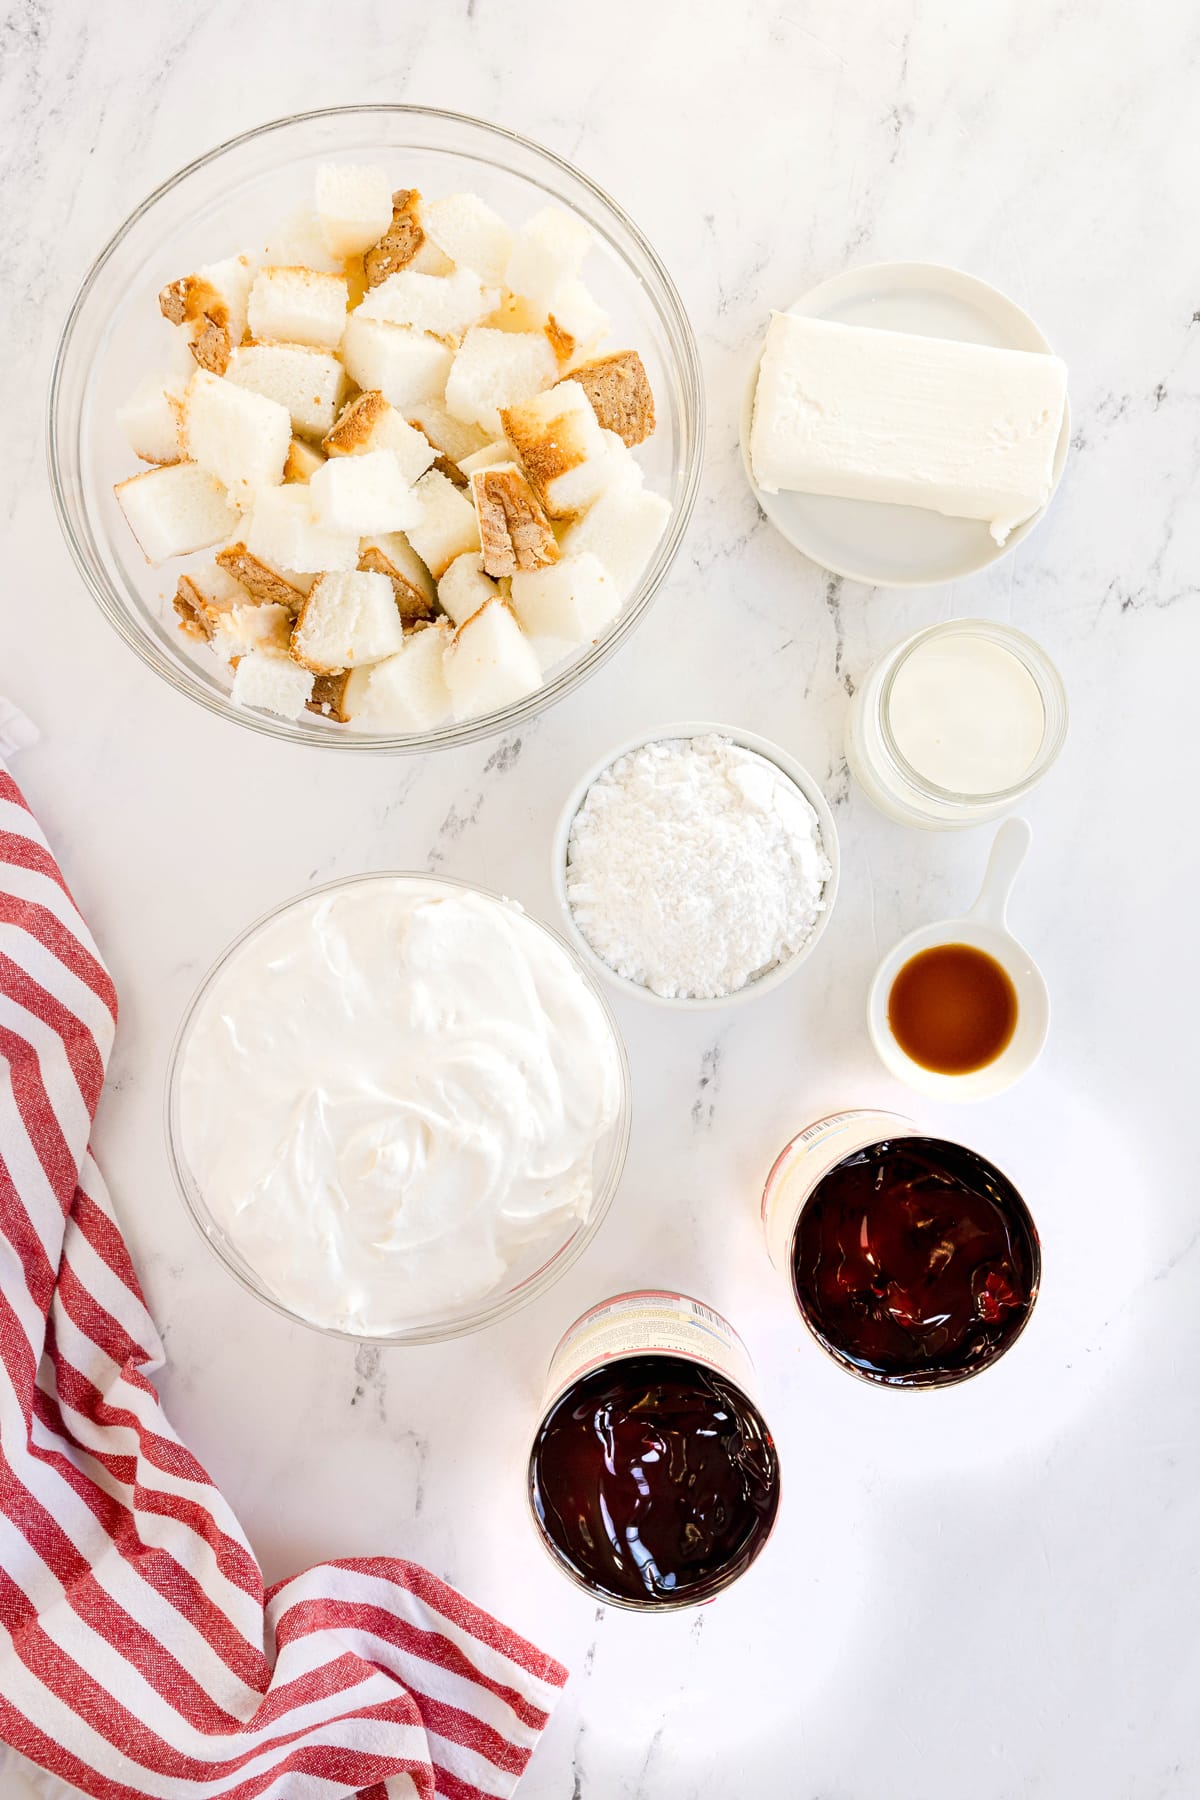
Below is a list of the ingredients you’ll need to make this recipe. Scroll down to the full recipe card for the specific amounts.
- Angel food cake – Cut it into bite-size pieces.
- Cream cheese – Softened so it will mix smoothly.
- Confectioner’s sugar – Sweetens the cream layer.
- Whole milk – Thins the cream mixture to the perfect consistency.
- Vanilla extract – Adds warm flavor to the cream layer.
- Whipped topping – Folded in for a light, fluffy finish.
- Cherry pie filling – Gives the dessert its signature color and fruit layer.
Substitutions or Variations
- Not a cherry fan? You can use blueberry, strawberry, or raspberry pie filling instead.
- Don’t have milk? You can use heavy cream for an extra-rich filling.
- Prefer a different cake? Swap the angel food cake for pound cake or sponge cake.
- Want a from-scratch touch? Homemade whipped cream can replace the whipped topping.
Instructions to Make My Cherries in the Snow Recipe
Here are my step-by-step instructions so you can make this recipe with ease. For the full, printable recipe with amounts and temperatures, scroll down to the recipe card below.
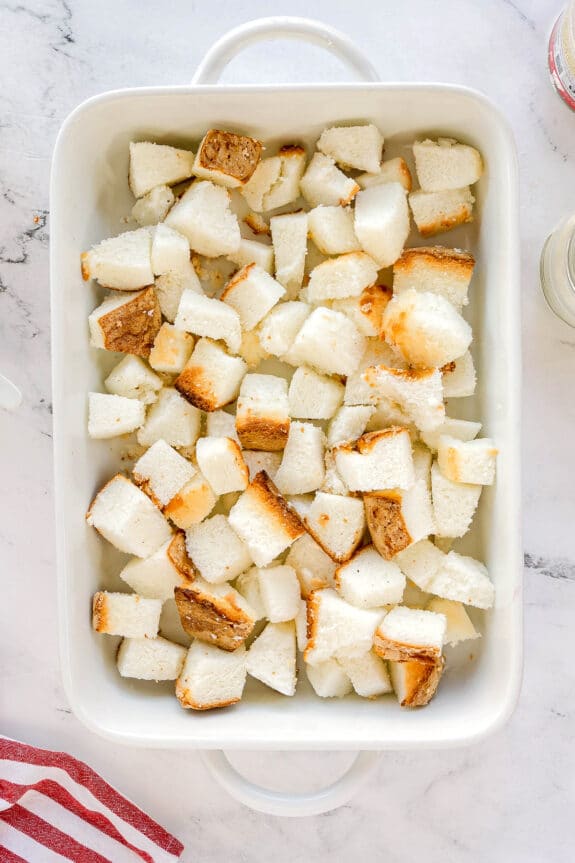
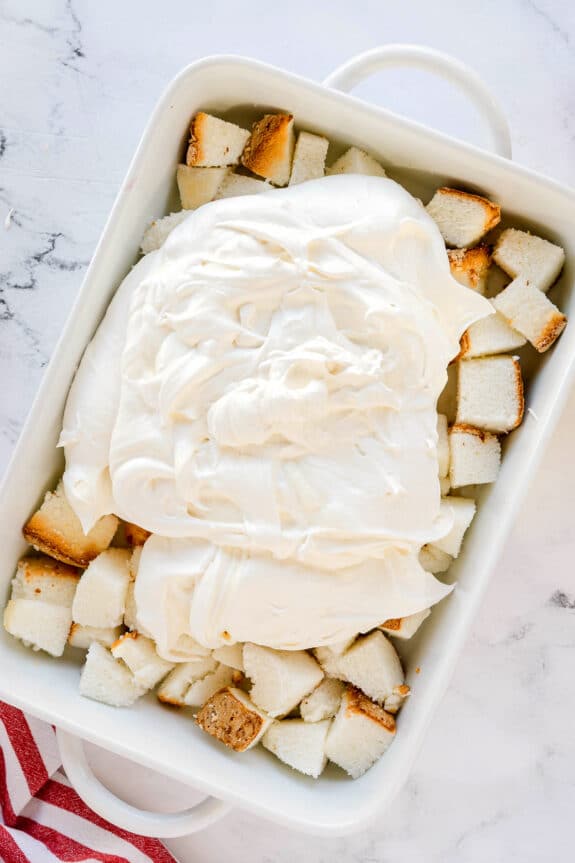
- Tear or cut the angel food cake into bite-size pieces and arrange them evenly across the bottom of a 9 x 13 baking dish.
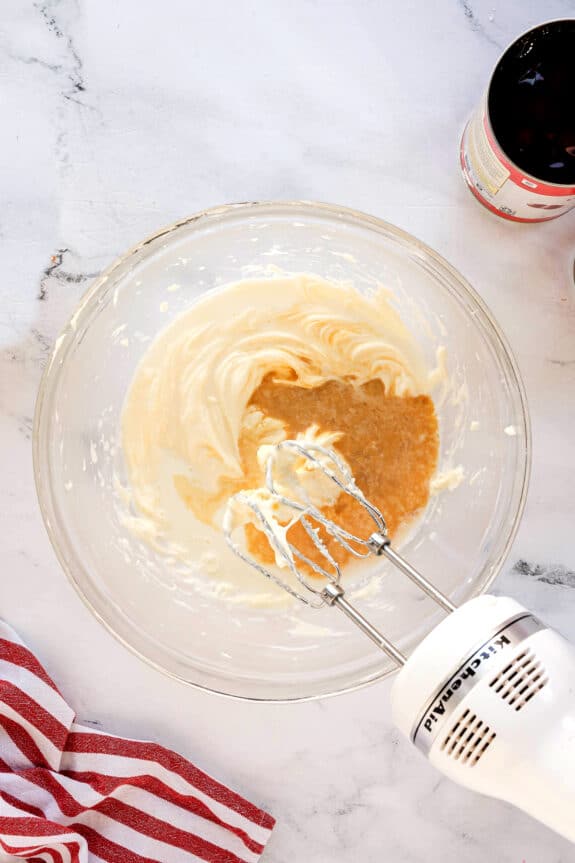
- In a large bowl, beat the softened cream cheese and confectioner’s sugar together until smooth and creamy.
- Pour in the milk and vanilla extract, mixing until fully combined and silky.
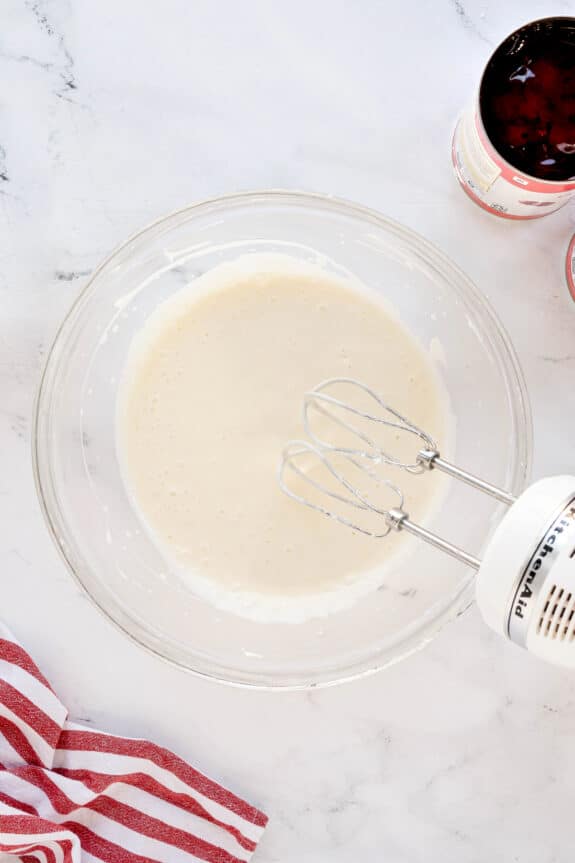
- Gently fold in the whipped topping until light and fluffy. The mixture should be thick but spreadable.
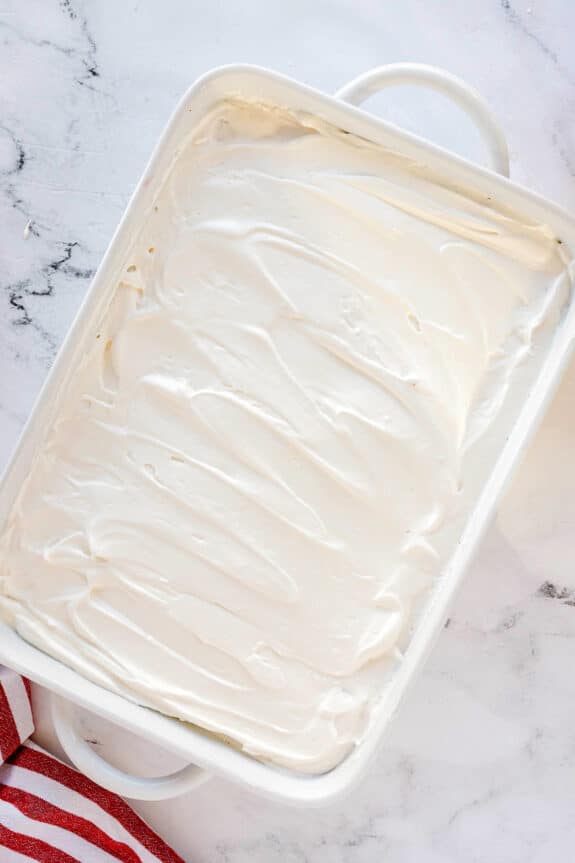
- Spread the cream cheese mixture evenly over the angel food cake layer, making sure to cover all the pieces.
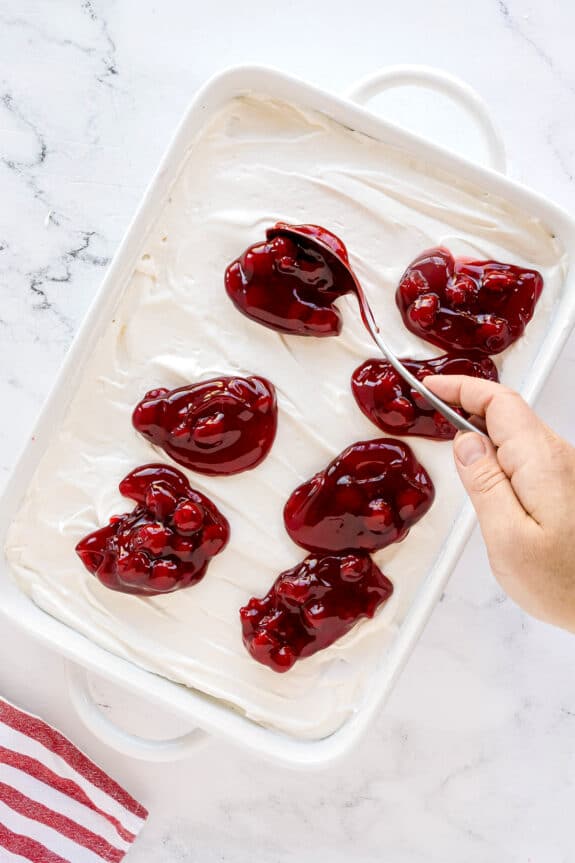
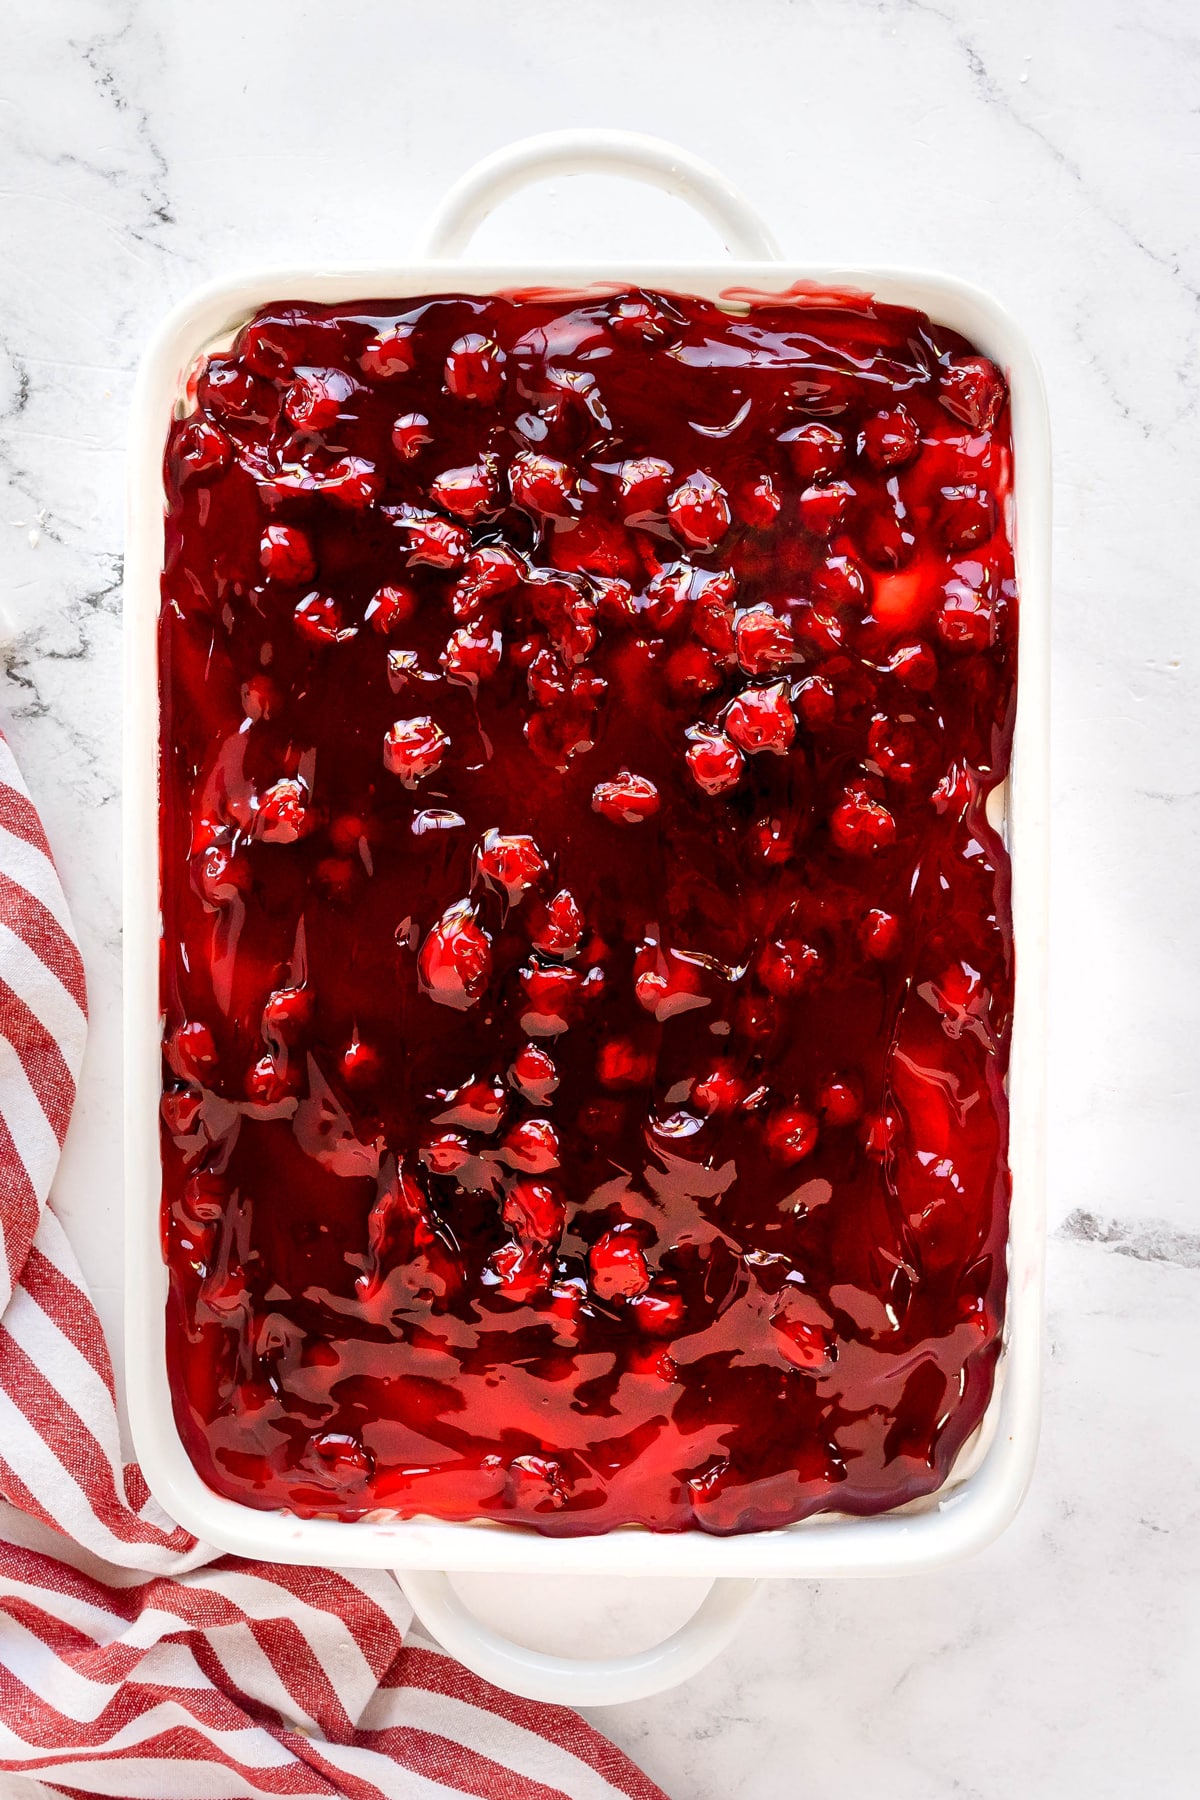
- Spoon the cherry pie filling evenly over the cream layer, spreading gently to avoid mixing the layers.
- Cover the dish and refrigerate for at least 2 hours, or overnight, before serving.
- Fold the cream mixture gently – overmixing deflates it and makes the layer heavier than it should be.
- Soften cream cheese fully before mixing – cold cream cheese creates lumps that are hard to smooth out.
- Use an offset spatula – to help spread the cream layer smoothly.
- Press the cream mixture into the crevices of the angel food cake pieces – so they get down into all the spaces.
- Chill overnight – if possible for the best flavor and texture.
FAQs
Make sure the cream layer is thick and fully mixed before spreading. If it’s too loose, it can seep into the cake instead of sitting on top.
Yes, but the texture improves noticeably after chilling for several hours. Overnight gives the layers time to set for clean slices.
A trifle dish shows off the layers beautifully. Just repeat the layers until you reach the top.
Storage Instructions
- Refrigerate – Store covered for up to three days. The cake stays fluffy, the cream stays set, and the cherry layer stays glossy.
- Freeze – Not recommended. Freezing makes the cream icy and the cake turn gummy once thawed.
More Cherry Dessert Recipes
- Cherry Fluff
- Chocolate Cherry Cheesecake
- Cherry Poke Cake
- Cherry Chip Cake
- Maraschino Cherry Chocolate Chip Cookies
- No Bake Cherry Cheesecake
Pin this recipe to find it later

Cherries in the Snow
Ingredients
- 14 ounces pre-made angel food cake store-bought is perfect
- 8 ounces cream cheese softened (1 block)
- 1 cup confectioner’s sugar
- ½ cup whole milk
- 1 teaspoon vanilla extract
- 12 ounces frozen whipped topping thawed (Cool Whip works great)
- 42 ounces cherry pie filling (2) 21-ounce cans
Instructions
Prepare the Cake:
- Tear or cut the angel food cake into bite-size pieces and arrange them evenly across the bottom of a 9 x 13 baking dish.14 ounces pre-made angel food cake
Make the Cream Layer:
- In a large bowl, beat the softened cream cheese and confectioner’s sugar together until smooth and creamy.8 ounces cream cheese, 1 cup confectioner’s sugar
- Pour in the milk and vanilla extract, mixing until fully combined and silky.½ cup whole milk, 1 teaspoon vanilla extract
- Gently fold in the whipped topping until light and fluffy. The mixture should be thick but spreadable.12 ounces frozen whipped topping
Assemble the Layers:
- Spread the cream cheese mixture evenly over the angel food cake layer, making sure to cover all the pieces.
- Spoon the cherry pie filling evenly over the cream layer, spreading gently to avoid mixing the layers.42 ounces cherry pie filling
Chill and Serve:
- Cover the dish and refrigerate for at least 2 hours, or overnight, before serving. This helps the dessert set and keeps the cake from getting soggy.
Notes
Nutrition
Did You Make This Recipe?
Don’t forget to share it with me on @thebalancingmom and follow on Tiktok @balancingmotherhood and Pinterest @thebalancingmom for more!