Candy Cane Danishes
This post may contain affiliate links, read our disclosure policy.

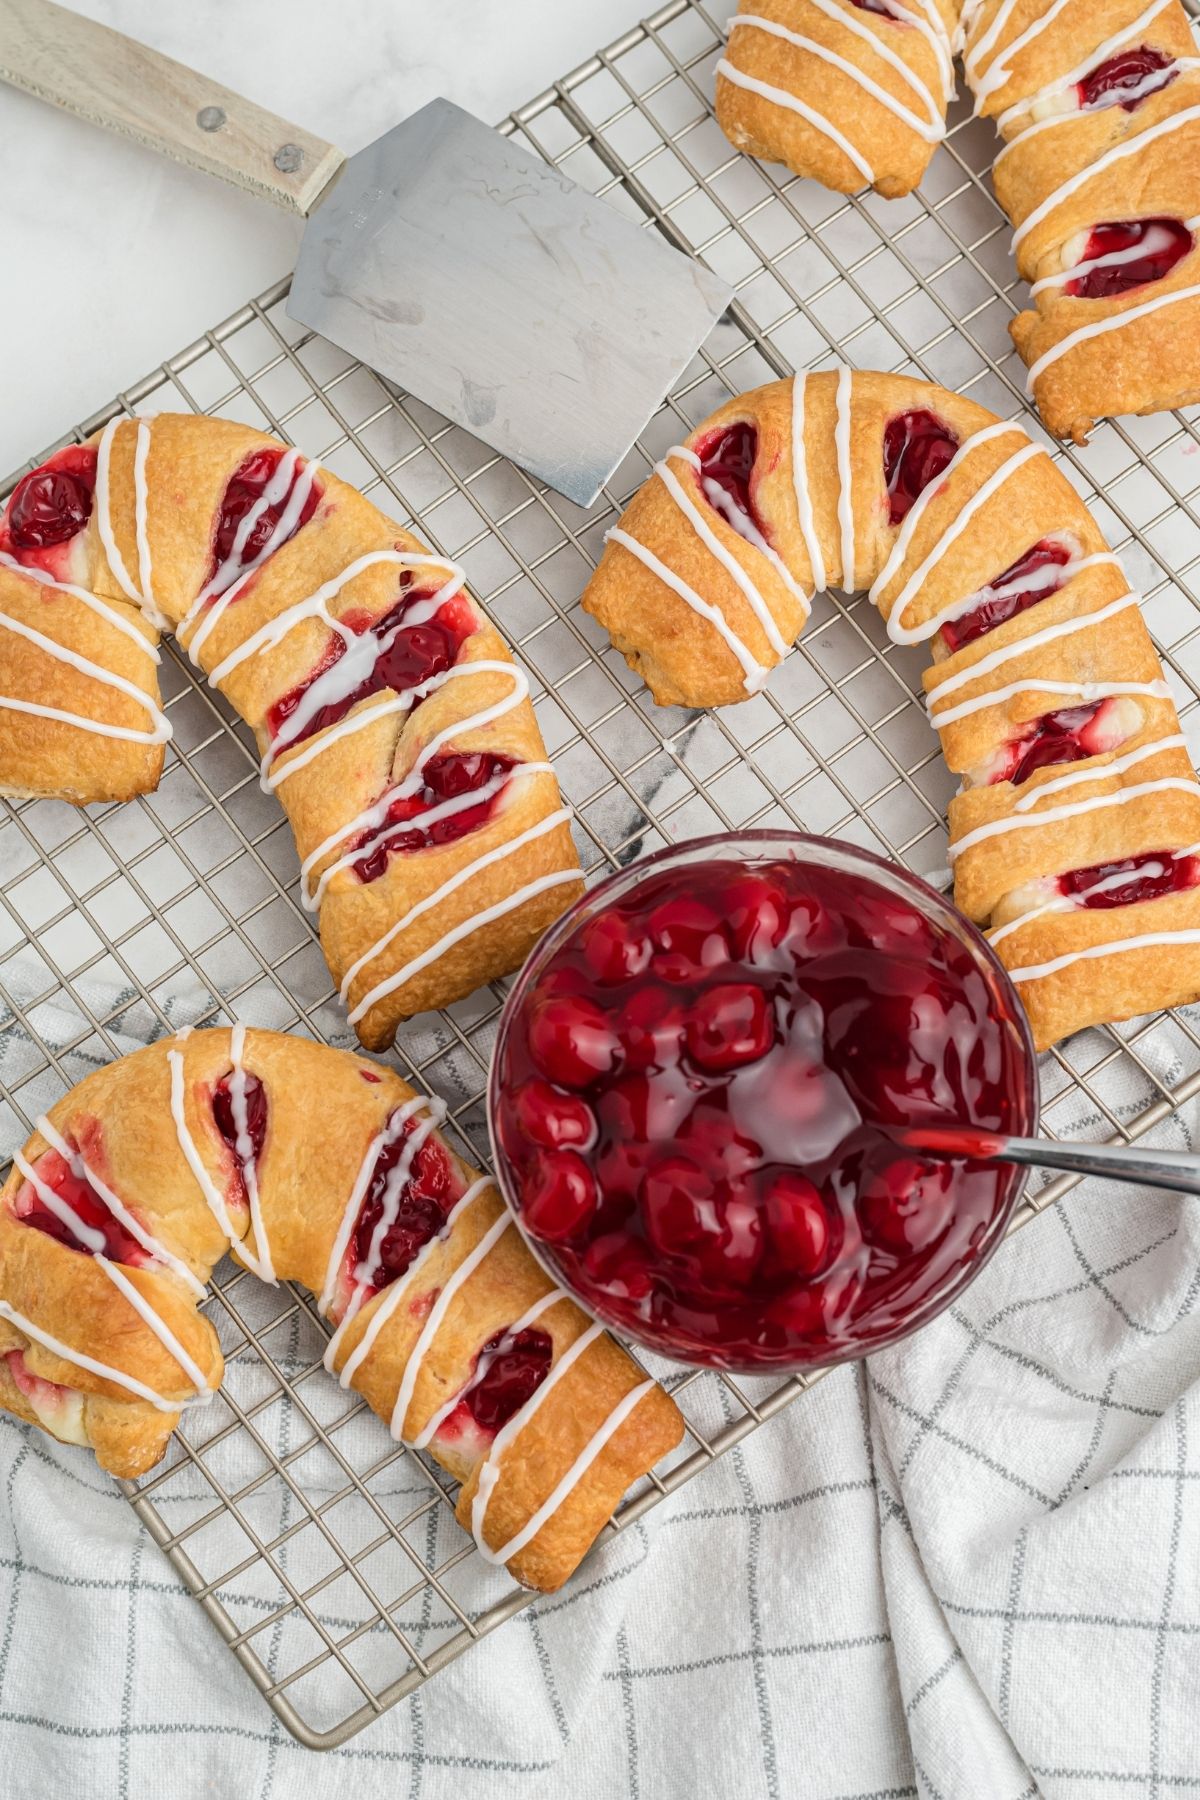
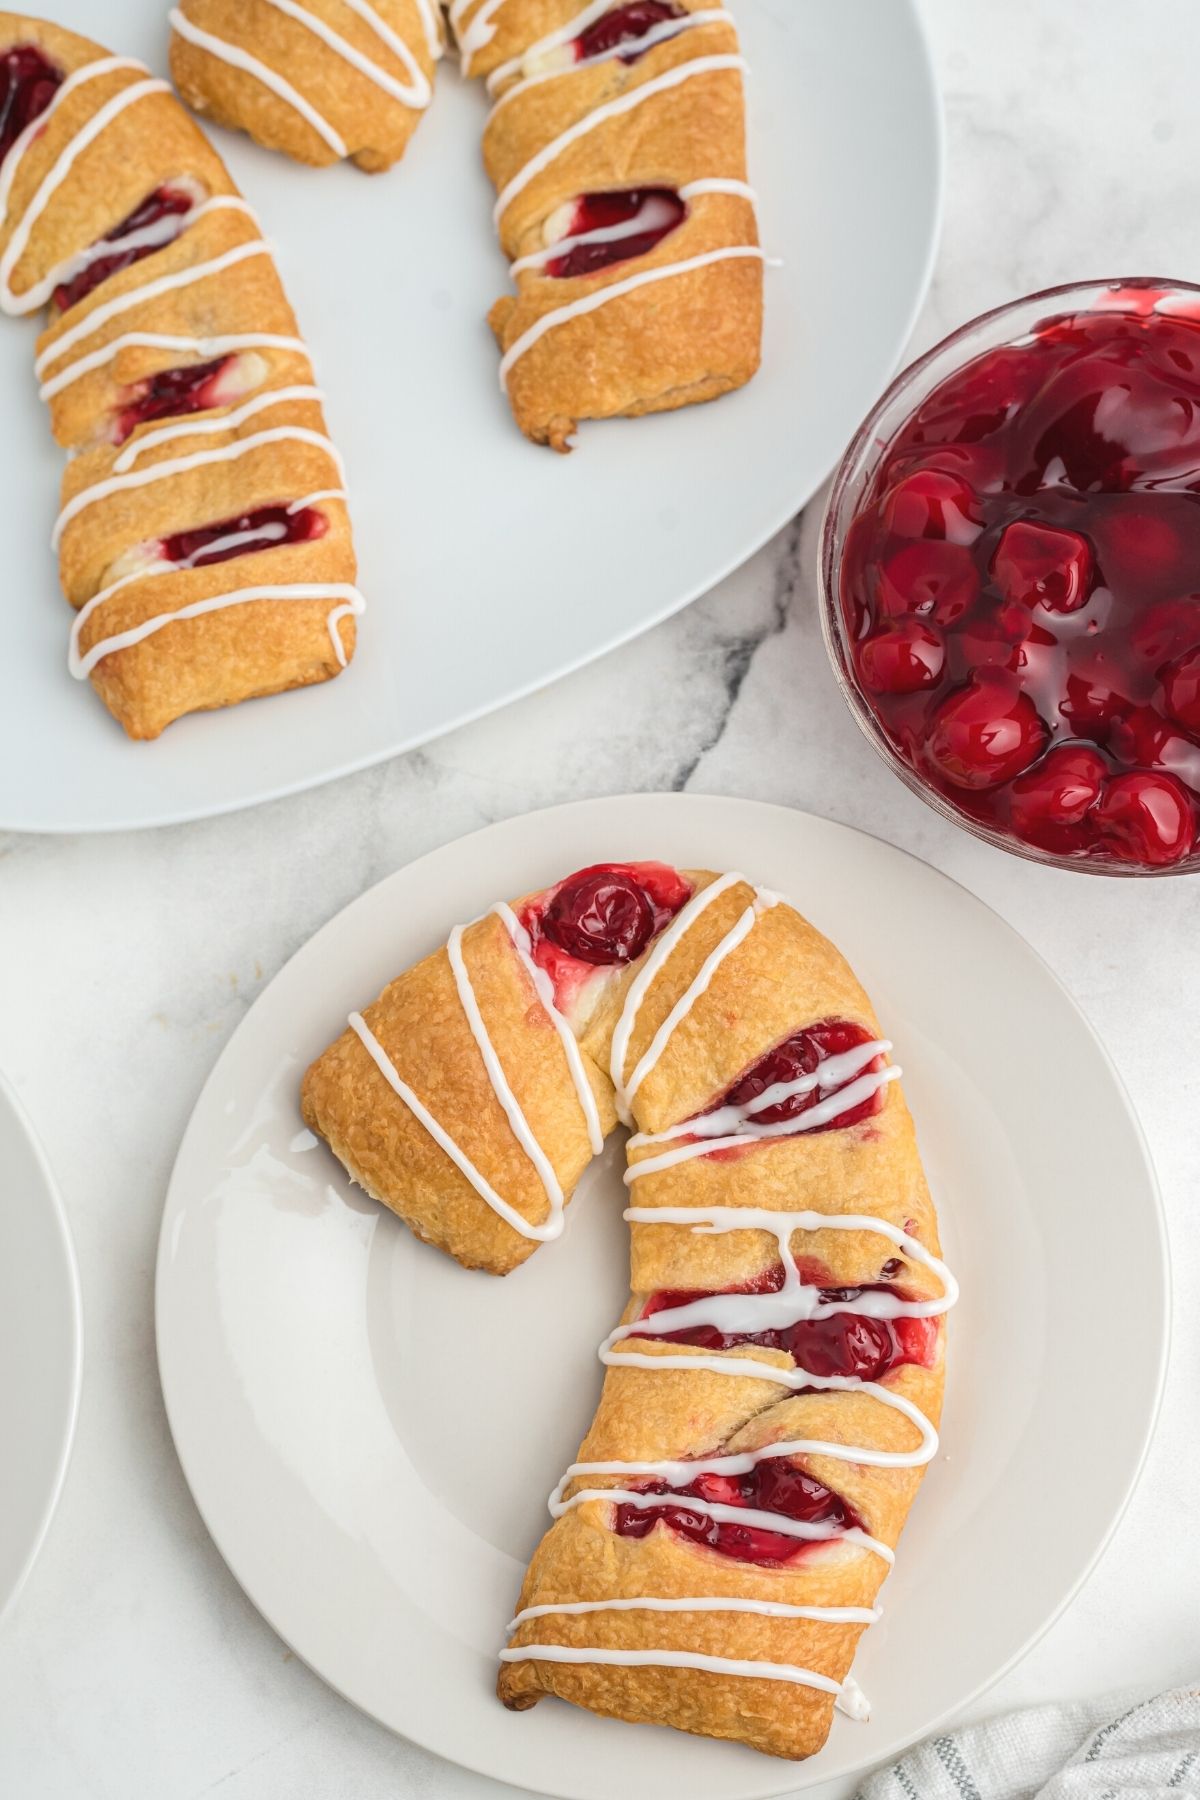
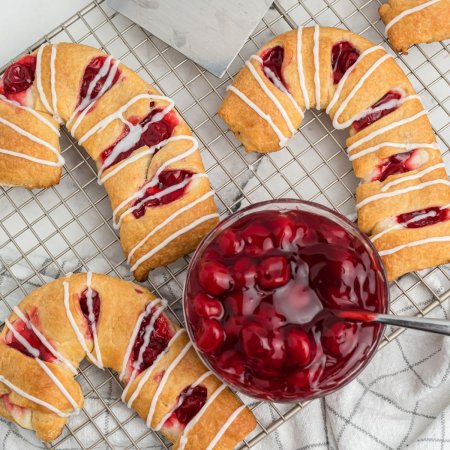
These Candy Cane Danishes are and easy and fun breakfast. Refrigerator crescent rolls are used as the base filled with a sweet cream cheese filling and topped with cherry pie filling to make the perfect Christmas morning treat.
Candy Cane Danishes
Made with the convenience of refrigerated crescent dough and store-bought canned cherry pie filling, you can whip up this easy candy cane danish in just 30 minutes.
Serve your candy cane cheesecake danishes with whipped cream or a serving of vanilla ice cream as an indulgent fruity cheesecake-like dessert or simply enjoy them as a sweet treat whenever those cravings hit! These holiday danishes are extremely versatile, allowing you to adapt them however you wish.
We love having special breakfasts at Christmas time — the entire month of December is an excuse to make fun breakfast recipes.
Ingredients
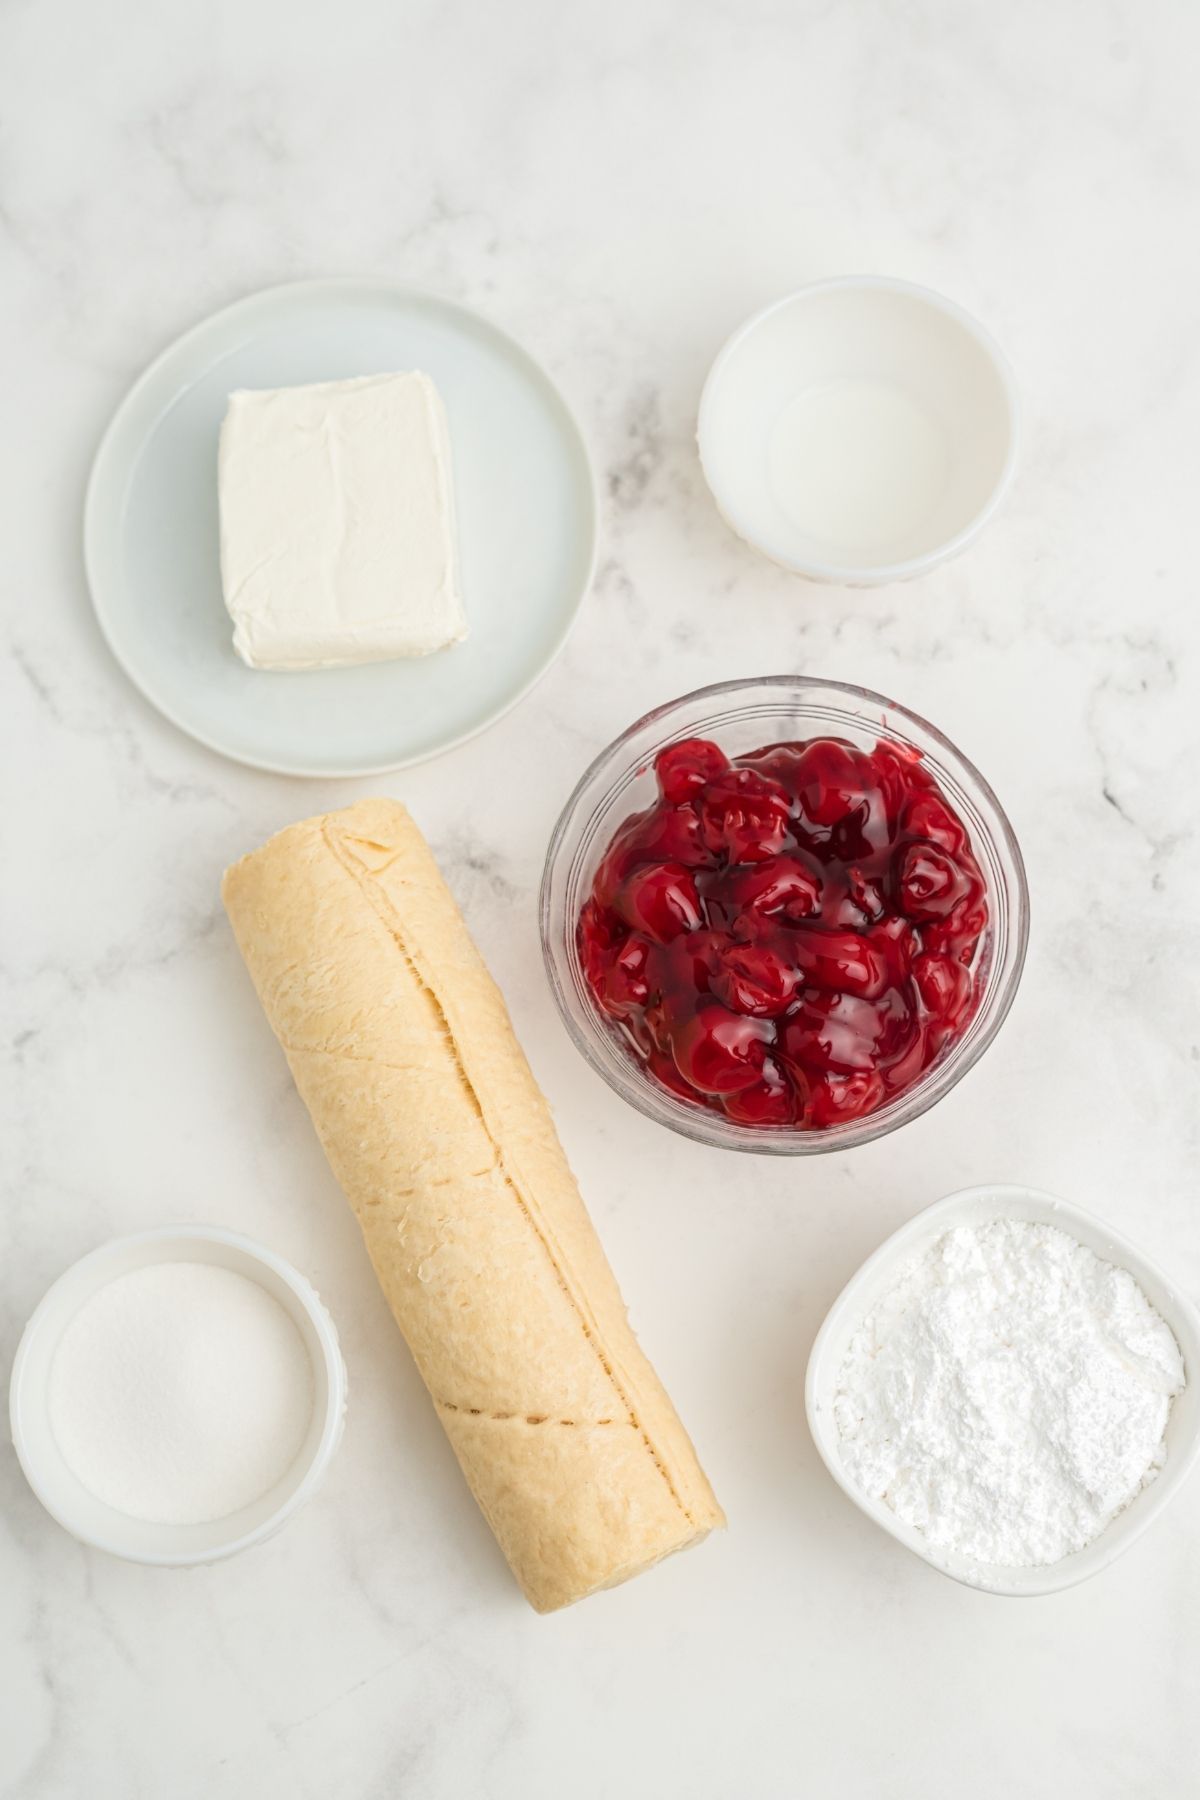
- 4 oz (from 8-oz package) cream cheese, softened
- 2 tablespoons sugar
- 1 can (8 oz) refrigerated crescent dinner rolls or 1 can (8 oz) refrigerated crescent dough sheet
- ¾ cup cherry pie filling (from 21-oz can)
- ¼ cup powdered sugar
- ½ teaspoon milk
Instructions
- Preheat oven to 375°F.
- Line large baking sheet with cooking parchment paper or a silpat liner
- In a medium bowl of an electric mixer combine cream cheese and sugar until creamy.
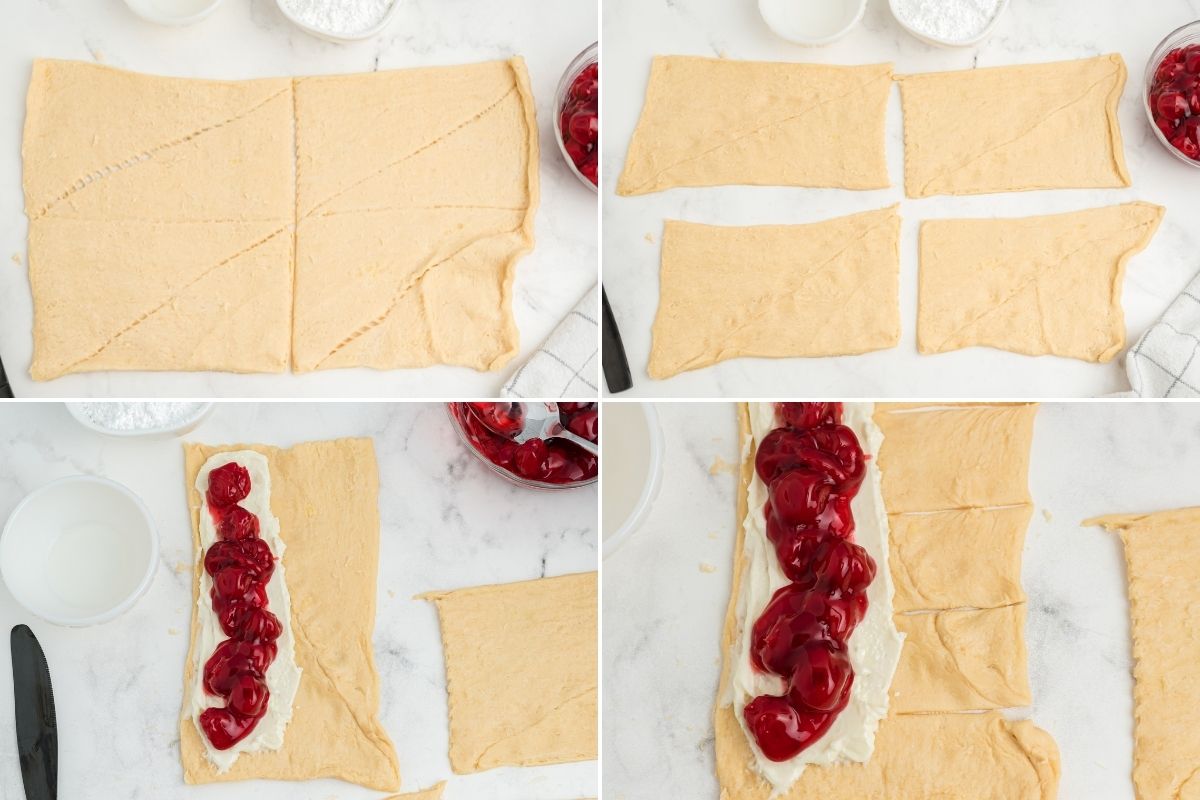
- Open crescent roll package and unroll dough on a floured surface. Pinch the crescent triangles together the seams, ten cut into four rectangles.
- Place dough rectangles onto cookie sheet, short side closest to you, spacing them apart.
- Spread 2 tablespoons of the cream cheese mixture onto left long side of dough – about 2 inches wide.
- Top the cream cheese mixture with about 2 tablespoons of pie filling.
- Repeat with all four rectangles
- On the right side that doesn’t have filling, use a pizza cutter to make six 1inch cuts in the crescent roll sections. Fold over these dough strips to the left to cover the cherry filling.

- Tuck the edge of the strip under the left side making candy cane stripes. Pinch ends of dough so they bake together
- Once all strips are tucked, you can pick up the top end of the dough and fold it into the shape of a candy cane.
- Repeat with all four rectangles.
- Bake 13 to 18 minutes or until golden brown. Let cool on wire rack.
- In small bowl, mix powdered sugar and 1/2 teaspoon milk until smooth.
- Drizzle glaze on top of baked danishes, putting the white frosting on the dough slices so you get a red (cherry) and white (frosting) formation on top of the dough.
CAN I STORE LEFTOVER CANDY CANE CHEESECAKE DANISHES?
Yes, you can! These Candy Cane Cheesecake Danishes are best tasting immediately after baked. And, judging by how delicious these danishes are, I would be seriously surprised if you had any leftovers!
If, however, you do have leftovers, store them in a parchment paper lined airtight container in the refrigerator for 3-5 days. Cream-based baked products must be kept in the refrigerator.
When serving these treats, make sure that they don’t sit out at room temperature for longer than 2 hours.
To reheat stored cheesecake danishes, at them to the oven 375℉ for 10-15 minutes, keeping a close watch so that they don’t burn. I would only suggest reheating these danishes in the microwave if you intend eating them immediately as the microwave can make them slightly hard once they start to cool, much like croissants.
HOW CAN I SOFTEN MY CREAM CHEESE QUICKLY?
The best way to soften cream cheese is by allowing it to sit on the counter for 15 minutes at room temperature.
If you’re in a rush then you can set your unwrapped cream cheese on a microwave dish to warm up on high for 15-20 seconds, checking on it every 10 seconds to ensure that you aren’t overheating it. If any liquid releases while being heated in the microwave, make sure to add it back to the ingredient mixture.
Another way to soften cream cheese quickly is to fill a bowl (large enough to hold your foil-wrapped cream cheese in) with warm-hot tap water. Place the cream cheese (still with the foil wrapper intact) in the bowl of water and allow it to sit for 5-7 minutes, pressing it to check for adequate softening.
Can I Use Puff Pastry?
Puff pastry will give different results than using the crescent dough. It might puff up too much.
WHAT VARIATIONS CAN I MAKE TO THESE CANDY CANE CHEESECAKE DANISHES?
- Fruit pie fillings – Use a different fruity pie filling instead of the cherry pie filling I’ve used. You could opt for strawberry pie filling, lemon pie filling, raspberry pie filling, apple pie filling …the options are endless and depend on your preferences!
- Crescent dough sheet – While I’ve made my candy cane cheesecake danishes with refrigerated crescent dinner rolls for added convenience, you can easily make use of refrigerated crescent dough sheet instead. When using the latter, you will need to take an additional step of cutting the unrolled dough into 6×4-inch rectangles before proceeding with the recipe but it’s simple enough.
- Candy Canes – Crush some candy canes and sprinkle them on top of the frosting for an extra bit of festivity!
- Hearts – Use this recipe as inspiration for making different basic shapes such as a heart cheesecake danish for Valentine’s Day!
- One big candy cane – Pillsbury has a large raspberry-cream cheese candy cane crescent danish with fresh raspberries that is another cute option
- Egg wash – Brush dough with an egg wash for a shiny result
- Vanilla – add a teaspoon of vanilla in the icing for added flavor
TIPS FOR MAKING CANDY CANE CHEESECAKE DANISHES
- Line a baking sheet with parchment paper to make it easier to remove the candy cane Danish. A rimless insulated baking sheet or silicone baking mat will also allow you to slip the Danish off instead of lifting it and risking it breaking.
- Begin folding the triangles over from the top of the cane after making the crescent shape and adding the filler. Using your fingers, gently tuck the ends of the pastry down the length of the dough.
- Make sure the frosting is applied while the Danish is still warm but not too hot. The warmth from the Danish will soften the icing somewhat, enabling it to smooth out nicely.
- There’s a good chance you won’t use all of the pie filling. Save it for some tasty hand pies, like these Air Fryer Hand Pies, or any other recipe calling for a fruity pie filling.
- Place some parchment paper down under the wire rack in case any frosting or filling drips onto your counter – this will save you from some unnecessary cleaning.
These make a fun Christmas breakfast treat the kids love! This cherry cheese pastry will become a Christmas ritual for the holiday season.
More Candy Cane Inspired Recipes

Candy Cane Danishes
Ingredients
- 4 ounces from 8-oz package cream cheese, softened
- 2 Tablespoons sugar
- 8 ounce can refrigerated crescent dinner rolls 1 can (8 oz) refrigerated crescent dough sheet
- ¾ cup cherry pie filling from 21-ounce can
- ¼ cup powdered sugar
- ½ teaspoon milk
Instructions
- Preheat oven to 375°F.
- Line large cookie sheet with cooking parchment paper or a silpat liner
- In small mixing bowl, combine cream cheese and sugar until creamy.4 ounces from 8-oz package cream cheese, softened, 2 Tablespoons sugar
- Open crescent roll package and unroll dough on a floured surface. Pinch together the seams, then cut into four rectangles.8 ounce can refrigerated crescent dinner rolls
- Place dough rectangles onto cookie sheet, short side closest to you, spacing them apart.
- Spread 2 tablespoons of the cream cheese mixture onto left long side of dough – about 2 inches wide.
- Top the cream cheese mixture with about 2 tablespoons of pie filling.¾ cup cherry pie filling
- Repeat with all four rectangles
- On the right side that doesn’t have filling, make six 1inch cuts. Fold over these dough strips to the left to cover the cherry filling. Tuck the edge of the strip under the left side.
- Once all strips are tucked, you can pick up the top end of the dough and fold it into a candy cane shape.
- Repeat with all four rectangles.
- Bake 13 to 18 minutes or until golden brown. Let cool on wire rack.
- In small bowl, mix powdered sugar and 1/2 teaspoon milk until smooth.¼ cup powdered sugar, ½ teaspoon milk
- Drizzle glaze on top of baked danishes, putting the white frosting on the dough slices so you get a red (cherry) and white (frosting) formation on top of the dough.
Nutrition
Did You Make This Recipe?
Don’t forget to share it with me on @thebalancingmom and follow on Tiktok @balancingmotherhood and Pinterest @thebalancingmom for more!