
Easy Easter Bunny Cake Tutorial
This post may contain affiliate links, read our disclosure policy.
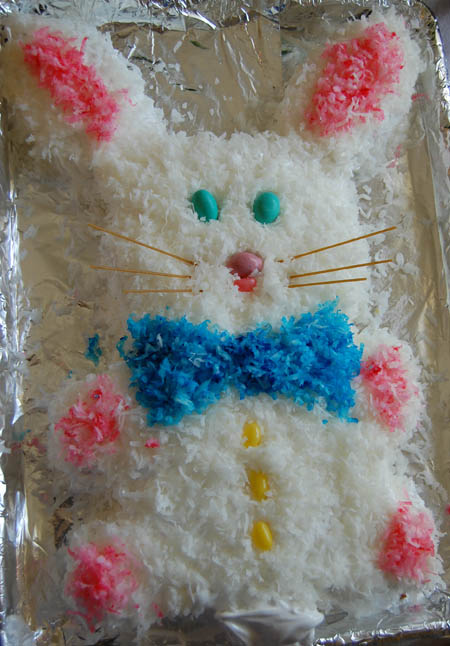
You too can make this cute Easter bunny cake. My mother has been making this cake for years. Even though my brothers and are a adults with children of our own, my mom still makes this Easter Bunny cake for Easter when the grandkids are around. It’s so simple and even though it’s not the fanciest cake, it is always a winner with kids. I have fond memories from childhood holding up this Easter bunny cake at Easter to have our photo taken with it.
There’s no special equipment needed for this cake — just two round cake pans.
Easter Bunny cake materials and ingredients
- Two round cake pans (I use 9 inch)
- White icing (you can make your own or use store bought)
- Coconut, one bag
- Food coloring (pink for the ears and paws and a color for the bow tie)
- Candy for eyes, nose and buttons
- Licorice for whiskers (we didn’t have any so I used spaghetti on this bunny)
How to make and decorate the Easter Bunny cake
First, bake a cake using two, 9-inch round cake pans. If you are using a box mix, one box is enough — just split the batter between both pans.
After the cakes have cooled, you’ll need to cut them into the correct shapes and place them on a flat surface. No fancy materials required. Next time I make this, I’m going to attempt a better background than a regular sheet pan covered in foil, but that’s all I had at the time I was baking. The beauty of this cake is that it really doesn’t take much to put a smile on a kid’s face.
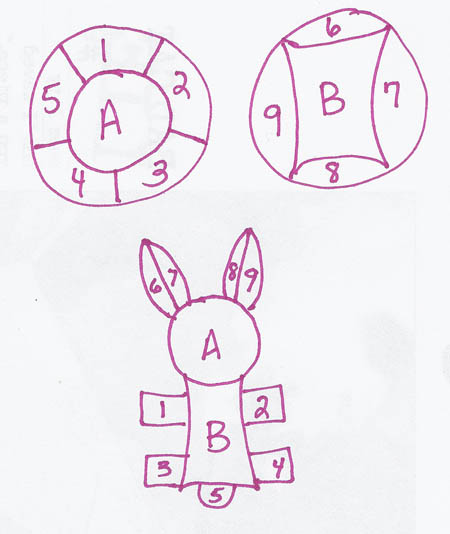
Here’s my crude drawing, but you’ll get the picture with it.
- Take one of the round cakes and cut a circle out of the middle of the cake. That will be the head. That’s A.
- With the remaining, outer circle, cut that into 5 pieces. Or, four if you don’t want a tail.
- With the second cake, cut four rounded semicircles from the sides of the cake. These will be used for ears. You’ll be left with B, the body.
- Put A on your board where you want the head.
- Put B below A, for the body.
- Take two pieces (6 and 7) and put them for one ear. Take the two other large pieces (8 and 9) for the other ear.
- Then, you’re left with pieces 1-5. Put these on the sides of the body for the paws.
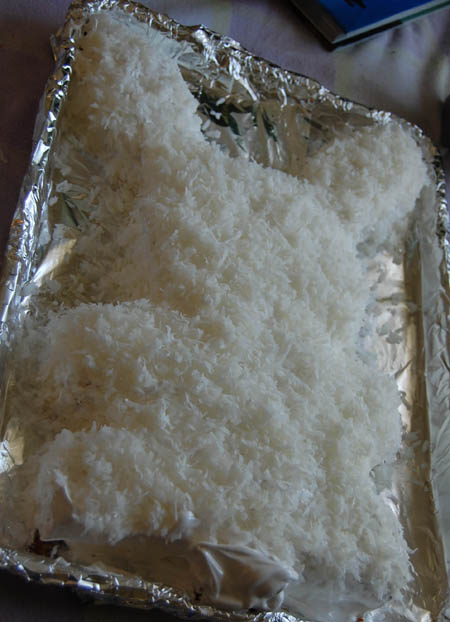
Once the pieces are on the pan in the right locations, all you do is frost like a regular cake. Put frosting between sections 6 and 7 and 8 and 9 of the ears so they stick together. Also put frosting between the body (section B) and each of the paws (sections 1,2,3,4). The frosting doesn’t have to be smooth since it will be covered with coconut.
Next, sprinkle coconut over the entire cake. I usually pat it down a tiny bit so that it stays on the cake and we don’t have any fly-away pieces, but I don’t think it’s necessary.
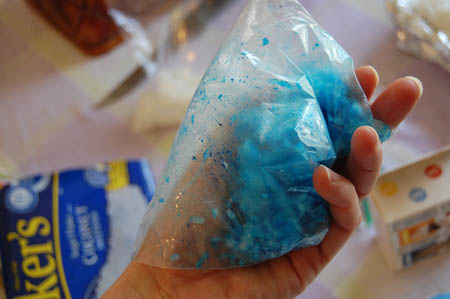
Next, color the coconut. It’s easy: grab a zip top bag, toss in a handful of coconut, add a few drops of food coloring, zip the bag and shake, shake shake.
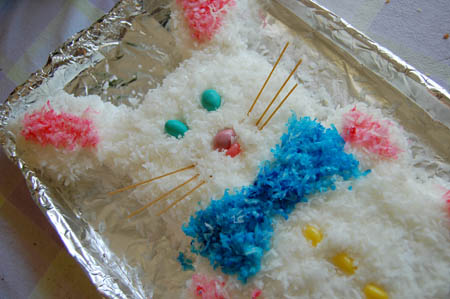
Decorate away!
I like to use pink for the ears and paws.
For the bow tie — I did this free hand. Just put down the blue coconut in the shape of a tie and gave it a pat to stay in place.
I used large M&Ms for the face and some jelly beans for his mouth and for the yellow buttons.
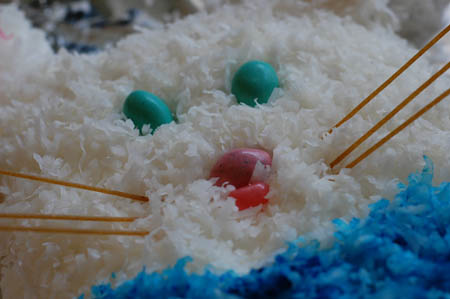
Usually, I use skinny licorice for whiskers, but we were out so my mother suggested the spaghetti, which worked out great.
Don’t let this Easter Bunny cake get away from you. It’s super easy, doesn’t take long, and your kids will remember it when they are grown. Just ask my mom.

Related:
- I like this version of the Easter bunny cake that stacks the paws up for a dimensional look.
- Another popular version of this easy Easter bunny cake uses just the head of the bunny with a big bow tie. Very cute.
- All of my cakes (Mickey Mouse cake, duck cake, fondant cakes and a rocket ship cake to name a few.)


Holy cow. Brings back many, many memories. We’ve been doing this cake forever. It is always a winner.
Great cake! It sounds really easy and looks fantastic. My kids would *love* it…hopefully I have time before Easter to give it a go.
Loving how easy this cake is and so darling. Thank you for sharing.
THIS IS THE CUTEST BUNNY CAKE I HAVE EVER SEEN!! I looked through many, many images and this one stood out! Thanks for your detailed instructions!!ADORABLE!!
Thanks everyone for the wonderful comments. I’ve been making this cake for years and loved it as a kid myself.
Wow, this is fantastic. I’ve just been browsing through all your cakes… you are very talented, beautiful work. Thanks for sharing 🙂
Hey there this is kind of of off topic but I was wanting to know if blogs use WYSIWYG editors or if you have to manually code with HTML.
I’m starting a blog soon but have no coding expertise so I wanted to get guidance from someone with experience.
Any help would be enormously appreciated!