
Butterfly Birthday Cake
This post may contain affiliate links, read our disclosure policy.
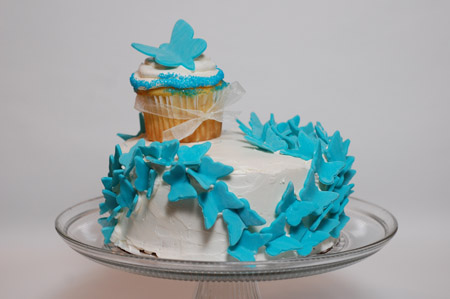
This is my baby’s first birthday cake. Made by moi! I am absolutely in love with this cake. I have to say it. I’ve been making cakes (only about one a year) for four years and this is my favorite to date. It is actually one of the easiest ones I’ve made too. Sometimes simpler is better.
Here’s how I made it:
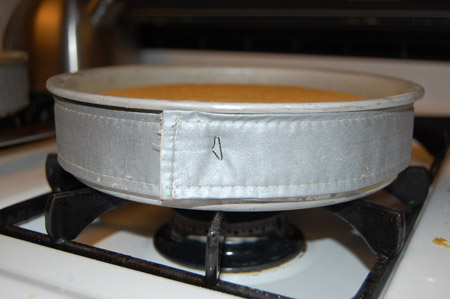
I started easy, with a box cake mix. I would have preferred to make the cake from scratch, but needed to cut some time from this project — boxed cake mixes can be a life saver for a cake like this. I did, however, want even cake layers so I tried the Wilton bake even strips. These things are amazing and deserve a blog post of their own. Just know they are worth the effort. I made two 6 inch cakes, wrapped these silver babies around the pans and they baked evenly. They were perfectly flat, even cakes when I took them out of the pan. Step one accomplished.

The next step was to ice the cake. I put on a homemade butter cream frosting (no shortcuts here) and let that set. I used Martha Stewart’s Italian meringue butter cream recipe, which is simply amazing! Meanwhile, I made 100 butterflies. I think the final number I used was about 77, but it felt like 100.
But first, I had to get the right color. I made a blue tutu for my daughter to wear at the butterfly party and I wanted the butterflies to match the shiny teal ribbon that was the centerpiece of the tutu (blog post later on that) so I bought a teal gel food coloring and tinted store bought fondant until I felt the color was right. Tinting fondant is easy. Just insert a toothpick into the coloring, dab it on the fondant and stretch it like taffy until the color is evenly mixed. Repeat until you have the right color.
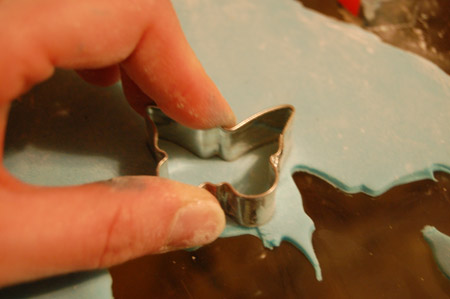
Next I rolled out the fondant (about 1/8 inch thick I’d guess) and used a butterfly cookie cutter that I got at a cake supply store in town. It’s a simple shape, but is one of the small cookie cutters. It’s only about an inch or so wide. So, I cut out tons and tons of butterflies. It’s true that I actually did cut out at least 77 of these babies. One — at — a — time. This took a while.
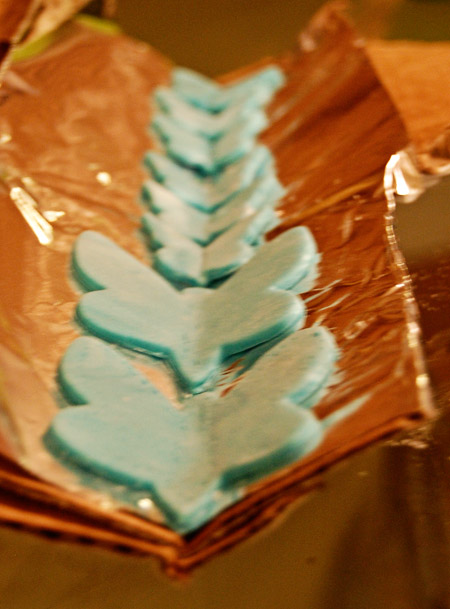
To get the sense of flight that I wanted, I needed to bend the butterflies and let them dry to harden. I used two methods to do this: one was the edge of a cardboard box that I lined with aluminum foil, the second method was to put line the interior of a plastic box. Anything would work, as long as it is sturdy enough to hold them in place while they dry.
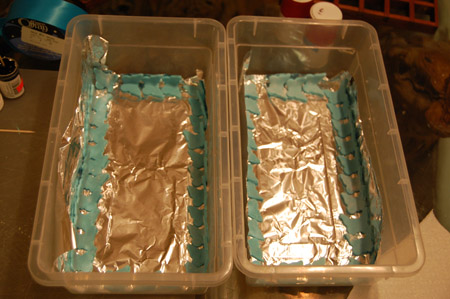
These are plastic shoe boxes that I lined with aluminum foil and placed the butterflies around the edges. I pressed them each into the corner to bend them and left them overnight to dry.
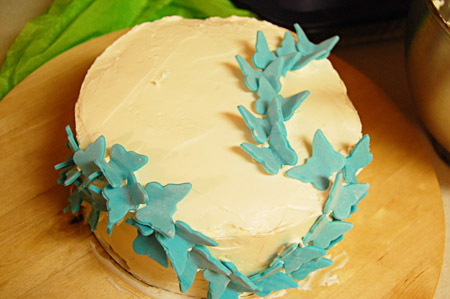
Now the fun part. This part might intimidate some, but I loved it. I didn’t have a plan on where these butterflies would go. I just knew that I wanted to have a swarming effect on the cake so I started at the bottom and worked my way around in curves until I got to the top.
To get the butterflies to stick to the cake, I used the butter cream icing like glue. I used a kitchen knife to spread some on the bottom of the butterfly, then I would place it on the cake and shoved it in a little.
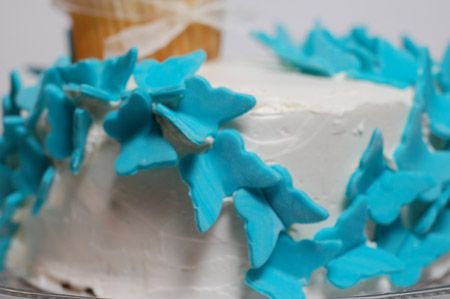
I did one layer of butterflies in the first curve. I left room on top for the cake topper.
Then I started to add a second layer.
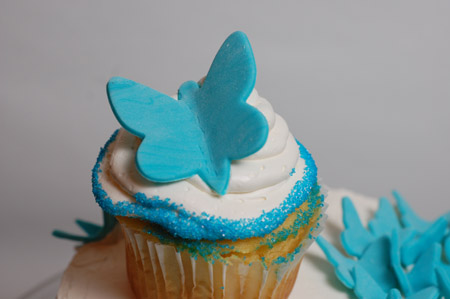
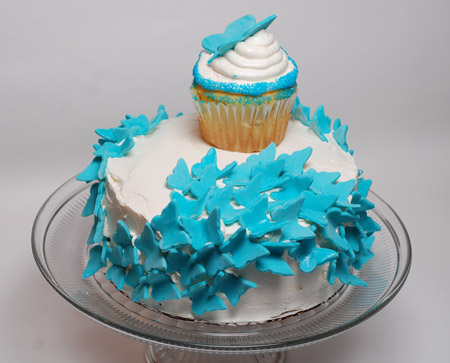
The topper was a jumbo cupcake with one large butterfly and some teal sugar crystals around the edge of the butter cream. I made this butterfly the same way I did the small ones; I just used a larger cookie cutter. This is the piece of cake that I gave to my daughter to eat. She got the whole cup cake and loved it!
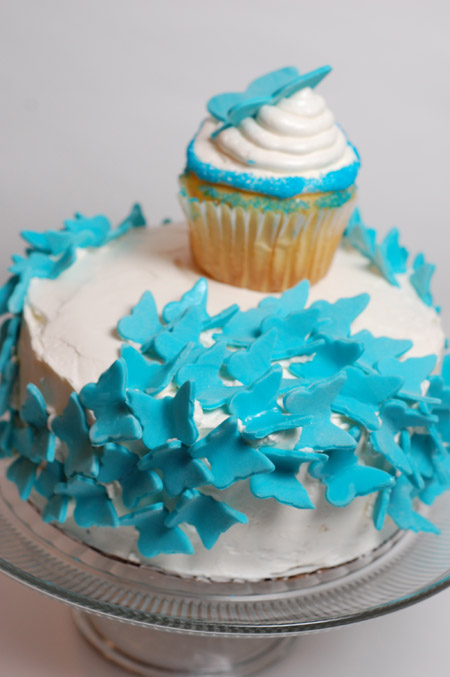
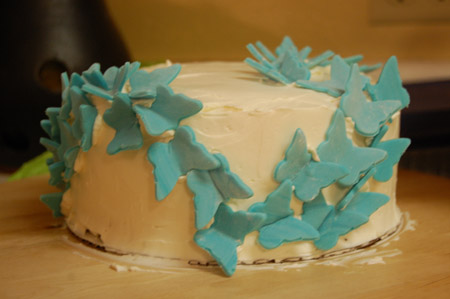
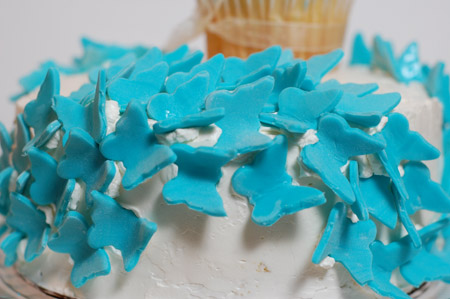
Here’s the swarm. I really piled the butterflies on in certain areas, making the swarm bigger and then taper down in parts. This is what I love about this cake.
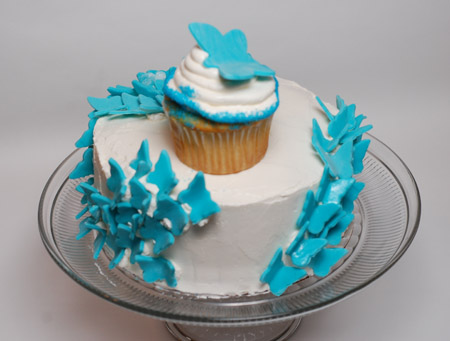
This is where the swarm started (on the right) and ended (on the left, leading up to the cup cake sitting on top of the cake.)
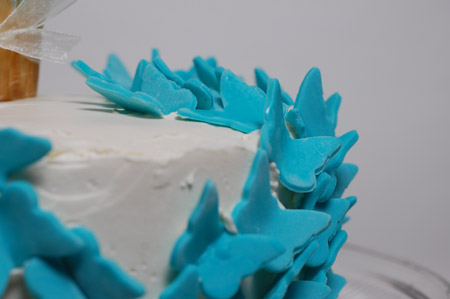
Here’s a close up of the little guys.
They just look like they are in flight to somewhere great.
Don’t you just want to be there on this flight?
I just can’t get enough of this cake.
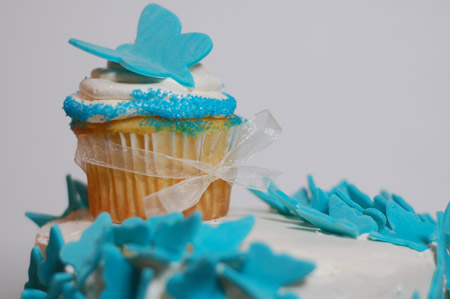
At the last minute the cup cake paper liner was really bothering me. It had come loose and I didn’t know what to do. I looked around for ideas and in my kitchen junk drawer was a piece of beautiful, shimmering opaque ribbon. I tied a bow around the cupcake wrapper and viola! the cupcake was complete. I actually think this is one of the details of the cake that I love the most. It adds the perfect touch to this cake.
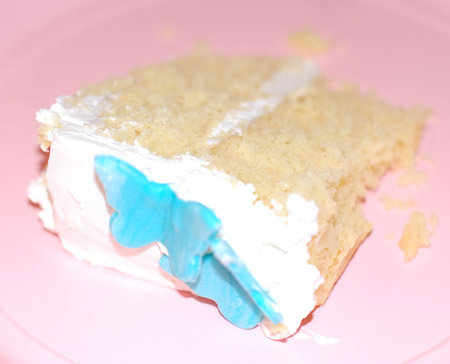
Here is a piece right before I got to taste it. I can still taste it now. Even though I used a store bought box mix, this cake was amazing. The icing made it. It was moist, beautiful and delicious.
Related:
- Simple use of fondant
- The original duck cake for my son’s first birthday. The first birthday cake I made.
- My Mickey Mouse Clubhouse cake (with photos)
- My car cake (with photos)
- Rocket ship cake (with photos)
- Elmo cake (with photos) SUPER cute. My NEW favorite cake!
- All my cake links


I love it, so creative! It was delicious too.
This was the most delicious cake I think I’ve ever eaten. Really tasty!
I was just wondering where you bought your cookie cutter from? I have looked everywhere for a mini butterfly cookie cutter and cannot find one.
I got it at a baking store in Orlando, Florida. I found one online that is the same as the one I used. Here’s the link http://www.thecookiecuttershop.com/bugs/bug8.shtml
Thanks for posting about this cake! I am making a cake similar to this one this Friday and this was exactly the proof I needed that my ideas would work. Your cake looks absolutely gorgeous! How long did it take the fondant to dry? Did you leave it at room temp to dry or refrigerate it? Thanks so much for taking the time to post your process for making this cake… You probably saved me like 6 hours of experimentation.
Jolie … thanks for the comments. I love this cake. I let the fondant butterflies dry overnight. They became hard in that timeframe. I didn’t refrigerate the cake afterward. My last cake that I did, I refrigerated and I won’t do it again. The cake dried out. I live in Florida and worry about leaving cakes out overnight, but they are always fine! Good luck. Send a pic when you are done — I’d love to see your cake.
Thanks for posting. It looks great. Congratulations!
I had the pleasure of wonkirg with Michelle Henke recently. She filmed and created a video for my wedding cake business. I can be easily distracted while wonkirg, at times. However, Michelle has an amazing way of following and filming without being in the way of one’s work. Michelle has such a sweet personality that I had no problem being myself during the filming of my video. I was so impressed with the results of all of her hard work! I was so amazed and pleased when I viewed the finished video it was so professional. It is obvious that Michelle is very skilled at what she does, and highly talented in her profession. The video was edited and put together in a way that was very interesting and entertaining, and my music was put together with the video perfectly. I am happy to give a high recommendation of Michelle’s services to anyone who is looking for wedding videography or commercial videography. You will be very pleased!